| Key Takeaway | Why It Matters |
|---|---|
| Wood whittling is a simple form of wood carving by hand. | No fancy tools needed—just a knife and softwood, perfect for wood projects for beginners. |
| Starting with easy wood carving ideas builds confidence. | You learn basic cuts, safe techniques, and make fun hand carved pieces quickly. |
| Small wood carving ideas need minimal time and skill. | Ideal for fast weekend wins—practical or decorative mini-projects. |
| Minimal cost—just a whittling knife and some softwood. | A budget-friendly hobby that can also produce unique wood carving gifts. |
If you’ve ever wanted to learn wood whittling but weren’t sure where to begin, this guide is for you! Below are 12 super easy wood carving ideas for beginners, each requiring only a sharp knife (and maybe some sandpaper). Unlike dremel wood carving ideas, whittling is a simple wood carving method done entirely by hand. Perfect for small wood whittling projects, these quick wins help build your confidence. Ready to discover the joy of creating wooden figurines carved wood style? Let’s dive in!
Early Affiliate Disclosure: This post may contain affiliate links. If you purchase something through them, I could earn a small commission—no extra cost to you. Looking for advanced guides for bigger wood carving projects? Ted’s Woodworking is my go-to source. Learn more here.
Table of Contents
- Why Whittling Is Perfect for Beginners
- Project 1: Simple Wooden Spoon
- Project 2: Easy Whittled Mushroom
- Project 3: Mini Wooden Fox or Bear
- Project 4: Heart-Shaped Pendant or Keychain
- Project 5: Basic Wooden Flower
- Project 6: Geometric Whittling Design
- Project 7: Mini Wooden Owl
- Project 8: How to Carve a Simple Wooden Bird
- Project 9: Hand-Carved Wooden Star
- Project 10: Tiny Wooden Gnome
- Project 11: Basic Wooden Ring
- Project 12: Sheep Wood Carving
- FAQs for Whittling Beginners
- Conclusion
- References
Why Whittling Is Perfect for Beginners
Whittling is a classic wood carving by hand technique where you only need a knife (and maybe a glove for safety). Unlike power‐tool‐based dremel wood carving ideas, whittling:
- Costs Less: You can start with softwoods like basswood, pine, or cedar.
- Promotes Relaxation: The repetitive slicing can feel meditative.
- Fits Anywhere: It’s portable—carve at a campsite, on your porch, or at the kitchen table.
- Builds Skills Gradually: From removing large chunks to refining edges, you learn essential knife control.
Quick Safety Tips
- Carve away from your body to avoid accidents.
- Keep your knife sharp; dull blades slip more easily.
- Wear a carving glove on the hand holding the wood if you prefer.
- Take breaks—tired hands cause mistakes.
Now, let’s explore these 12 easy wood carving ideas perfect for beginner wood whittling projects!
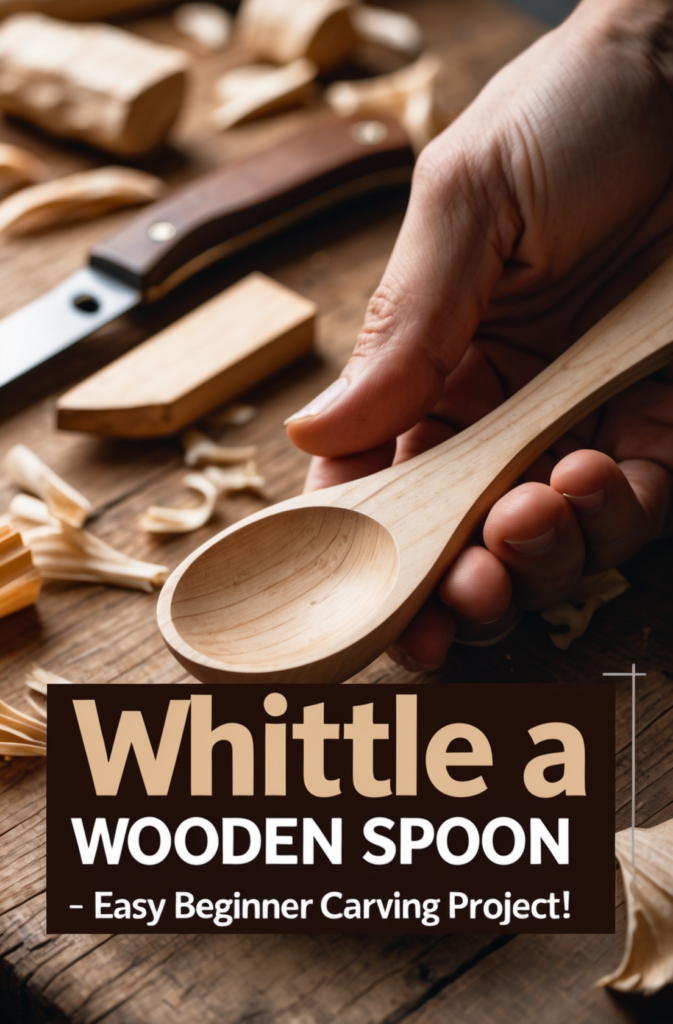
Project 1: Simple Wooden Spoon
Skill Level: Beginner
Time Required: 1–2 hours
Tools Needed:
- Whittling knife
- Pencil
- Basswood or pine block
- Sandpaper (optional)
How to Make It:
- Draw the Spoon Outline
Sketch a shallow bowl plus a handle on your wood. Keep the handle’s width slightly chunky at first. - Rough Out the Handle
Use broad cuts to define the handle’s thickness. Go slowly, carving away from your body. - Hollow the Bowl
Carve shallow slices from the center to form the bowl area. Thin layers help you control depth. - Refine & Finish
Round edges, sand if you want a smoother feel. Food‐safe oil is great for finishing if you plan on kitchen use.
Why Beginners Love It: It’s practical, easy to carve, and covers both hollowing and shaping basics.
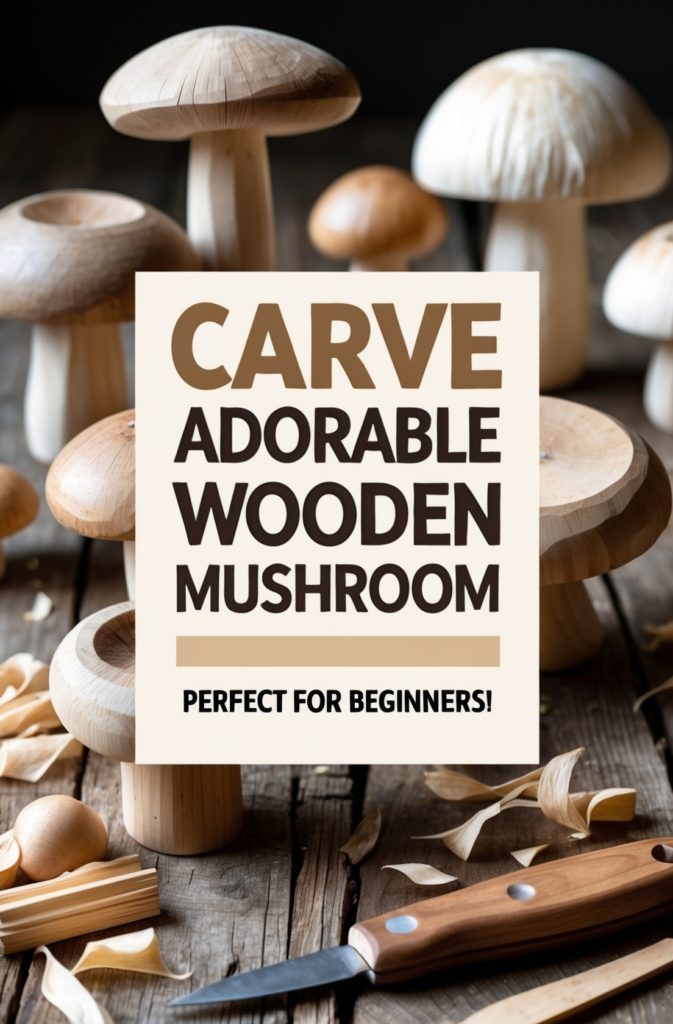
Project 2: Easy Whittled Mushroom
Skill Level: Beginner
Time Required: 1 hour
Tools Needed:
- Whittling knife
- Softwood scrap
- Sandpaper (optional)
How to Make It:
- Outline the Mushroom
Picture a round cap on top, a narrower stem below. Lightly mark where cap meets stem. - Rough Out the Cap & Stem
Carve larger sections first to distinguish the top dome and bottom stalk. - Smooth the Transition
Use smaller cuts around the stem‐cap boundary, removing lumps. - Optional Sand or Oil
A quick sand improves the finish. A dab of oil or wax can highlight the wood grain.
Why Beginners Love It: Minimal detail needed, and mistakes can blend into the “natural shape.”
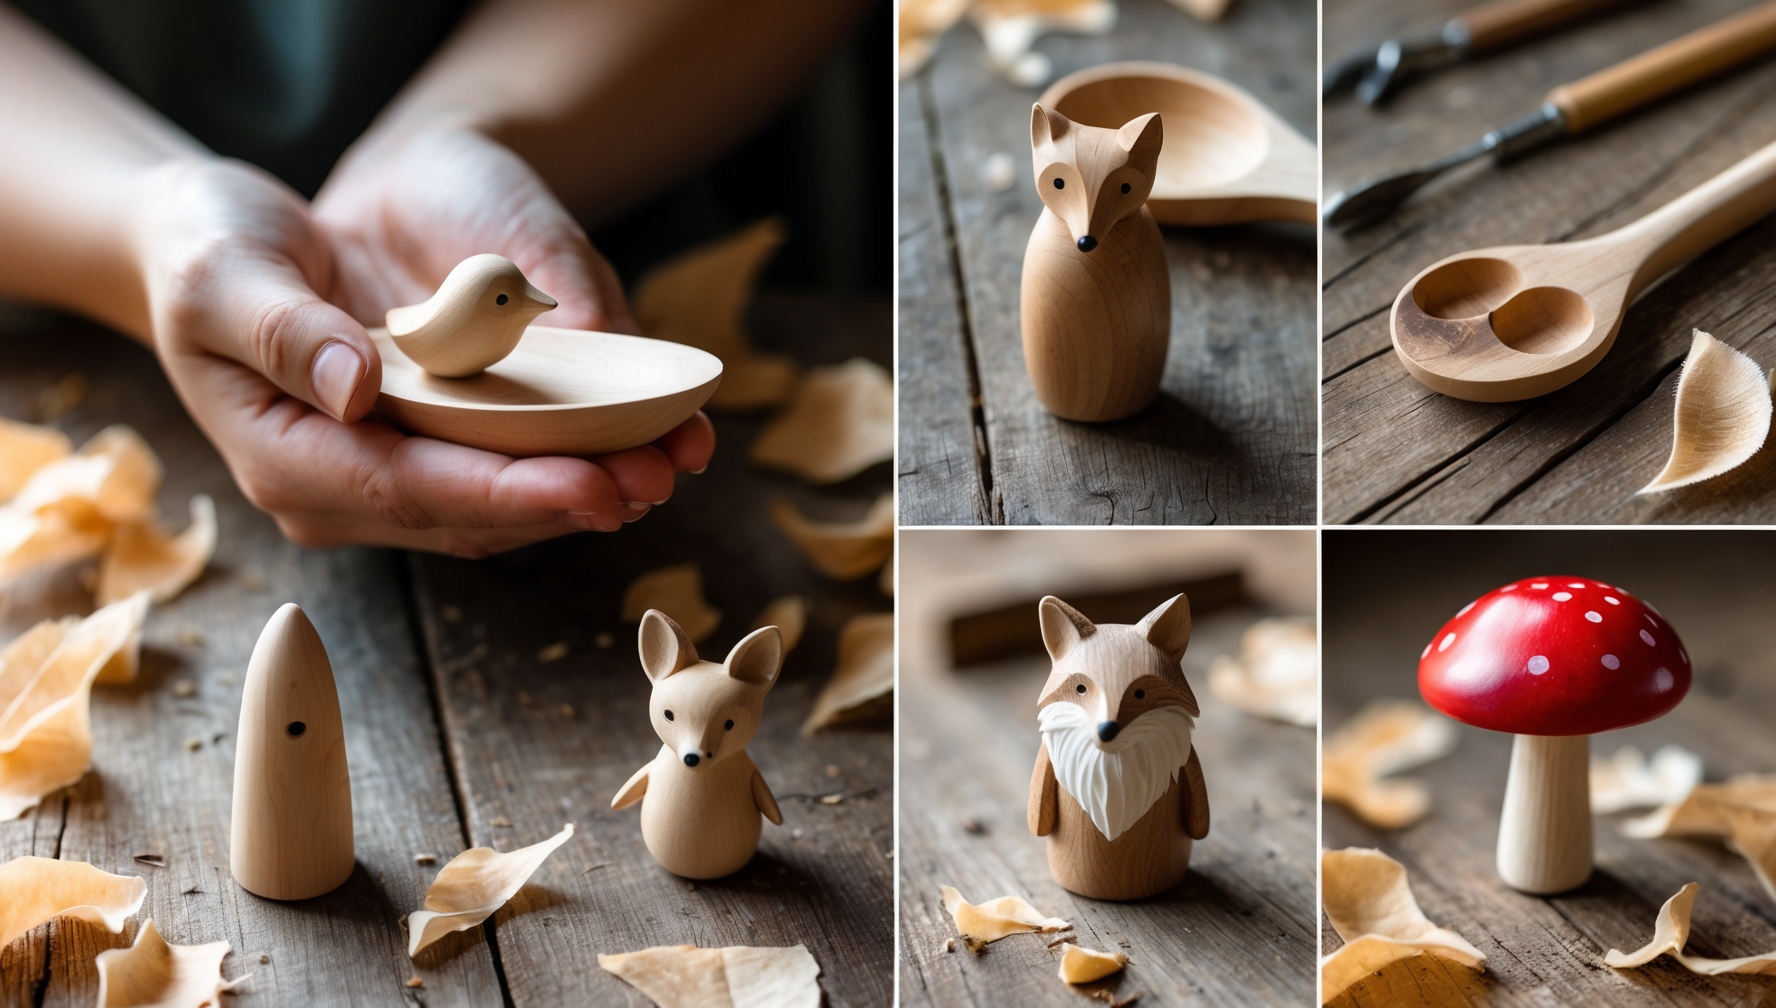
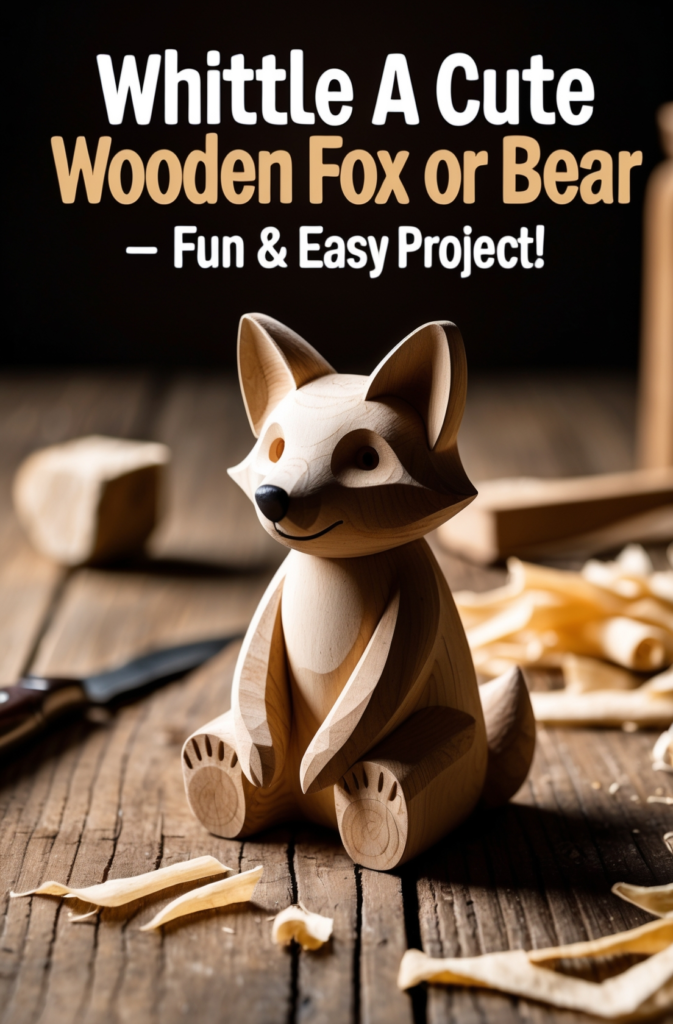
Project 3: Mini Wooden Fox or Bear
Skill Level: Beginner
Time Required: 2–3 hours
Tools Needed:
- Whittling knife
- Pencil
- Basswood or cedar block
- Optional paint
How to Make It:
- Sketch the Silhouette
Draw a basic side profile: ears, snout, body. Keep it simple. - Remove Bulk Wood
Carve away the large, extra wood with big strokes to get the general outline. - Define Face & Ears
Use finer cuts for ear tips, snout, and slight facial curves. - Add Character (Optional)
Paint eyes or a nose. Extra cuts can mimic fur texture.
Why Beginners Love It: Animals are fun, and any slipups can pass as “fur.” Great practice in shaping organic forms.
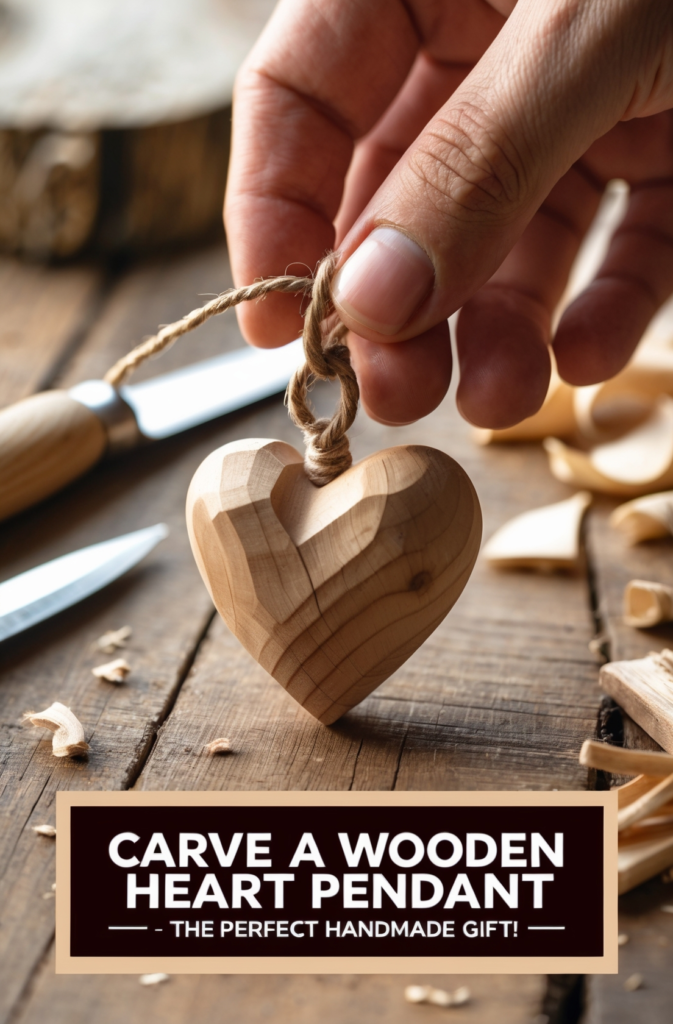
Project 4: Heart-Shaped Pendant or Keychain
Skill Level: Beginner
Time Required: 1 hour
Tools Needed:
- Whittling knife
- Softwood piece
- Pencil
- Optional drill
How to Make It:
- Draw the Heart
Lightly pencil a heart shape. Keep the design clear and centered. - Carve to the Outline
Gradually remove wood around the edges, forming the curved sides. - Smooth & Round
Round edges so it feels comfortable in hand. Sand if you like a polished look. - Drill & Attach
If making a pendant or keychain, drill a tiny hole and add a ring or cord.
Why Beginners Love It: Fast to complete, easy to gift, and teaches symmetrical carving.
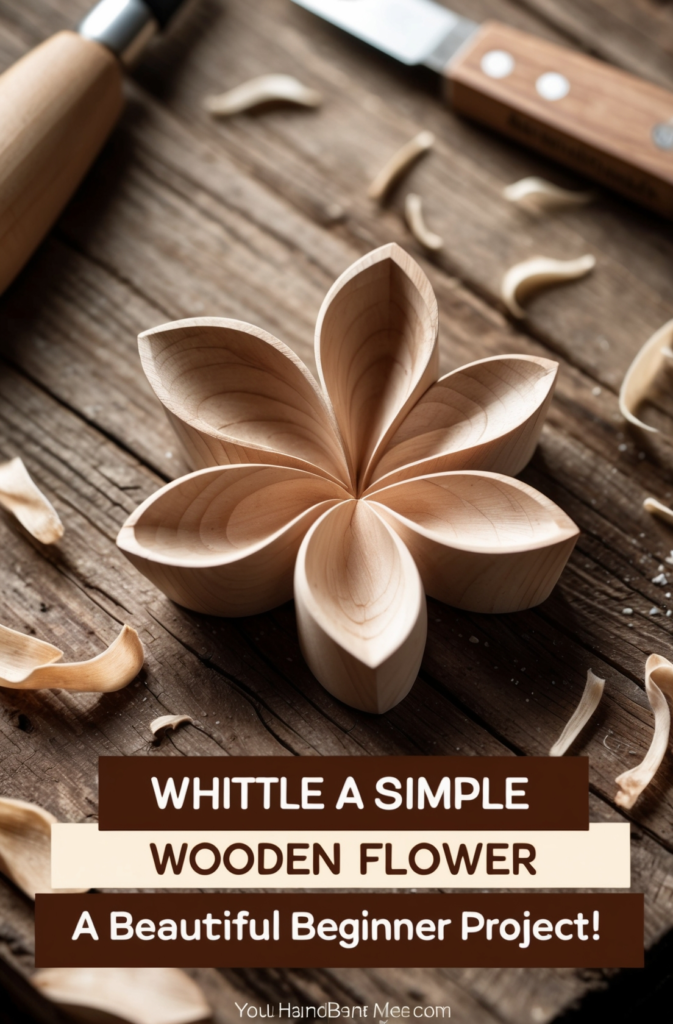
Project 5: Basic Wooden Flower
Skill Level: Beginner
Time Required: 1–2 hours
Tools Needed:
- Whittling knife
- Thin softwood piece
- Pencil
- Sandpaper (optional)
How to Make It:
- Sketch Petals
Mark petals in a circular pattern on the wood’s surface. - Carve the Negative Space
Remove wood between petals for a layered effect. Use small, careful cuts. - Round Petal Edges
Smooth the transition on each petal tip to achieve a gentle bloom. - Attach Magnet or Pin
If desired, mount a magnet for easy display on a fridge.
Why Beginners Love It: Shallow relief carving introduces layering, but no complex details needed.
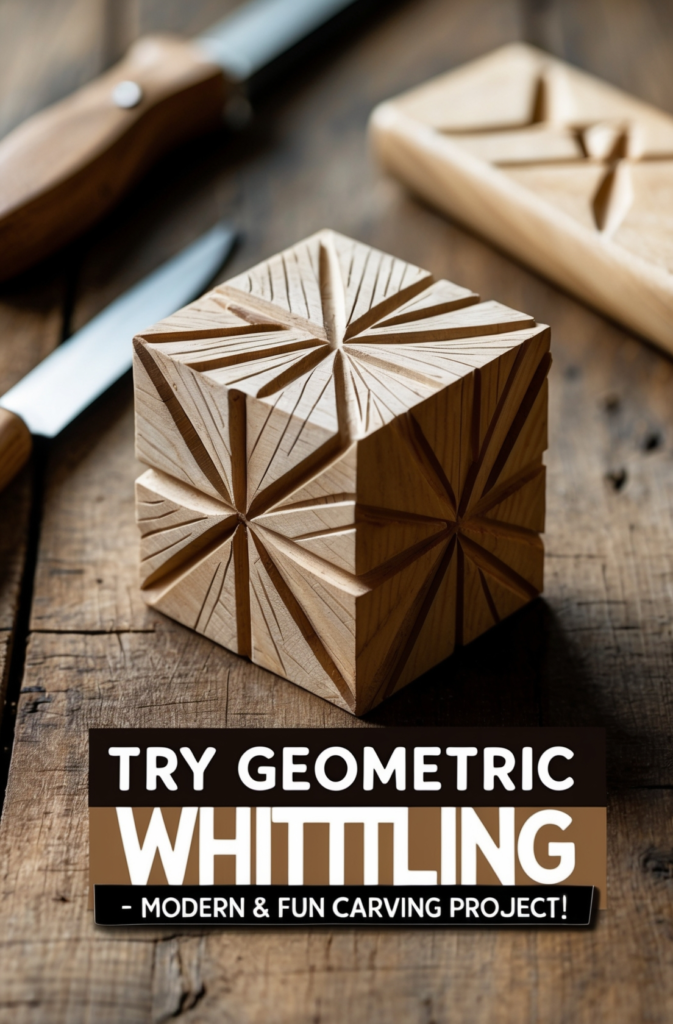
Project 6: Geometric Whittling Design
Skill Level: Beginner
Time Required: 1–2 hours
Tools Needed:
- Whittling knife
- Pencil
- Optional paint
How to Make It:
- Mark Geometric Shapes
Use a pencil to outline triangles, squares, or diamonds across the block. - Carve Along the Lines
Make controlled cuts along each line to create distinct edges. - Vary Depth
Carve some lines deeper for contrast. Consider painting the carved grooves. - Refine & Finish
Gently sand any rough edges. A simple coat of beeswax can seal the surface.
Why Beginners Love It: Repetition helps master steady cuts and even depth across multiple shapes.
Project 7: Mini Wooden Owl
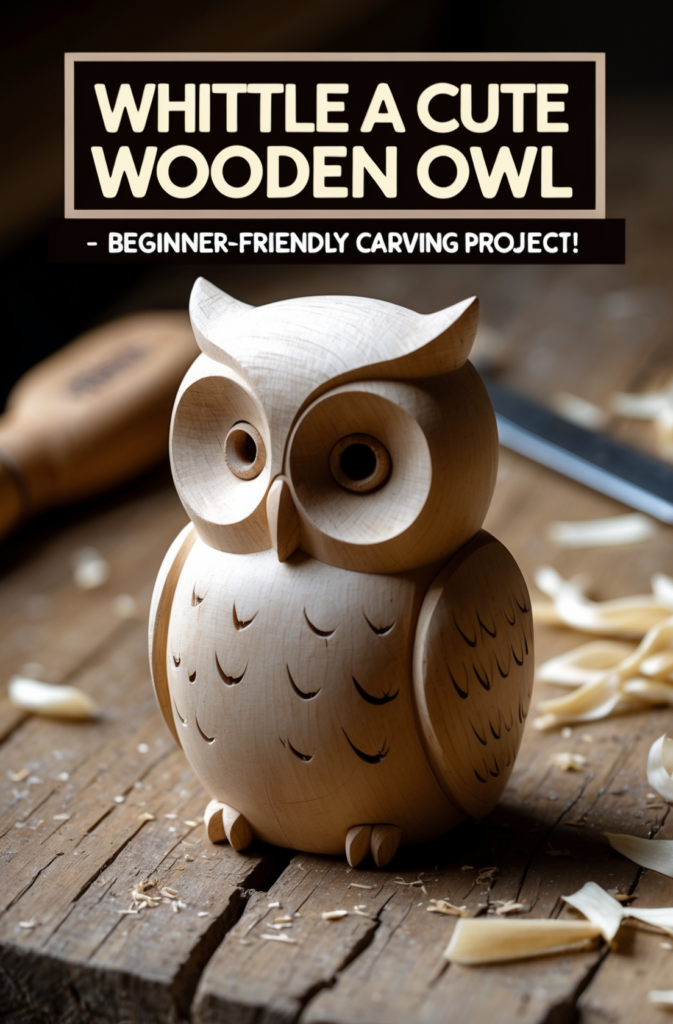
Skill Level: Beginner
Time Required: 2–3 hours
Tools Needed:
- Whittling knife
- Pencil
- Small basswood piece
- Optional paint
How to Make It:
- Shape the Head
Carve a dome at the top for the owl’s head. Leave enough wood below for the body. - Round the Body
Remove extra wood to form a short cylinder or oval shape. - Carve Face Details
Mark circles for eyes. Gently carve shallow notches or lines. - Add Feathers (Optional)
Light incisions can mimic feathers. Paint if you want a more colorful owl.
Why Beginners Love It: Mistakes become “feather lines.” Cute, forgiving, and easy to show off.
Pro Tip: If you crave bigger wood carving projects or advanced techniques, Ted’s Woodworking has you covered with thousands of plans. Explore them here.

Project 8: How to Carve a Simple Wooden Bird
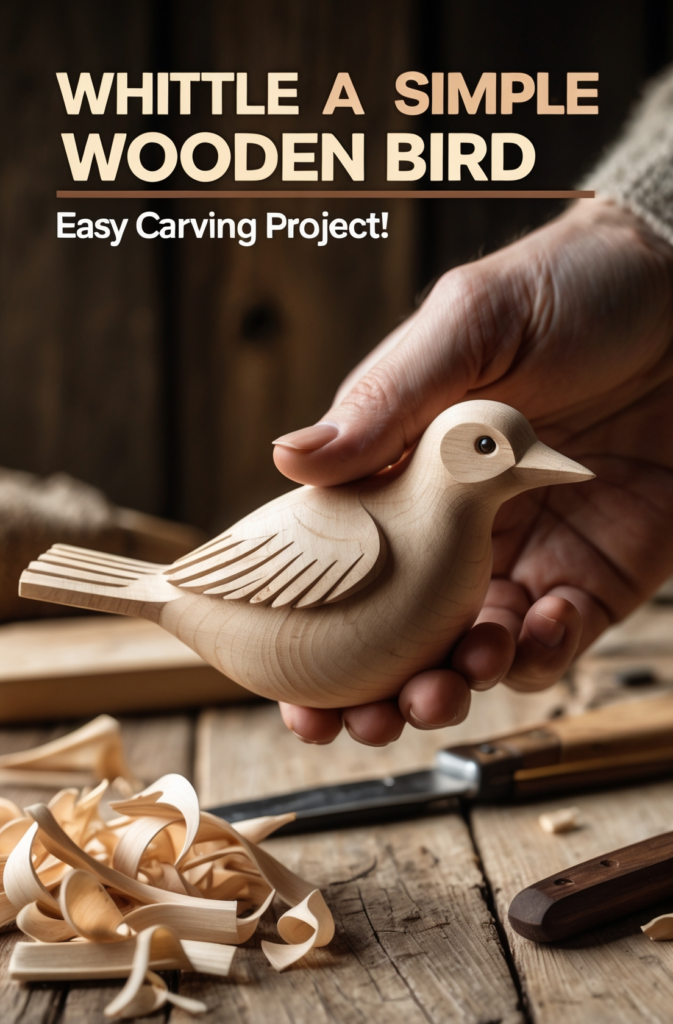
Skill Level: Beginner
Time Required: 1–2 hours
Tools Needed:
- Whittling knife
- Pencil for sketching
- Basswood block (or cedar/pine)
- Fine-grit sandpaper (optional)
- Beeswax or wood oil (optional)
Step-by-Step Guide to Carving a Simple Wooden Bird
- Sketch the Bird Outline
Lightly draw the side profile: smooth curved body, beak, and tail. Wings come later. - Rough Out the Shape
Slowly whittle away wood around your outline. Big, sweeping cuts define the body, tail, and beak. Always carve away from fingers. - Refine the Wings and Body
Use small, controlled cuts for subtle wing curves. Round edges for smoothness. Carve gradually—less is more. - Carve the Beak & Tail
Taper the beak to a soft point with careful cuts. Thin the tail slightly, creating a gentle V‐shape if you like. - Add Feather Texture (Optional)
Lightly carve small lines on wings or body for feather details. Fine cuts work best. - Sand & Finish
Sand if you want a sleek finish. Beeswax or wood oil brings out the grain. - Display Your Wooden Bird!
Use it as a decoration, gift, or part of a mobile. Paint or burn details for extra character.
Why This Project Is Great for Beginners
– Simple, smooth cuts—no intricate details
– Quick to complete—done in an afternoon
– Teaches rounding, shaping, small detail carving
– Minimal tools—just a knife and softwood
Project 9: Hand-Carved Wooden Star
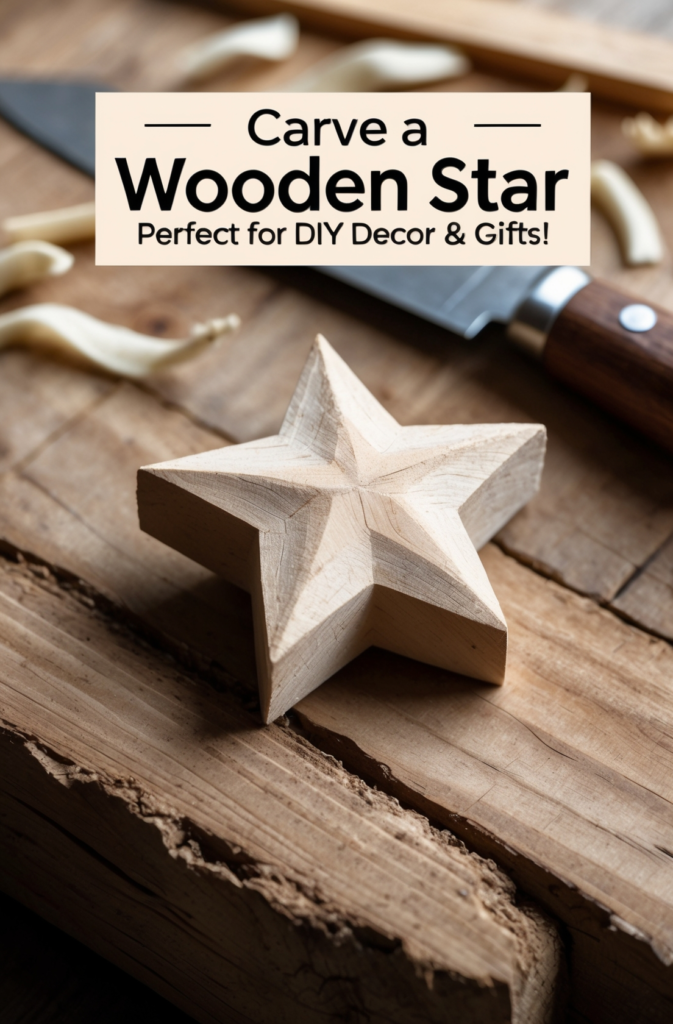
Skill Level: Beginner
Time Required: 1–2 hours
Tools Needed:
- Whittling knife
- Pencil
- Optional drill (if you want an ornament hole)
How to Make It:
- Draw a 5-Point Star
Use a pencil to mark the five points clearly, keeping angles consistent. - Carve Toward Each Edge
Slowly remove wood from the outside in, defining each star point. - Shape the Edges
Round them or keep them sharp. Adjust depth for dramatic lines. - Optional Hole & Finish
Drill a hole for string if making an ornament. A quick coat of oil can enhance the grain.
Why Beginners Love It: Great practice for angled cuts and symmetrical shape. Also works as small wooden ornaments for any occasion.
Project 10: Tiny Wooden Gnome
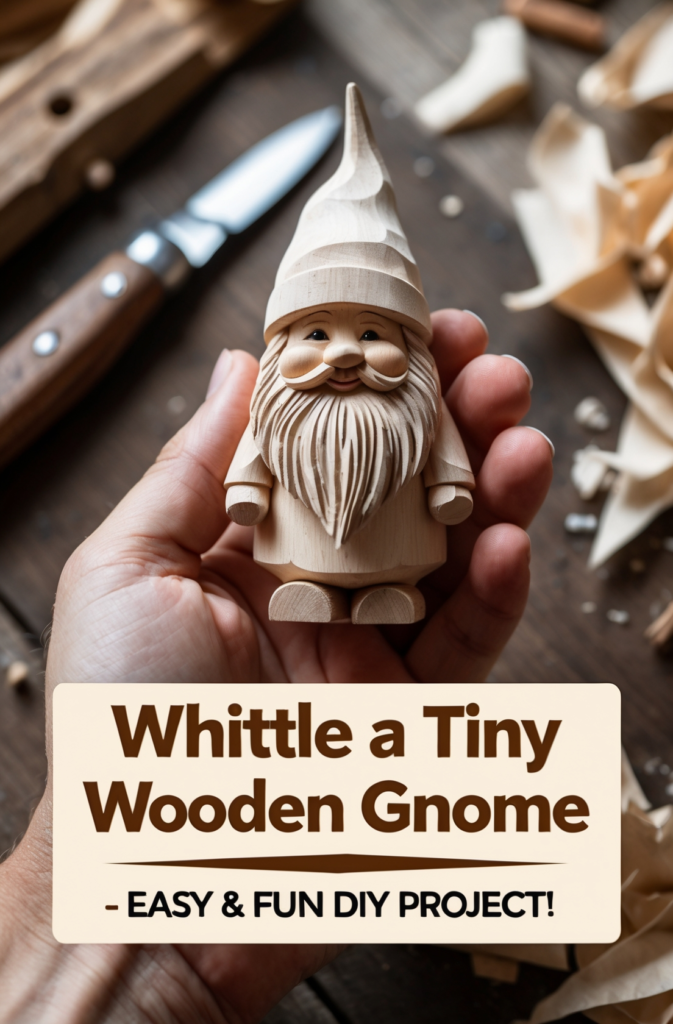
Skill Level: Beginner
Time Required: 2–3 hours
Tools Needed:
- Whittling knife
- Pencil
- Basswood or pine piece
- Optional paint
How to Make It:
- Carve the Hat
Shape a cone at the top for the hat. Decide how tall you want it and remove bulk wood. - Add the Nose
Leave a round bump for the nose just below the hat’s edge. - Beard Texture
Use short incisions for the beard. Any slip-ups can hide as hair details. - Finish & Optional Paint
Smooth edges or keep them rustic. A quick paint job can add extra charm.
Why Beginners Love It: Gnomes are trendy, adorable, and mistakes disappear into ‘beard lines.’ Perfect for gifts or décor.
Project 11: Basic Wooden Ring
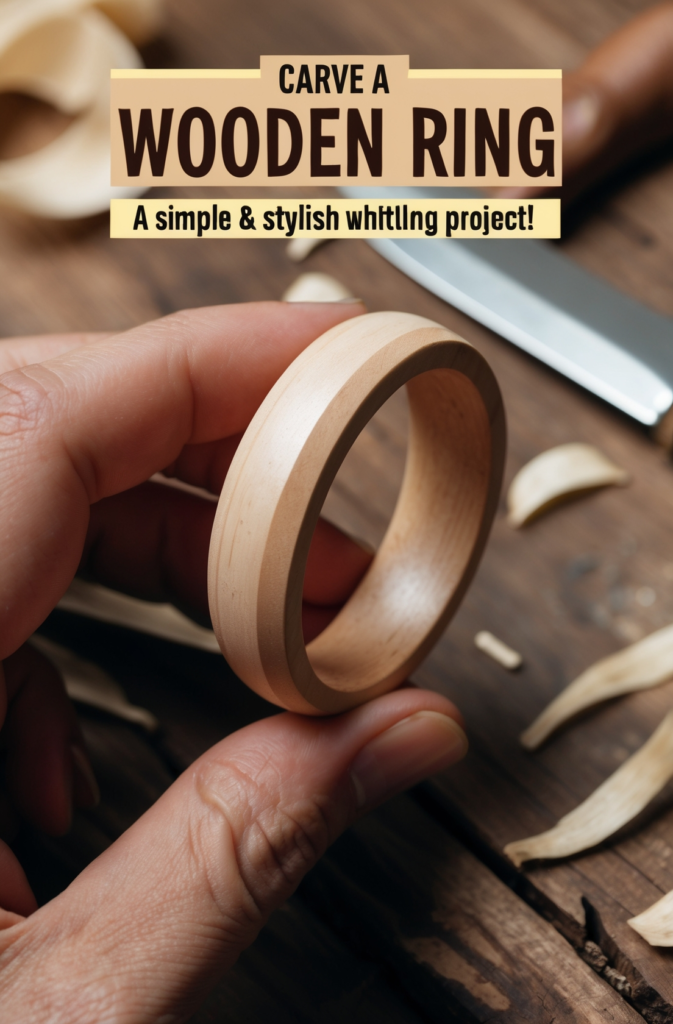
Skill Level: Beginner
Time Required: 1–2 hours
Tools Needed:
- Whittling knife
- Small hardwood/softwood piece
- Sandpaper
- Optional drill
How to Make It:
- Create the Hole
Drill or carefully carve out a center hole bigger than your finger size. - Shape the Outer Band
Whittle from the outside to form a ring shape. Take small slices for control. - Smooth & Sand
Use sandpaper to remove rough edges. Ensure it’s comfortable on your finger. - Oil or Wax
A quick coat of beeswax or oil prevents dryness and adds sheen.
Why Beginners Love It: It’s wearable art and quick to finish—perfect for personalizing or gifting.
Project 12: Sheep Wood Carving

Skill Level: Beginner
Time Required: 2–3 hours
Tools Needed:
- Whittling knife
- Basswood block
- Optional fine‐tip knife
How to Make It:
- Rough Out a Puffy Body
Carve a short, rounded shape. Think of a marshmallow for reference. - Define Face & Ears
Leave a bit of wood for the snout area. Make small ear nubs if desired. - Add Wool Texture
Light incisions for a wooly effect. Keep them shallow so you don’t weaken the piece. - Flatten Bottom
So it can stand. Optional short legs if you’re confident in cutting them.
Why Beginners Love It: Cute, forgiving shape where little nicks can become “wool.” Great for trying texturing.
Pro Tip: If you crave bigger wood carving projects or advanced techniques, Ted’s Woodworking has you covered with thousands of plans. Explore them here.
FAQs for Whittling Beginners
Q1: What wood is best for whittling?
Softwoods like basswood, pine, or cedar are easiest to carve. Basswood is a top pick for beginner wood whittling projects due to its smooth grain.
Q2: How do I keep my knife sharp?
Use a leather strop with honing compound after each session. A sharp blade glides through wood and prevents slipping accidents.
Q3: What are the basic whittling safety tips?
Always carve away from your body, keep your thumb behind the blade, wear a carving glove on the holding hand, and rest if your hand feels tired.
Q4: Can I add details with a Dremel?
Yes, for advanced or tiny details you can try dremel wood carving ideas. But these 12 whittling projects are knife-only, focusing on classic hand carving.
Q5: Are there free wood carving patterns to follow?
You can find wood carving patterns free online—print, trace, and carve for easier shapes or consistent outlines.
Conclusion
Whittling is a wonderful way to master easy wood carving ideas without big power tools. From a simple wooden spoon to a tiny wooden bird, you can create cool wood projects using just a knife and some softwood. Each project—mushroom, fox, ring, or flower—reinforces knife control and shaping basics. Which whittling project will you try first? Let me know in the comments, and feel free to share pictures of your hand carved creations on social media!
References
- Popular Woodworking – Tips on carving tools & safety.
- This Old House – Basic woodworking advice for all skill levels.
- Wood Magazine – Advanced carving techniques & project ideas.