- Introduction
- Top Questions & Pain Points
- Project Outline (5–7 Main Steps)
- Step-by-Step Instructions
- Troubleshooting & Common Mistakes
- FAQs
- Next Steps & Advanced Techniques
- Glossary of Terms
- Recommended Visual Aids
- Conclusion
Introduction
Creating a diy wooden family name sign is a fun and beginner-friendly woodworking project that instantly brings warmth and personalization to any home. You can take a simple plank of wood and transform it into a cherished decor piece featuring wood lettering, your family’s last name, or an established sign date. By the end of this guide, you’ll be able to craft your own family sign—perfect for showcasing on a wall, mantle, or entryway.
This post contains affiliate links. If you purchase through these links, I may earn a small commission at no extra cost to you. I only recommend resources I find valuable—like Ted’s Woodworking, which offers 16,000+ DIY plans for projects like Diy Wood Signs and Family Wood Signs!
Top Questions & Pain Points
When people begin working on a Family Name Sign Diy or Custom Family Signs, they often ask:
- Where do I find quality wood? – Many are unsure how to select the right lumber for Family Signs Diy or Diy Last Name Signs.
- What tools do I need if I’m a beginner? – Concerns about saws, drills, and sanding equipment.
- Should I use paint or stain? – Picking the right finish for an Established Sign can be confusing.
- How do I get clean lettering? – Achieving crisp wood lettering or stenciled designs can feel intimidating.
- How do I seal it for durability? – People worry about moisture, especially for Last Name Signs Wooden displayed on porches or in high-humidity areas.
- Can I add my family’s established date? – Yes! Many want an Established Family Signs look that includes a year.
- What if I have zero experience? – Beginner crafters doubt their ability to make Last Name Signs Wooden Diy or more elaborate Family Established Sign Diy.
- Are there special safety concerns? – Proper ventilation, using protective gear, and handling power tools can be daunting.
Project Outline (5–7 Main Steps)
Here’s a quick overview of how we’ll tackle our diy wooden family name sign project:
- Gather & Prep Materials
- Cut & Sand Your Wood
- Stain or Paint the Base
- Add Wood Lettering & Personal Details
- Seal and Display
Step-by-Step Instructions
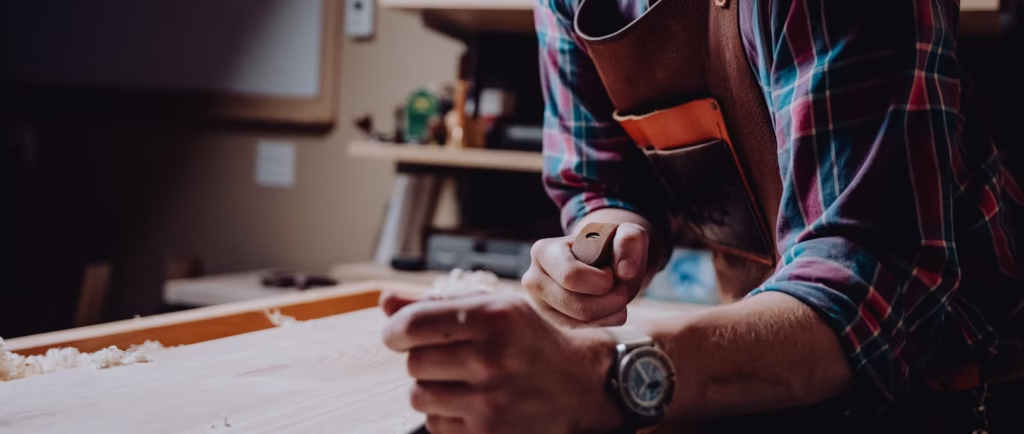
Step 1: Gather & Prep Materials
What to Do:
- Choose a wooden board suitable for Last Name Signs. Pine or cedar are popular for Family Wood Signs.
- Gather basic tools: saw, sandpaper, paint/stain, sealant, and stencils or wood cutouts for lettering.
Warnings & Preparations:
- Wear protective gloves and goggles, especially when handling power tools.
- Check your workspace is well-ventilated if you’re using paints, stains, or sealants.
Tips & Best Practices:
- Source Sustainably: Reclaimed wood can add character to your Family Signs Diy while being eco-friendly.
- Dry & Clean: Wipe down any dust or debris before starting; this ensures smooth paint or stain application.
Tools/Resources:
- Sandpaper (80-120 grit) for rough sanding, then 150-220 grit for a final smooth finish.
- Optional: Letter stencils or a cutting machine to create Diy Wood Signs with consistent fonts.
Step 2: Cut & Sand Your Wood
What to Do:
- Measure and cut your board to your desired dimensions. For an Established Signs Diy project, 24-36 inches wide is common.
- Sand all surfaces and edges until smooth to the touch.
Warnings & Preparations:
- Keep fingers clear of the blade if you’re using a circular or miter saw.
- Inspect the wood for knots or cracks that might interfere with your design.
Tips & Best Practices:
- Rounded Edges: Slightly rounding corners can help prevent splinters and create a softer look for Family Established Sign Diy pieces.
- Test Sanding: Always test your sanding on a scrap piece to ensure you get the finish you want.
Tools/Resources:
- Power sander (orbital or detail) for quicker, more even results.
- Saw horses or a stable worktable for cutting.
Step 3: Stain or Paint the Base
What to Do:
- Apply your chosen stain or paint. This forms the backdrop for Last Name Signs Wooden Diy projects.
- Let the base coat dry completely before adding any lettering or Established Family Signs detail.
Warnings & Preparations:
- Work in a ventilated area; fumes from stain or paint can be strong.
- Follow the recommended drying times on the product label.
Tips & Best Practices:
- Swatch Test: Always test the color on a small scrap before coating the entire board.
- Multiple Thin Coats: Thinner layers yield a smoother finish and prevent drips.
Tools/Resources:
- Lint-free cloth for stain application, or a foam roller/brush if painting.
- Painter’s tape to protect any areas you don’t want stained or painted.
Finding all these steps helpful? If you want detailed woodworking plans for bigger projects—like building matching Family Wood Signs stands or frames—check out Ted’s Woodworking. You’ll get 16,000+ plans for everything from Last Name Signs Wooden crafts to full-scale furniture!

Step 4: Add Wood Lettering & Personal Details
What to Do:
- Arrange wooden letters or stencils for your family’s last name or the word “FAMILY.”
- Include extra details like an established date or decorative flourishes for custom family signs.
Warnings & Preparations:
- Double-check spelling before attaching letters or painting.
- If using adhesives, ensure proper cure time before handling the sign.
Tips & Best Practices:
- Light Pencil Guides: Mark where letters will go to maintain straight alignment.
- Mix & Match Fonts: Combine cursive and block fonts for a unique diy last name signs aesthetic.
Tools/Resources:
- Wood glue or strong craft adhesive for attaching letters.
- Acrylic paint pens or a small brush for detail work.
Step 5: Seal and Display
What to Do:
- Apply a clear polyurethane or polycrylic sealant to protect your Established Family Signs from wear.
- Let the sealant dry completely. Hang or display your family sign in your desired spot—entryway, living room, or porch.
Warnings & Preparations:
- Check the weather rating on your sealant if your sign will be displayed outdoors.
- Always let each coat cure fully to avoid a sticky finish.
Tips & Best Practices:
- Edge Sealing: Don’t forget to coat the edges and back if it’s going outside.
- Hanging Hardware: Use sturdy hooks or brackets if you want your Family Wood Signs or Last Name Signs Wooden displayed on the wall.
Tools/Resources:
- Foam brush or sprayer for sealant application.
- Hanging kit (e.g., D-rings or sawtooth hangers) for easy mounting.
Affiliate Tie-In (End-of-Post Call-to-Action):
“Ready to tackle more ambitious projects now that you’ve mastered a diy wooden family name sign? Unlock thousands of expert plans in Ted’s Woodworking and bring your creative vision to life!”
Troubleshooting & Common Mistakes
- Crooked Lettering: Use a ruler or laser level to align letters, or mark pencil guidelines before gluing.
- Paint Bleeding Under Stencils: Use painter’s tape to secure stencils and apply paint lightly in multiple coats.
- Fading or Peeling Finish: Ensure each layer (stain, paint, sealant) dries fully before adding the next.
FAQs
- Can I use any type of wood? – Yes! Pine, cedar, and poplar are affordable and easy to work with for Family Name Sign Diy projects.
- How long does this project take? – With drying times, expect about 1–2 days before your Diy Wood Signs are fully ready to display.
- What if I don’t have a cutting machine for letters? – Store-bought wooden letters or stencils work great for Established Signs Diy or Custom Family Signs.
- Do I need to seal my sign if it’s indoors? – It’s optional, but sealing helps preserve Last Name Signs from moisture and dust.
- Can I add color to the letters? – Absolutely. Paint or stain them separately for a bolder look.
Next Steps & Advanced Techniques
- Layering Techniques: Combine paint and stain on the same sign for a rustic-chic effect on your Family Established Sign Diy.
- Distressing & Antiquing: Sand edges or use a crackle paint medium for an aged appearance—ideal for Established Family Signs.
- Raised Frames: Build a simple frame around your sign to make it pop as a statement decor piece.
Glossary of Terms
- Wood Lettering: Cut or carved letters used for decorating wooden crafts.
- Established Sign: A decorative sign featuring a family name and the year the family was “established.”
- Custom Family Signs: Personalized wood signs tailored to a specific family’s name or preferences.
- Last Name Signs: Wooden signage highlighting a family’s surname.
Recommended Visual Aids
- Step-by-Step Photos: Show each stage of sanding, painting, and lettering.
- Close-Up of Letter Application: Demonstrates how to align and attach letters for Family Signs Diy.
- Video Clip of Staining: Short demonstration of how to apply stain evenly.
Conclusion
A diy wooden family name sign adds instant charm to any space while celebrating your loved ones. By following these simple steps—selecting quality wood, prepping and sanding, staining or painting, adding wood lettering, and sealing—you’ll create a family sign that’s both personal and timeless. Don’t forget to experiment with diy last name signs variations like including an established family signs date or using unique fonts.
With this guide (and perhaps Ted’s Woodworking for your next big project), you’ve got the tools and inspiration to craft Family Wood Signs that showcase your story. Gather your supplies, pick your design, and begin creating your very own custom family signs today!