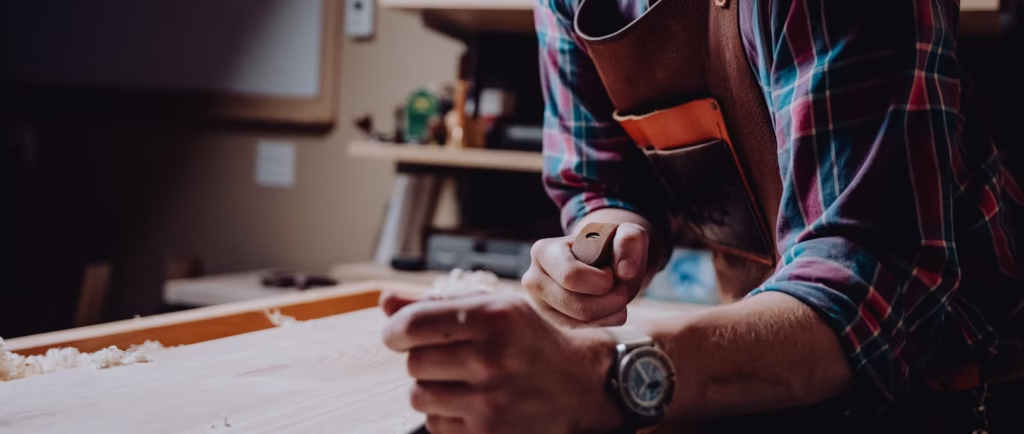
Ready to transform your home with diy wood projects furniture that are both stylish and budget-friendly? Whether you’re a complete newbie or already have a few sawdust-covered weekends under your belt, making your own wood furniture is an incredibly rewarding hobby. You’ll not only save money by skipping the high retail markups, but you’ll also get to customize each piece to perfectly fit your space and style.
The great news? You don’t need to be a master woodworker to create pieces you’ll cherish for years. In this article, we’ll walk you through ten beginner-friendly wood working projects—each one tried, tested, and guaranteed to add warmth and charm to your home. From small easy woodworking projects that can be done in a single weekend to scrap wood ideas you can explore, these builds cover a wide range of styles and skill levels.
🔥 Bonus: If you’re looking for even more detailed woodworking plans, grab 16,000+ project blueprints here! 📥
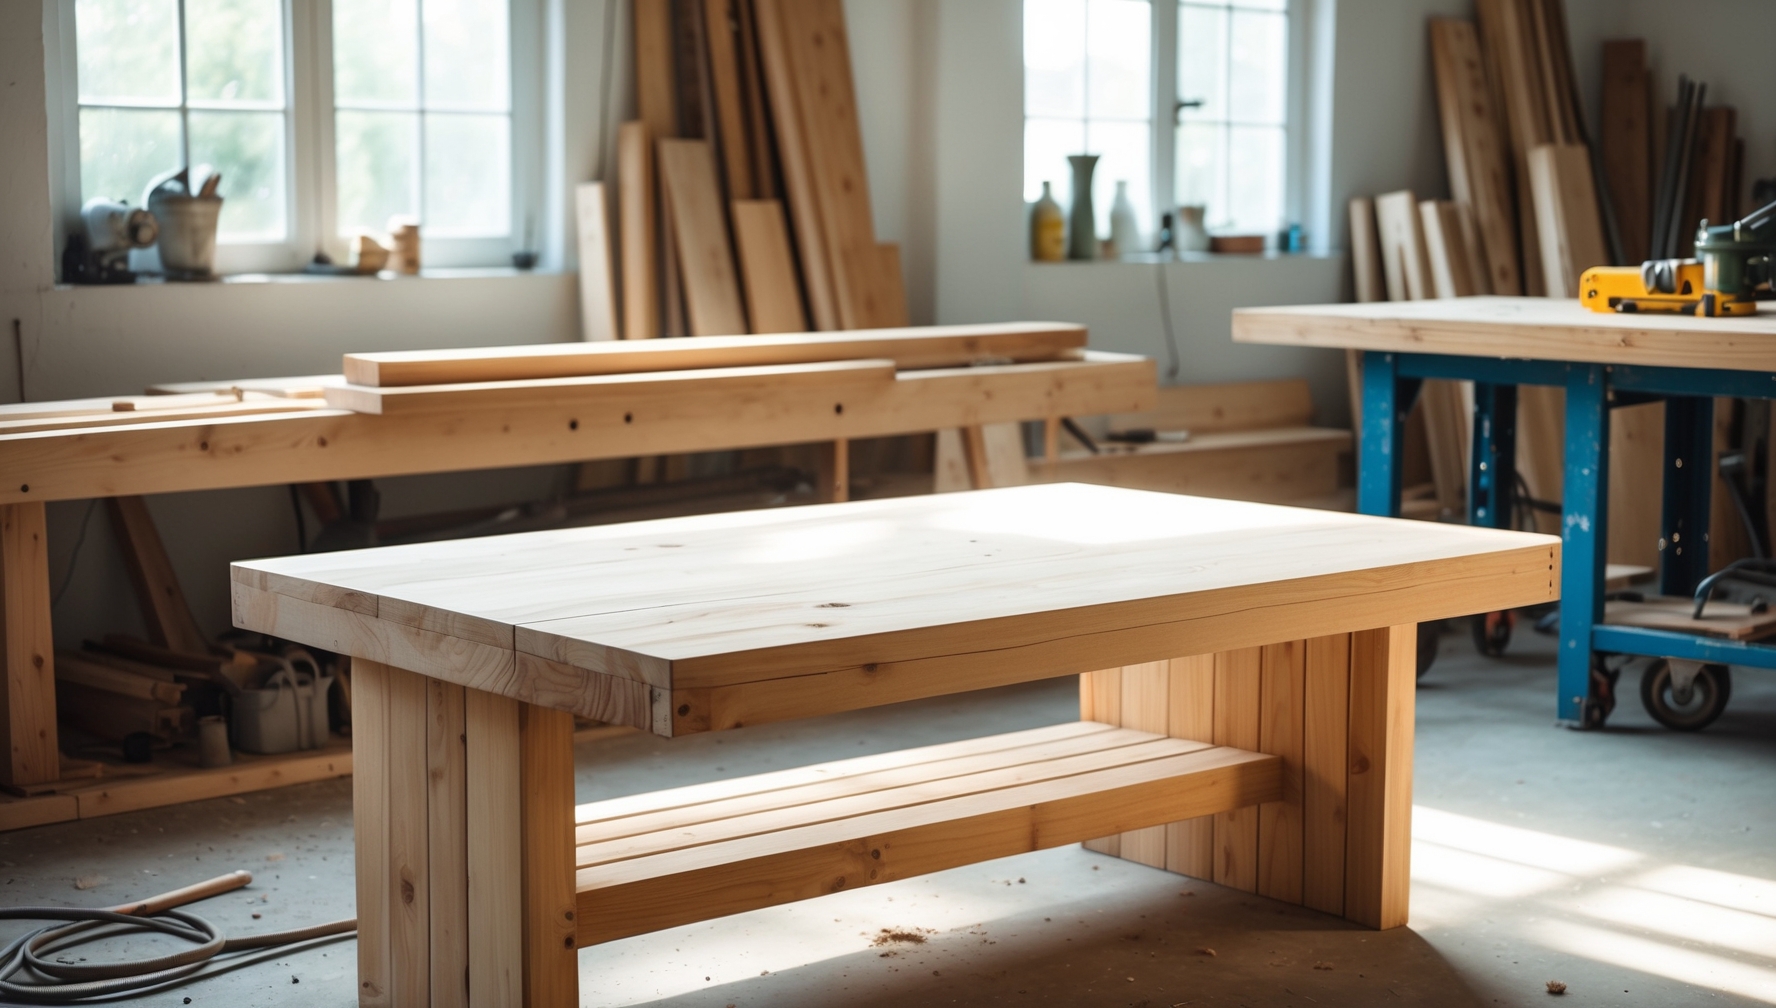
1. DIY Rustic Coffee Table (Perfect for Beginners!)
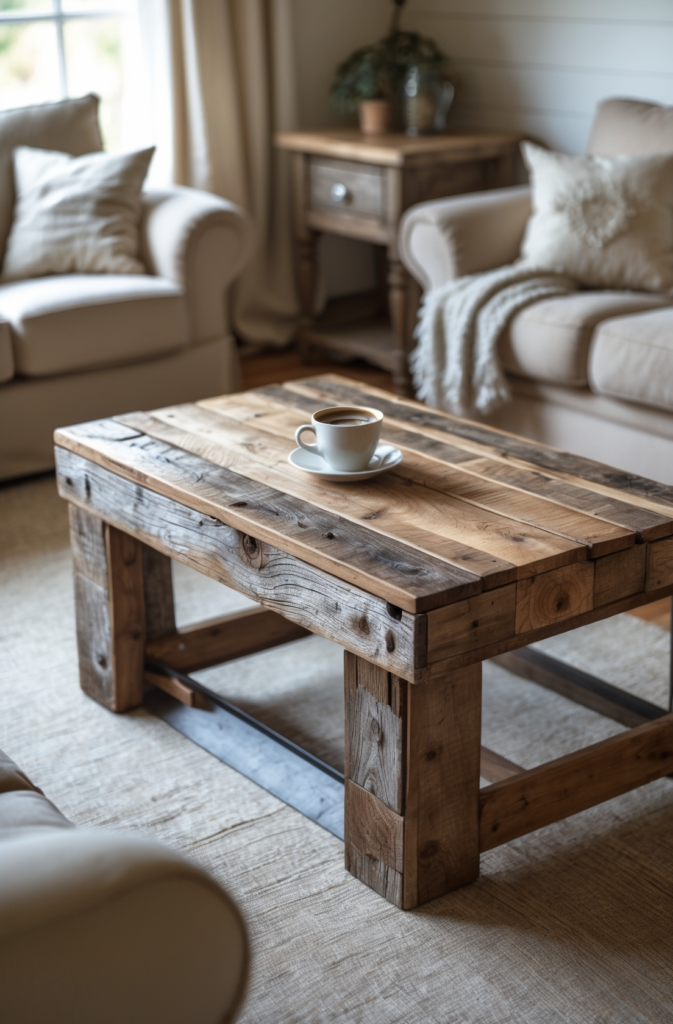
The DIY Rustic Coffee Table is a staple in any living room and one of the easiest wood working projects for beginners. This piece is all about embracing the natural beauty of wood, so you don’t have to worry if your boards have minor imperfections—they’ll add character! Plus, if you’re looking for small woodworking projects, this one can be scaled to fit any space.
Materials Needed:
- Reclaimed wood planks (or standard 2x4s)
- Wood screws or nails
- Wood glue
- Sandpaper (medium and fine grit)
- Stain or paint (optional)
- Polyurethane finish (optional)
Step-by-Step Guide:
- Measure & Cut: Determine the desired size of your coffee table. Cut your top planks to length, and trim any support pieces for the legs or frame.
- Assemble the Frame: Create the table’s base by screwing or nailing the support pieces to the legs. Make sure everything is square using a carpenter’s square.
- Attach the Top: Align your top boards and secure them to the frame with screws. Use wood glue for added strength.
- Sand Smooth: Sand the entire table with medium grit first, then finish with fine grit for a smooth surface.
- Stain or Paint: If you want a more refined look, apply a wood stain or a coat of paint. Let it dry completely.
- Protective Finish (Optional): Apply a clear polyurethane or sealer to protect your new coffee table from spills and scratches.
In just a few hours (plus drying time), you’ll have a rustic centerpiece that showcases your diy wood projects furniture skills.
Need more coffee table designs or want professional-level plans?
🔥 Check out Ted’s Woodworking for 16,000+ blueprints! 📥
2. DIY Console Table (Modern & Stylish!)
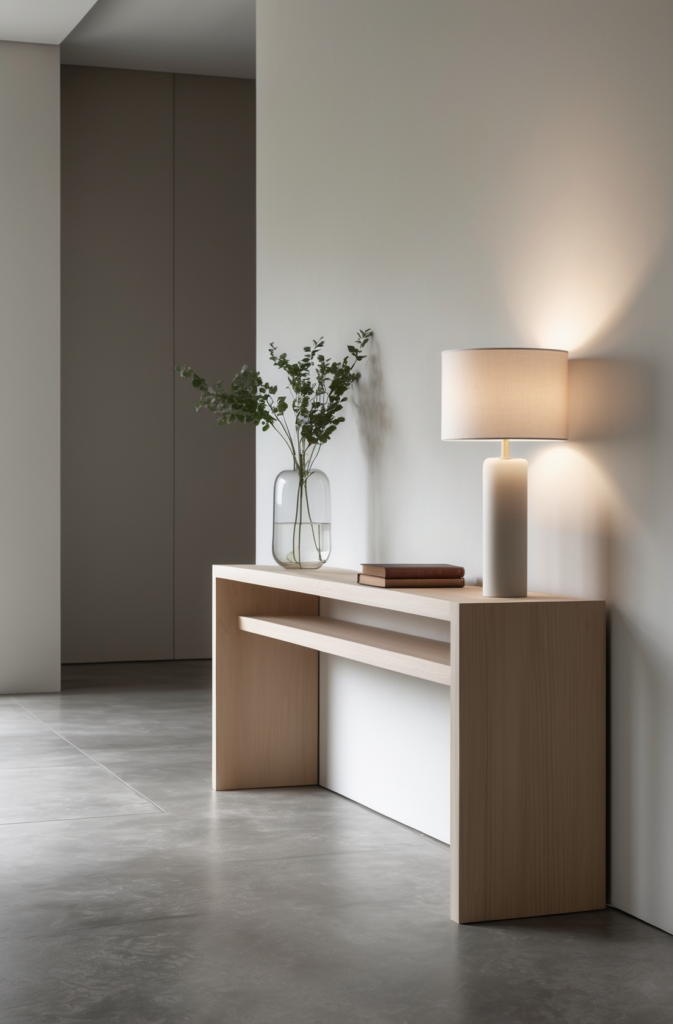
A DIY Console Table can add both storage and style to your entryway, hallway, or behind the sofa. Its narrow design means it doesn’t take up a lot of space, making it ideal for those looking to maximize function without crowding their home. This is also one of the small easy woodworking projects you can complete over a weekend.
Materials Needed:
- 1×6 or 1×8 boards (for the tabletop and lower shelf)
- 2×2 boards (for the legs and supports)
- Wood screws
- Wood glue
- Sandpaper
- Stain or paint
- Varnish or polyurethane (optional)
Step-by-Step Guide:
- Design Your Table: Decide on the table’s length, width, and height. Sketch a quick plan to ensure your measurements make sense.
- Cut the Wood: Cut the tabletop, lower shelf, and leg pieces to size. You’ll also need cross supports for the frame.
- Assemble the Frame: Attach the legs to the cross supports. Check for levelness by placing the frame on a flat surface.
- Add Top & Shelf: Secure the tabletop to the frame, then attach the lower shelf. Use wood glue and screws for a sturdy build.
- Finishing Touches: Sand all surfaces to remove rough edges. Apply stain or paint, and seal with a topcoat for durability.
This sleek table is perfect for displaying decorative items or providing a convenient spot to drop your keys and mail.
Craving more modern woodworking designs?
🔥 Grab 16,000+ woodworking plans from Ted’s Woodworking! 📥
3. DIY Scandinavian Bench – Build It in 2 Hours!
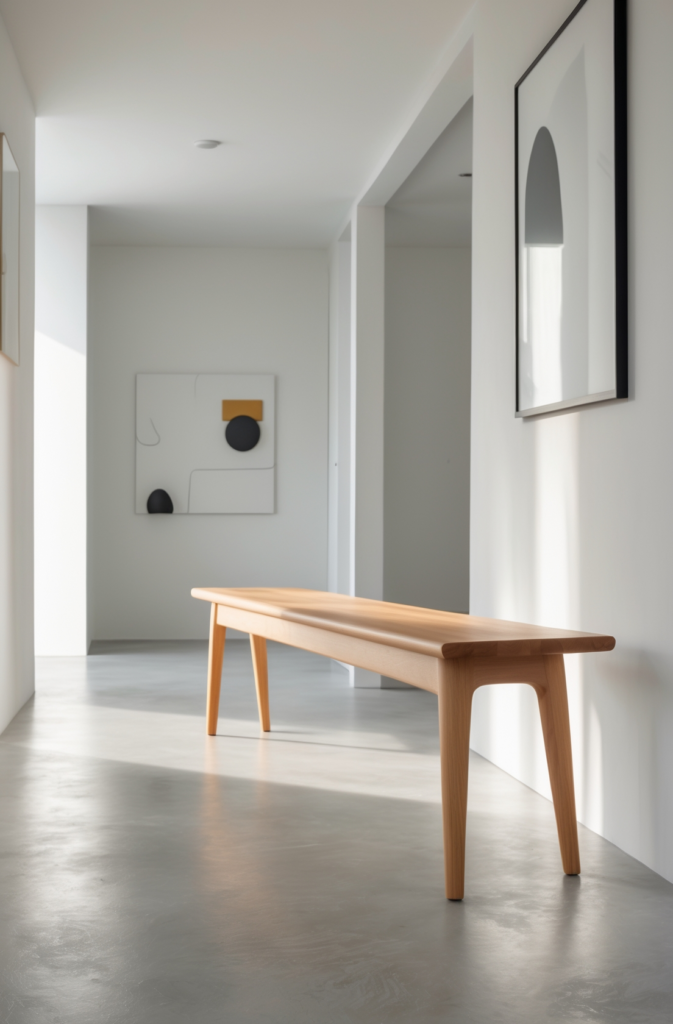
If you love the simple, modern aesthetic—clean lines, light wood tones, and functional design—then this DIY Scandinavian Bench is a must-try. It fits right in with the hantverk diy spirit, focusing on craftsmanship and minimalist charm. Place it in your entryway, dining room, or at the foot of your bed for extra seating and style.
Materials Needed:
- 1×12 board (for the seat)
- Four wooden legs (tapered legs for a Scandinavian feel)
- Mounting brackets for the legs (if not built directly)
- Wood screws
- Sandpaper
- Light wood stain or clear varnish
Step-by-Step Guide:
- Cut the Seat: Determine the length of the bench seat. A standard entryway bench might be around 36 to 48 inches long.
- Sand the Board: Smooth out edges and surfaces before attaching legs.
- Attach Legs: Position the legs at each corner, ensuring they’re evenly spaced from each edge. Screw them in or use mounting brackets.
- Check Stability: Flip the bench upright and gently test for wobble. Tighten screws if needed.
- Finish: Apply a clear varnish or a light stain to protect the wood and maintain that airy Scandinavian vibe.
This super-simple bench project can easily be done in an afternoon, perfect for those seeking easy wood solutions in their home.
Want more quick-build furniture options?
🔥 Check out Ted’s Woodworking for detailed tutorials! 📥
4. DIY Outdoor Sectional Sofa – Free Plans Included!
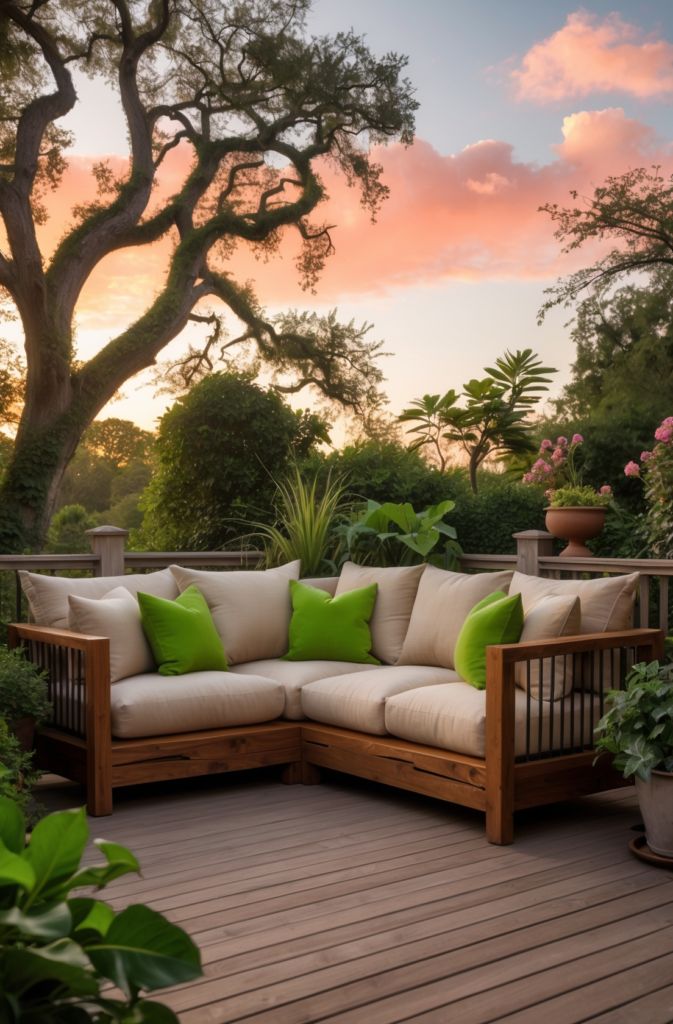
If you love spending time outdoors, a DIY Outdoor Sectional Sofa is the perfect weekend project. This piece will transform your patio or backyard into a comfortable retreat for lounging, entertaining, or just enjoying some fresh air. It’s also a great example of woodworking projects that sell if you ever decide to monetize your hobby.
Materials Needed:
- Pressure-treated lumber (2x4s or 2x6s)
- Outdoor screws (rust-resistant)
- Outdoor cushions or foam + weatherproof fabric
- Sandpaper
- Outdoor wood sealant or paint
- Measuring tape, saw, drill
Step-by-Step Guide:
- Measure Your Space: Decide how large you want each section of the sofa to be. Most people build modular units that can be arranged in various configurations.
- Cut the Wood: Use 2×4 or 2×6 boards for the frame and seat supports. Measure carefully for consistent lengths.
- Assemble Seat & Back: Build rectangular frames for the seat base, then attach back supports at a slight angle for comfort.
- Connect Sections: Create multiple seating sections and join them. This modular approach allows you to easily move or rearrange pieces.
- Sand & Seal: Sand rough edges and apply a weatherproof sealant or paint to protect from moisture and UV rays.
- Add Cushions: Top each section with outdoor cushions or foam wrapped in weatherproof fabric.
With this sectional, your outdoor space becomes an inviting spot for relaxation. You can even incorporate scrap wood ideas for smaller accents like armrest tables or built-in plant holders.
Need step-by-step diagrams for building modular outdoor furniture?
🔥 Browse Ted’s Woodworking for detailed outdoor projects! 📥
5. DIY Wooden Side Table (Budget-Friendly!)
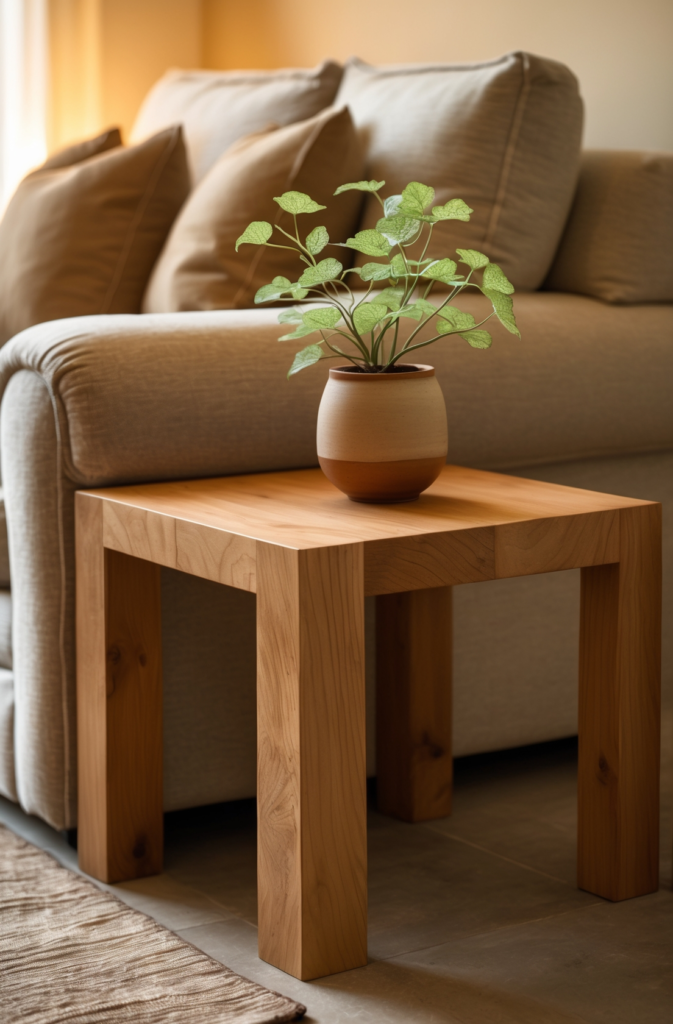
A side table is a quick and easy wood build that can be completed on a tight budget. It’s a perfect companion for your sofa, armchair, or even a bedside area if you’re short on space. Plus, if you’ve been collecting scrap wood crafts ideas, you can often use leftover pieces to create a unique tabletop pattern.
Materials Needed:
- 1×4 or 1×6 boards (for the tabletop and lower shelf, if desired)
- 2×2 boards (for the legs)
- Wood screws or nails
- Sandpaper
- Stain or paint (optional)
- Topcoat sealer (optional)
Step-by-Step Guide:
- Design & Cut: Determine the dimensions of the tabletop. Cut the boards to create the top and any additional lower shelf.
- Attach Legs: Cut the 2×2 boards to your desired height. Attach them to the underside of the tabletop using screws.
- Add Shelf (Optional): If adding a lower shelf, attach support blocks to the legs, then secure the shelf boards.
- Sand: Smooth edges and surfaces with sandpaper. Pay special attention to corners to avoid splinters.
- Finish: Apply stain or paint. Once dry, add a clear sealer for extra protection.
In just a few steps, you’ll have a functional side table that fits perfectly into your living space—at a fraction of the retail cost.
Looking for more quick, budget-friendly ideas?
🔥 Ted’s Woodworking has an entire section on small furniture projects! 📥
6. DIY Farmhouse Dining Table (Rustic Charm!)
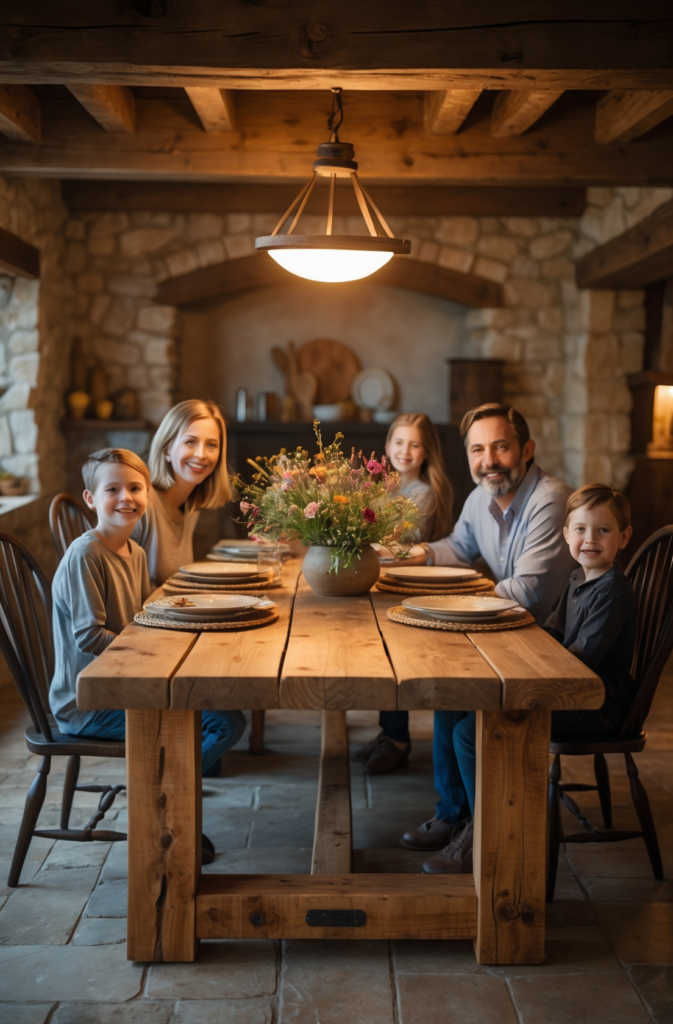
For those who enjoy a warm, rustic aesthetic, you can’t beat a DIY Farmhouse Dining Table. It’s the perfect centerpiece for family gatherings, holiday feasts, or casual get-togethers with friends. While this project is slightly more advanced, it’s still totally doable for beginners willing to take it slow—and it can easily be counted among the wood shop projects that quickly build your confidence.
Materials Needed:
- 2×6 or 2×8 boards (for the tabletop)
- 4×4 posts (for the legs)
- 2×4 boards (for the apron/supports)
- Wood screws or lag bolts
- Wood glue
- Sandpaper
- Stain and sealer
Step-by-Step Guide:
- Cut Boards for the Top: Decide on the table length and cut your 2×6 or 2×8 boards accordingly. Join them using wood glue and pocket hole screws for a seamless surface.
- Construct the Apron: Cut 2x4s to form a rectangle that fits just inside the dimensions of your tabletop. This adds stability and support.
- Attach Legs: Cut the 4×4 posts to the desired height. Secure them to the apron using heavy-duty wood screws or lag bolts.
- Secure the Top: Flip the base upright and center the tabletop on it. Attach from underneath using screws.
- Sand & Stain: Sand down any rough spots, then apply your stain of choice to bring out the wood grain. Once dry, seal with a topcoat.
Your new dining table will be the talk of every dinner party and family gathering. Plus, you’ll have the satisfaction of knowing you built it yourself—a prime example of woodworking projects that sell if you take custom orders.
Prefer step-by-step video instructions and exact measurements?
🔥 Check out Ted’s Woodworking for comprehensive farmhouse table plans! 📥
7. DIY Wooden Floating Shelves (Space-Saving & Stylish!)
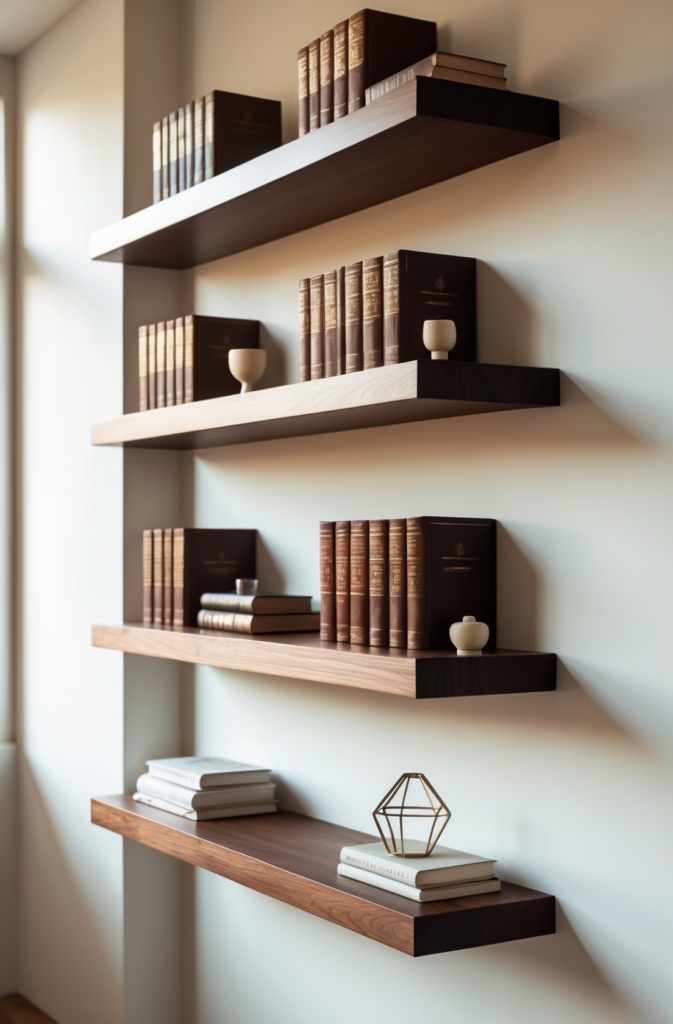
Floating shelves are both stylish and incredibly functional, making them a popular choice for anyone looking to maximize storage without adding bulky furniture. They work great in living rooms, kitchens, bathrooms—basically anywhere that could use some extra shelf space. They also count as small woodworking projects you can quickly finish, making them a perfect weekend undertaking.
Materials Needed:
- Wood boards (length depends on your wall space)
- Hidden bracket hardware or floating shelf mounting brackets
- Drill and wall anchors (if no stud is available)
- Sandpaper
- Stain or paint
- Level
Step-by-Step Guide:
- Measure & Mark: Determine where you want your shelves. Mark the height and make sure they’re level.
- Install Brackets: Locate studs if possible. If not, use wall anchors for secure mounting. Attach the brackets according to the manufacturer’s instructions.
- Prepare the Wood: Cut to your desired length, then sand and finish with stain or paint.
- Mount the Shelves: Slide the shelf boards onto the brackets. Ensure they’re secure and level.
- Decorate: Add books, plants, or other decorative items to make the space pop.
These shelves are a quick yet impactful project that can free up floor space and give your walls a modern, uncluttered look—ideal for those wanting easy wood projects that add immediate value to their home.
Need more space-saving furniture ideas?
🔥 Browse Ted’s Woodworking for thousands of creative shelf designs! 📥
8. DIY Bookshelf (Simple & Functional!)
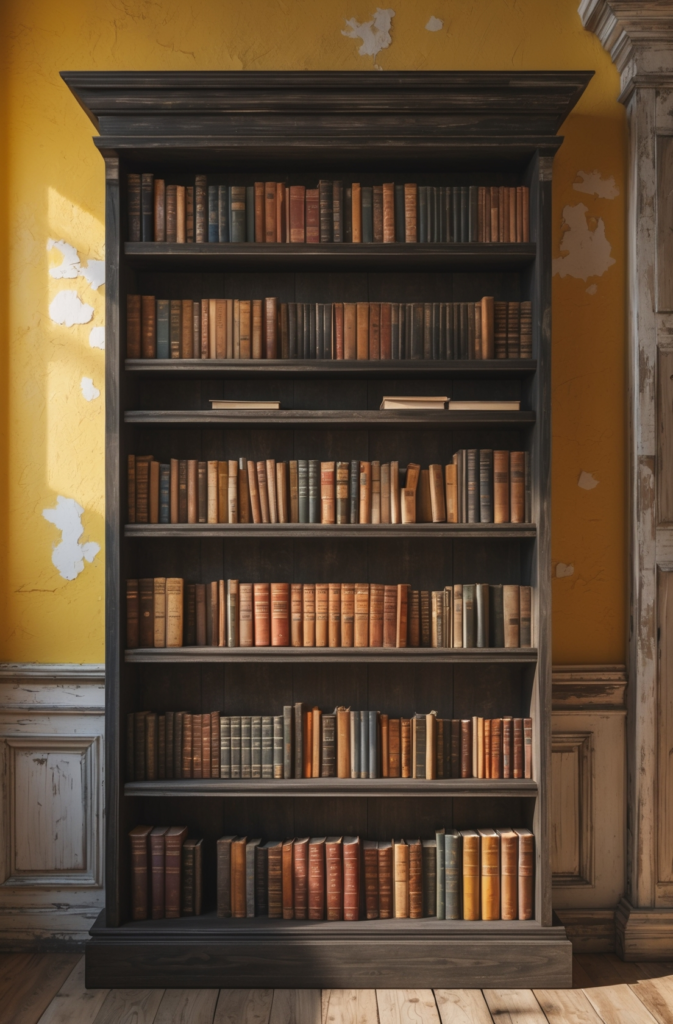
Whether you’re an avid reader or just need some extra storage, a DIY Bookshelf is a fantastic way to display books, collectibles, and more. Simple, rectangular bookshelves are quite straightforward to build, making this a great project for beginners wanting to practice measuring and assembling wood shop projects.
Materials Needed:
- 1×12 boards (for shelves and sides)
- 1×2 or 1×3 boards (for trim or additional support)
- Wood screws or nails
- Wood glue
- Sandpaper
- Paint or stain (optional)
- Back panel (plywood) if desired
Step-by-Step Guide:
- Plan Your Shelf: Decide how tall and wide you want the bookshelf. Sketch a rough design to ensure it fits your space.
- Cut the Boards: Cut the side pieces and as many shelves as you need. Use 1x12s for a sturdy base.
- Assemble Sides & Shelves: Attach shelves to the side pieces, ensuring even spacing. A carpenter’s square helps maintain right angles.
- Optional Back Panel: Attach a thin sheet of plywood to the back for added stability.
- Finishing Touches: Sand everything, fill any nail holes with wood filler, then paint or stain. Seal for durability.
You can customize the look by adding trim, molding, or decorative feet. This basic design also gives you the freedom to adjust shelf height as needed.
Want to tackle a large, multi-shelf bookcase or a custom library wall?
🔥 Ted’s Woodworking has extensive bookshelf plans to fit every style! 📥
9. DIY Wooden Coffee Bar Cabinet (Ultimate Kitchen Upgrade!)
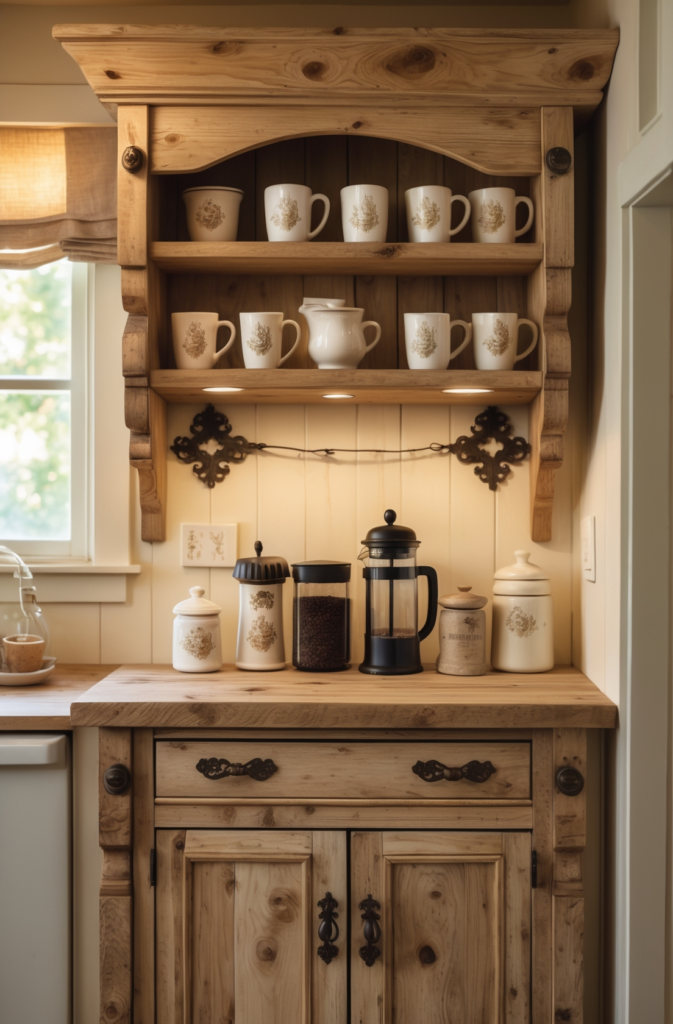
Calling all coffee lovers! A dedicated DIY Coffee Bar Cabinet is the perfect solution to keep all your coffee-making essentials organized. This stylish piece not only frees up kitchen counter space but also creates a cozy coffee nook for your daily brew ritual. It’s one of those woodworking projects that sell well at local craft fairs if you decide to make extras.
Materials Needed:
- 2×2 or 2×4 boards (for the frame)
- 1×12 boards (for shelves and sides)
- Plywood for the back panel
- Cabinet doors (optional) or reclaimed wood boards for doors
- Wood screws
- Hinges and handles (if you want doors)
- Paint or stain
- Sealer
Step-by-Step Guide:
- Design & Measure: Decide how wide and tall you need the cabinet. Consider shelf spacing for coffee machines, mugs, and supplies.
- Build the Frame: Assemble the frame using 2x2s or 2x4s. This forms the skeleton of your cabinet.
- Add Shelves & Sides: Cut 1×12 boards for the sides and shelves. Attach them to the frame with screws and wood glue.
- Install Doors (Optional): If you prefer an enclosed space, add doors using hinges and handles. Reclaimed wood is great for a rustic look.
- Finish: Sand, then paint or stain to match your kitchen decor. Seal with a water-resistant topcoat to protect from spills.
Your morning routine just got a major upgrade! Add hooks or small shelves for mugs, and keep all your coffee pods, filters, and extras neatly in one place—true hantverk diy style meets modern convenience.
Looking for more kitchen-friendly woodworking plans?
🔥 Discover more designs in Ted’s Woodworking library! 📥
10. DIY Wooden Nightstand (Minimalist & Functional!)
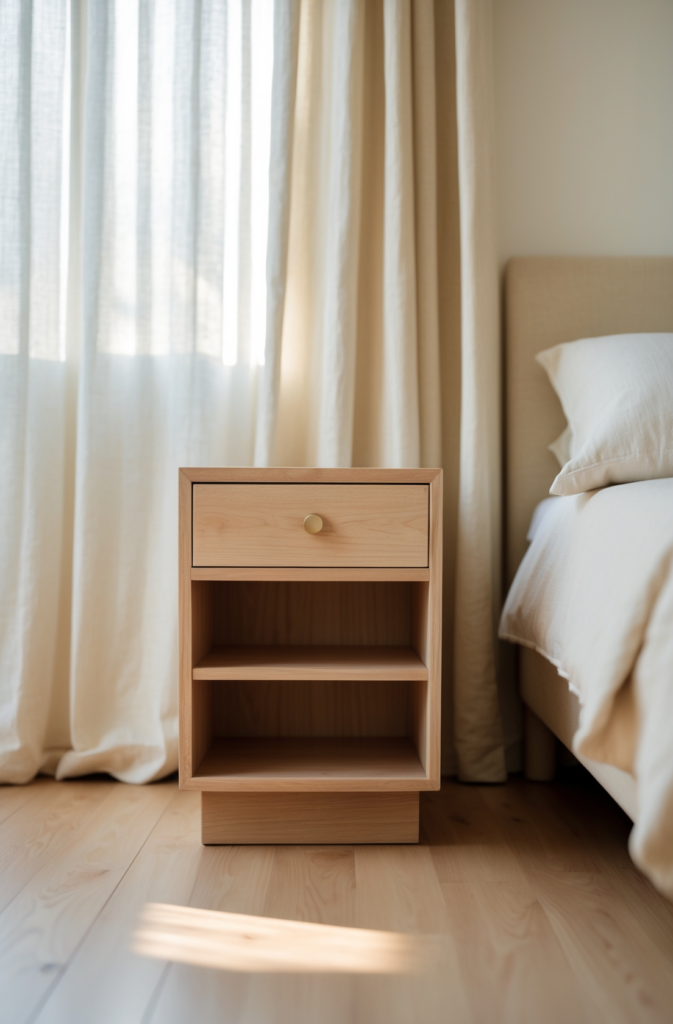
A DIY Wooden Nightstand is a small yet mighty project that adds convenience to your bedroom. You can keep a lamp, books, or phone charger within arm’s reach, and the minimalist design ensures it blends seamlessly with any decor. If you have leftover materials from other scrap wood crafts, you can even incorporate unique patterns or textures on the front panel.
Materials Needed:
- 1×6 or 1×8 boards (for the top, sides, and bottom shelf)
- 2×2 boards (for legs)
- Drawer slides (if you’re adding a drawer)
- Drawer knob or handle
- Wood screws
- Sandpaper
- Paint or stain
- Sealer
Step-by-Step Guide:
- Plan Your Nightstand: Decide if you want a drawer, an open shelf, or both. Draw a quick sketch with measurements.
- Cut Wood & Assemble: Construct the box or frame. If adding a drawer, leave space for the drawer opening.
- Attach Legs: Cut 2x2s to the height you want. Secure them to the corners of the nightstand frame.
- Install Drawer (Optional): Build the drawer box, attach drawer slides, and fit it into the nightstand.
- Finishing Touches: Sand all surfaces, paint or stain, and apply a sealer. Attach a handle or knob if you have a drawer.
Your new nightstand will be a perfect partner for your bed, adding both style and functionality to your bedroom. As far as scrap wood ideas go, you can easily adapt this project to use leftover boards from previous builds.
Want more bedroom furniture plans?
🔥 Ted’s Woodworking has comprehensive tutorials for all bedroom furniture! 📥
Ready to Start Building?
Congratulations! You’ve just explored 10 of the best diy wood furniture projects that even beginners can tackle. From a rustic coffee table to a sleek Scandinavian bench, there’s something here for every style and skill level. Building your own furniture not only allows you to explore hantverk diy craftsmanship, but it also lets you put those scrap wood ideas to good use. Remember, each project can be adapted to create small easy woodworking projects or large statement pieces—depending on your space and ambition.
Want even more project ideas? Get 16,000+ detailed woodworking plans here! 📥
If you’re hungry for more tips and inspiration, check out some of our related posts:
- 15 Best-Selling Barn Wood Projects You Can Make & Sell for Profit!
- 12 Easy DIY Wood Projects for Beginners That You Can Finish in a Weekend
We hope you feel inspired to pick up those power tools and give these projects a go. Each one is beginner-friendly but can be customized to fit your exact preferences. Whether you’re interested in scrap wood crafts, wood shop projects, or larger builds, remember that the best way to improve is to start building and keep learning along the way!
Don’t forget to Pin this article on Pinterest so you can revisit these projects or share them with friends looking for diy wood projects furniture inspiration. Happy building, and we can’t wait to see what you create!