| Key Takeaway | Why It Matters |
|---|---|
| Wood burning (pyrography) can turn regular wooden items into cool art. | You can create things that are both useful and display your unique style. |
| These 12 easy wood burning ideas for beginners are perfect if you’re new to diy wood burning. | You’ll learn basic wood burning tips without feeling overwhelmed. |
| Use simple pyrography designs or wood burning stencils to make precise patterns. | You can achieve creative results, even if you’re a beginner. |
| A simple pyrography pen does most of the work. | Fewer tools mean you can focus on fun designs and a neat finish. |
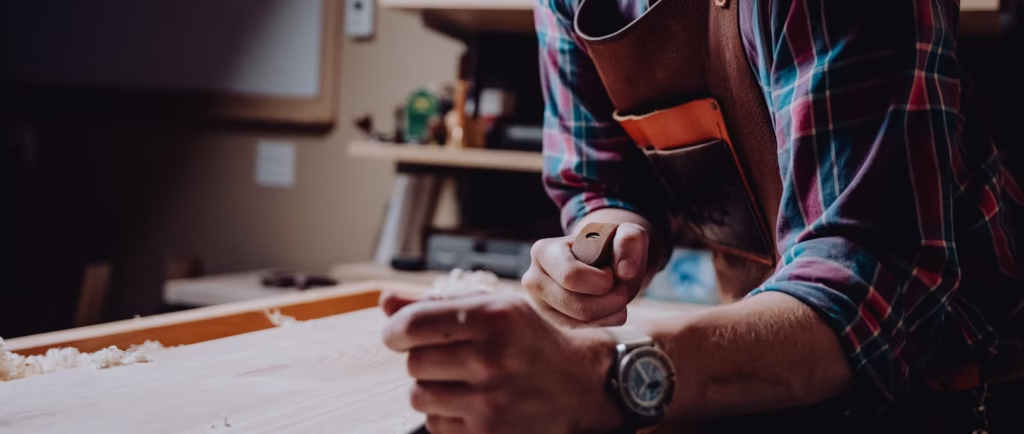
Welcome to the fun world of wood burning, also called pyrography! You can use it to draw or write on wooden objects by burning the surface. This post will guide you through 12 easy wood burning ideas for beginners that can add a modern DIY look to your home. Each project uses beginner wood burning methods and offers tips for stencils, shading, and more. By the end, you can personalize spoons, cutting boards, signs, and so much more. Even better, these ideas suit anyone curious about a creative pastime – kids included!
Early Affiliate Disclosure: This post has affiliate links. If you buy something through these links, I may earn a small commission at no extra cost to you. For detailed woodworking plans, check out Ted’s Woodworking – my go-to resource for step-by-step plans. Learn more here.
Table of Contents
- Project 1: Minimalist Wood Burn Spoons
- Project 2: Beginner Wood Burning Patterns on Coasters
- Project 3: Diy Wood Burning Nature Scene Plaques
- Project 4: Engraved Cutting Boards with Wood Burning Stencils
- Project 5: Rustic Signs with Simple Pyrography Designs
- Project 6: Personalized Wooden Keychains for Gifts
- Project 7: Wood Burning Techniques for Kitchen Utensils
- Project 8: Decorative Boxes with Beginner Wood Burning Patterns
- Project 9: Modern Wall Art with Geometric Pyrography
- Project 10: Family Name Plaques with Wood Burning Stencils
- Project 11: Festive Wood Burned Ornaments
- Project 12: Bold Woodburning Ideas for Sign Boards
- Tips for Mastering Pyrography Projects
- Advanced Wood Burning Techniques for Complex Designs
- Maintenance and Care for Wood Burned Items
- Real-Life Success Stories from DIY Enthusiasts
- Quick Takeaways
- Conclusion
- FAQs
- We Want Your Feedback!
- References
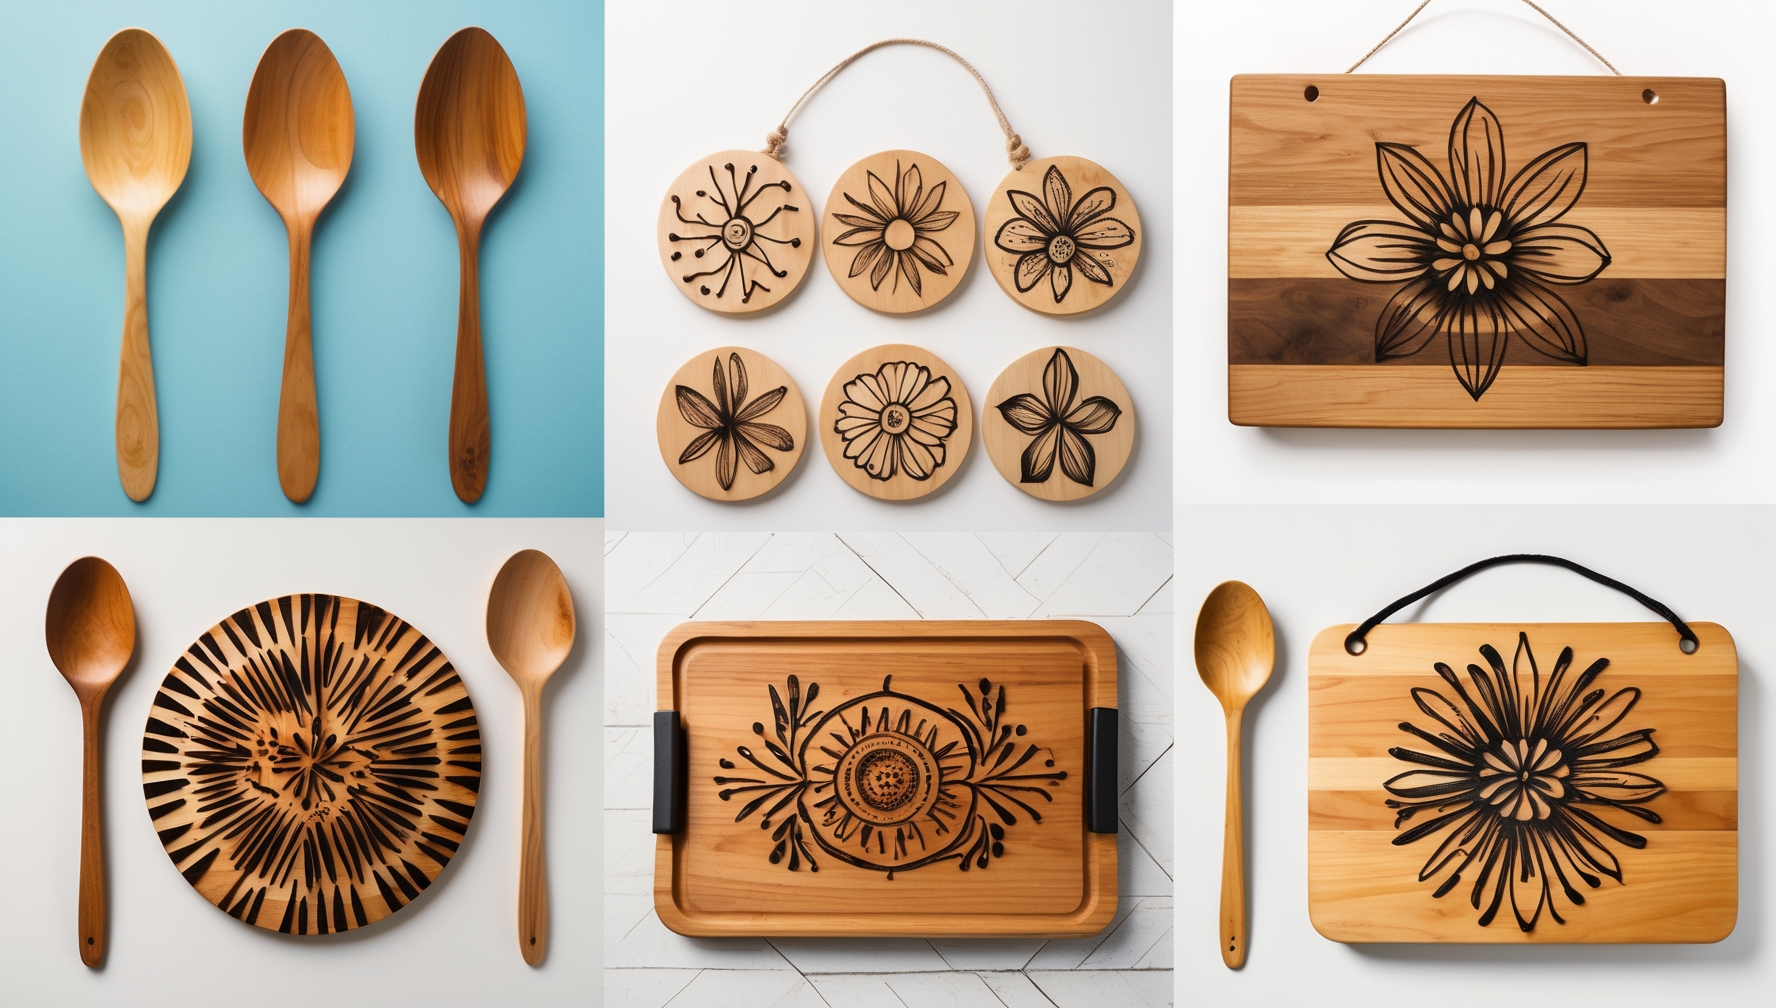
Project 1: Minimalist Wood Burn Spoons
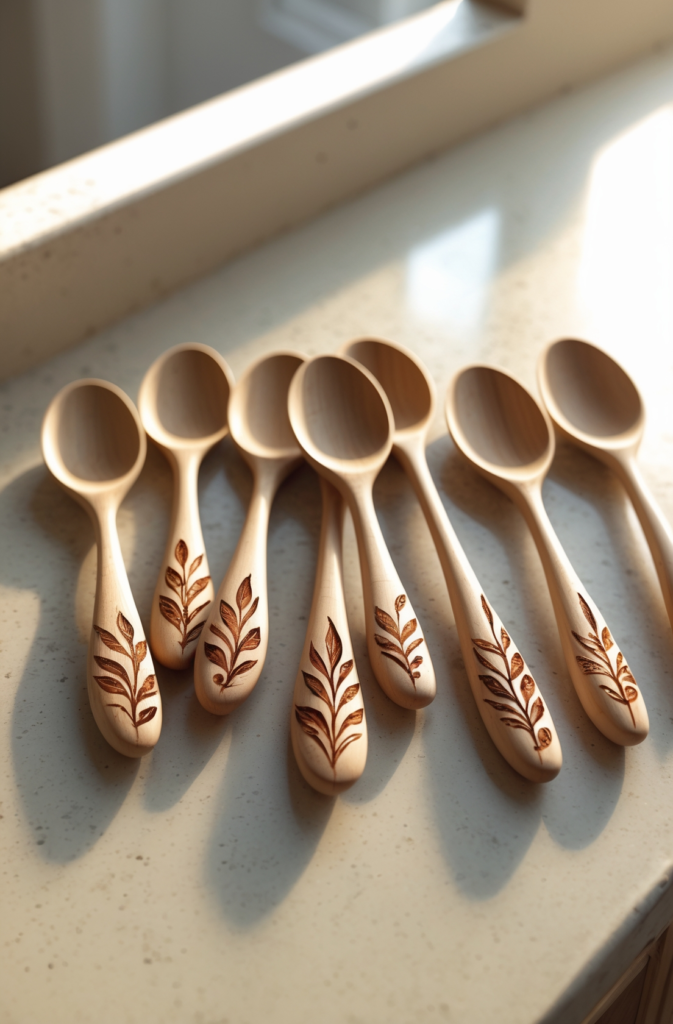
Wooden spoons can look great with simple diy wood burning designs. One beginner drew tiny leaves on her spoons, and family members were impressed during dinnertime. All you need is a wood burning pen, sandpaper, and a bit of patience. Because they’re small, spoons make perfect beginner wood burning pieces.
- Materials: Wooden spoons, pyrography pen, sandpaper, food-safe sealant
- Tools: Pencil, small wood burning tips
How to Make It:
Sand each spoon until smooth. Draw your design in pencil (like leaves, hearts, or lines). Carefully burn the design, then wipe off dust. Finally, coat each spoon with food-safe sealant to keep them safe for cooking. One crafter said her swirl-pattern spoons were a hit at a family brunch.
Tip for Decorating: Tie a few spoons together with ribbon and give them as a friendly kitchen gift.
Project 2: Beginner Wood Burning Patterns on Coasters
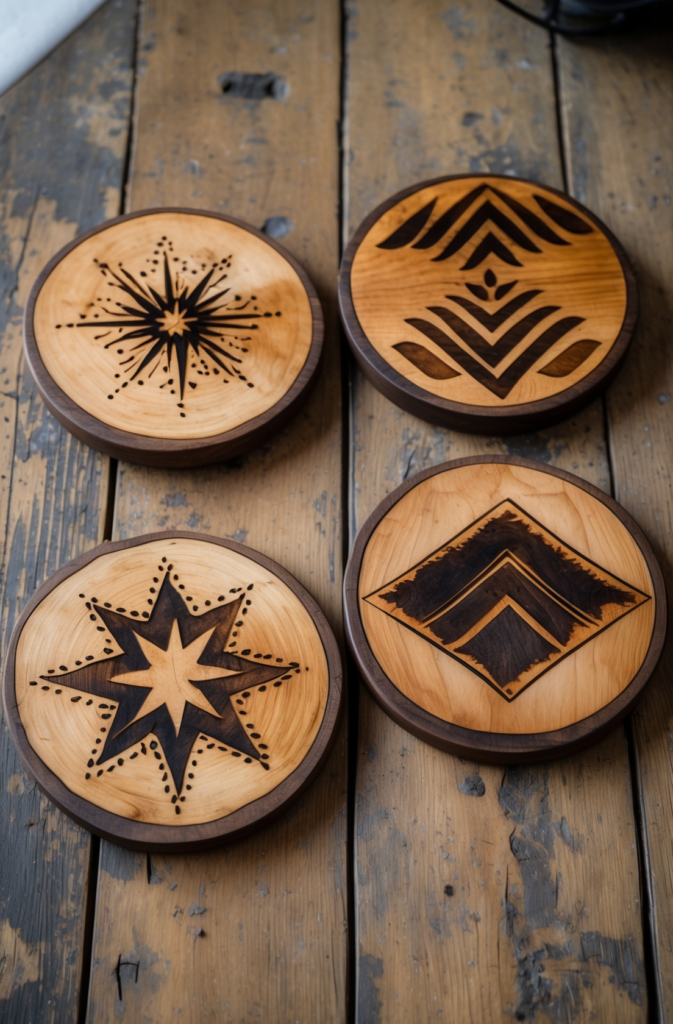
Coasters are easy to practice on because they’re small. A friend burned simple star shapes on her wooden coasters and sealed them, then used them for drinks in the living room. People loved how handmade they felt. You can also use wood burning stencils if freehand lines scare you.
- Materials: Wooden coasters, pyrography pen, optional stencils, clear finish
- Tools: Pencil, fine-grit sandpaper, measuring tape
How to Make It:
Sand the coasters so they’re smooth. Draw or stencil your pattern. Burn along the lines with steady heat. Apply a clear coat to protect from drink spills. One newbie said these coasters gave her quick success and boosted her confidence in wood burning techniques.
Tip for Decorating: Stack them on a tray or arrange them neatly on a shelf to show off your handiwork.
Project 3: Diy Wood Burning Nature Scene Plaques
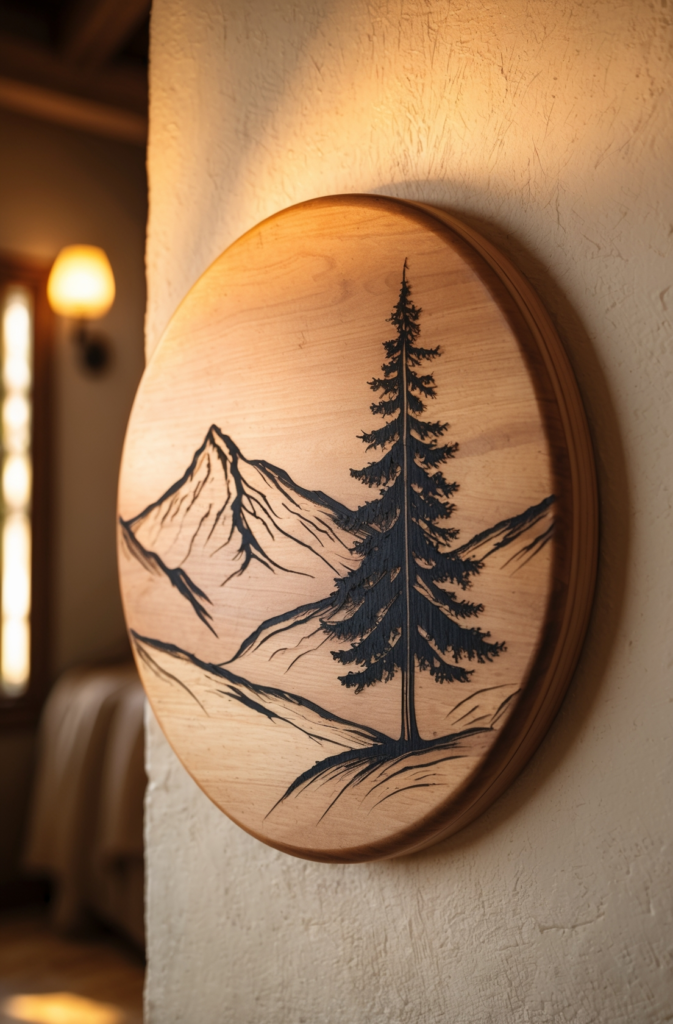
Nature scenes can bring calm vibes into your home. One hobbyist sketched mountain outlines on a plaque, then shaded in some trees. Guests commented on the peaceful look. You can do water scenes, forests, or sunsets. It’s a good way to learn shading—darker burns for tree trunks, lighter burns for clouds or water.
- Materials: Wood plaque, pyrography pen, sealant, reference pictures
- Tools: Pencil, sandpaper, shading tips
How to Make It:
Outline a simple nature image first. Burn the main lines, then add light shading where needed. Sand gently if you see rough spots. Finally, seal it. A crisp mountain scene can remind you of outdoor adventures, even when you’re indoors.
Tip for Decorating: Place it near some potted plants or on a blank wall to let it shine.
Project 4: Engraved Cutting Boards with Wood Burning Stencils
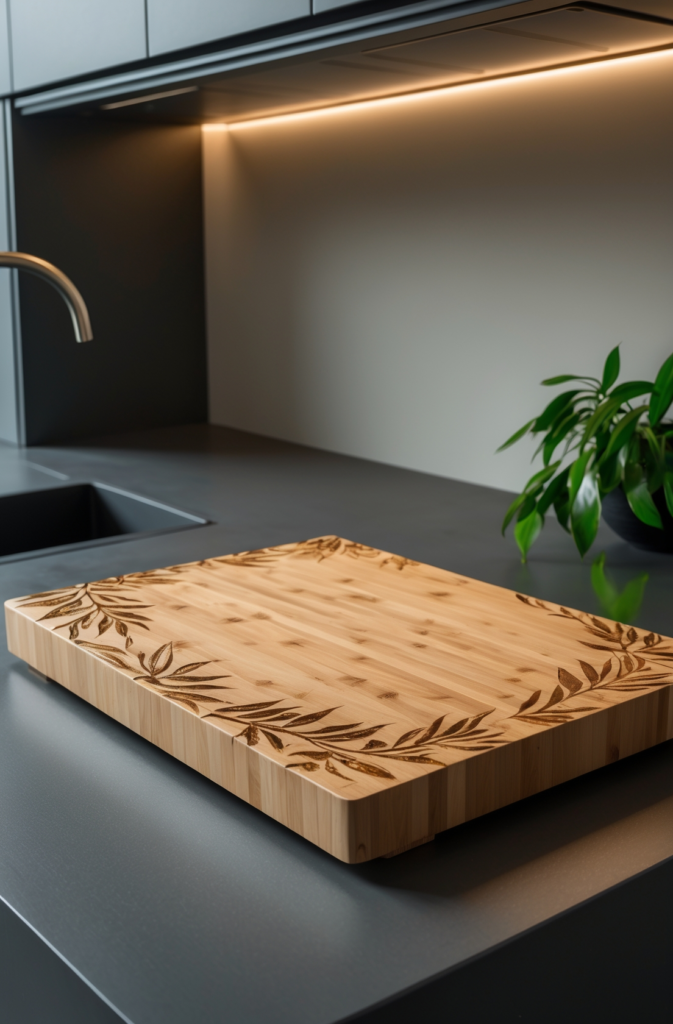
Cutting boards can be both practical and good-looking with wood burning stencils. A home cook once etched a leaf design along the edges of her board, and visitors loved it. Just make sure you use a food-safe finish because you’ll likely use it for slicing or serving. The board’s flat surface makes it easier for beginner wood burning tasks.
- Materials: Wooden cutting board, stencils, pyrography pen, food-safe finish
- Tools: Sandpaper, pencil, measuring tape
How to Make It:
Sand the board lightly, place the stencils, and burn the pattern at moderate heat. Wipe off any dust and apply a food-safe sealant. One newbie said her repeating leaf design looked so pro that guests thought she bought it at a fancy store.
Tip for Decorating: Keep the board on display when you’re not using it. It doubles as a stylish kitchen accent.
Project 5: Rustic Signs with Simple Pyrography Designs
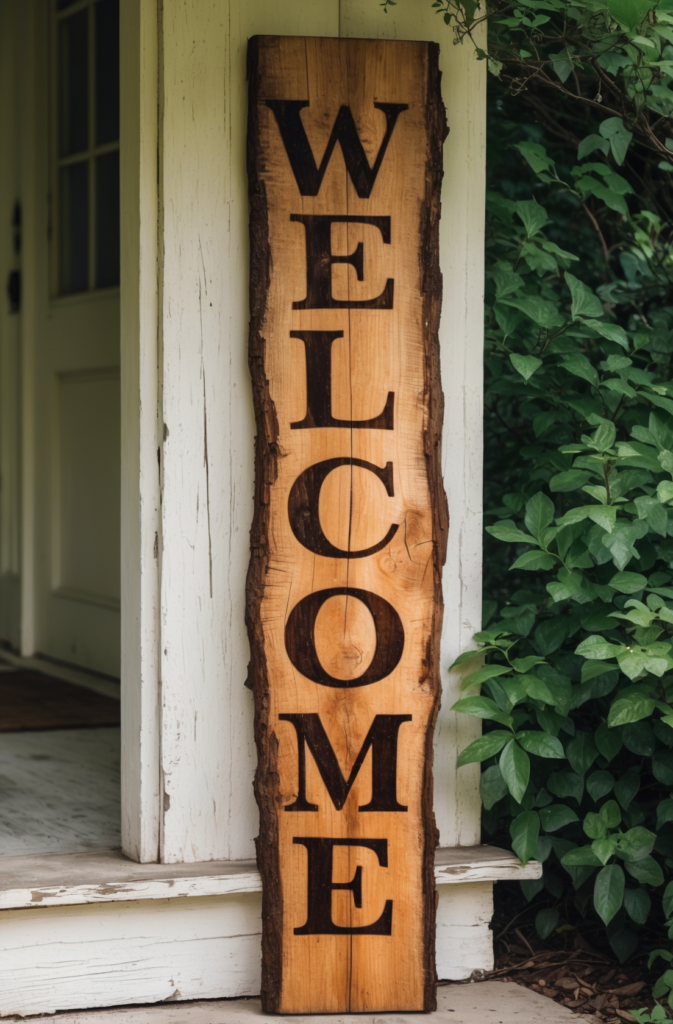
A rustic sign can make your home feel friendlier. You might burn words like “Welcome” or “Home” onto a wood plank. For instance, one family made a sign that greeted everyone at their front door. People said it was such a nice touch. If you plan to keep it outdoors, be sure to use weatherproof sealant. Short words work best if you’re just learning how to do lettering.
- Materials: Wooden plank, pyrography pen, pencil, clear sealant
- Tools: Sandpaper, measuring tape, basic burn tips
How to Make It:
Smooth the plank. Lightly write a short word or phrase. Burn the letters slowly. Wipe off dust and seal. The family’s sign gave their porch a cozy, country feel.
Tip for Decorating: Hang it with strong hooks near the door or just lean it on a porch wall to say hello to visitors.
Pro Tip: Want bigger, more detailed projects beyond these easy wood burning ideas? Check out Ted’s Woodworking. It has 16,000+ guides that can help you learn new woodworking tricks and advanced pyrography methods. See their plans here.
Project 6: Personalized Wooden Keychains for Gifts
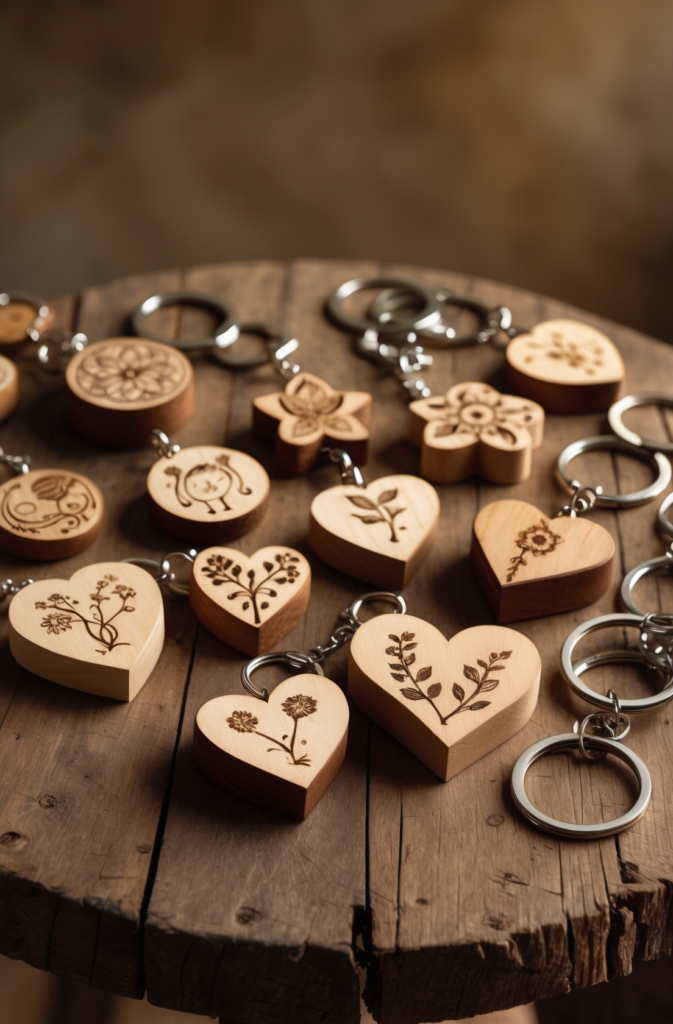
Small wooden keychains are fun to personalize. One college student drew simple animal faces on them, and everyone wanted one. They’re small, so it’s a great place to start if you want to try out new wood burning tips. You can also add quick lettering or monograms. A bit of sealant helps them survive pockets and bags.
- Materials: Wooden keychain blanks, pyrography pen, sealant, keyrings
- Tools: Pencil, sandpaper, small burn tips
How to Make It:
Sand the blank for a smooth start. Lightly sketch your idea (maybe hearts, initials, or animals). Burn the lines, attach the keyring, and seal. People enjoy these keychains as quick souvenirs or tokens of friendship.
Tip for Decorating: You could do matching keychains for your whole group of friends, so you all share a design.
Project 7: Wood Burning Techniques for Kitchen Utensils
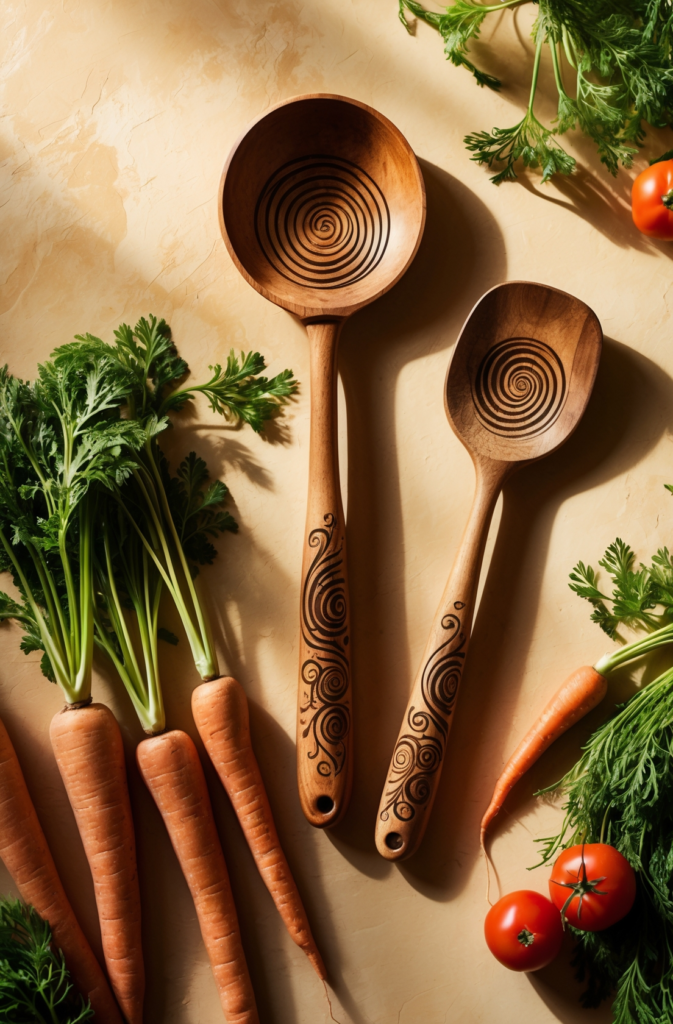
If you loved the spoon idea, you can do spatulas, ladles, and more. One cook drew spiral lines on a wooden ladle, and guests thought it was store-bought. Just keep them safe for cooking by using a food-safe sealant. Simple lines or shapes can transform basic utensils into conversation starters. They’re also a neat gift for a cooking enthusiast.
- Materials: Wooden utensils, pyrography pen, sandpaper, food-safe finish
- Tools: Pencil, measuring tape, swirl burn tips
How to Make It:
Choose utensils with smooth surfaces. Draw your shapes. Burn them carefully. Wipe away debris and coat with a food-safe product. One proud cook said using swirl utensils at dinner made people smile and ask where she got them.
Tip for Decorating: Tie your newly burned ladle and spatula together with a bow for an instant kitchen-themed gift.
Project 8: Decorative Boxes with Beginner Wood Burning Patterns
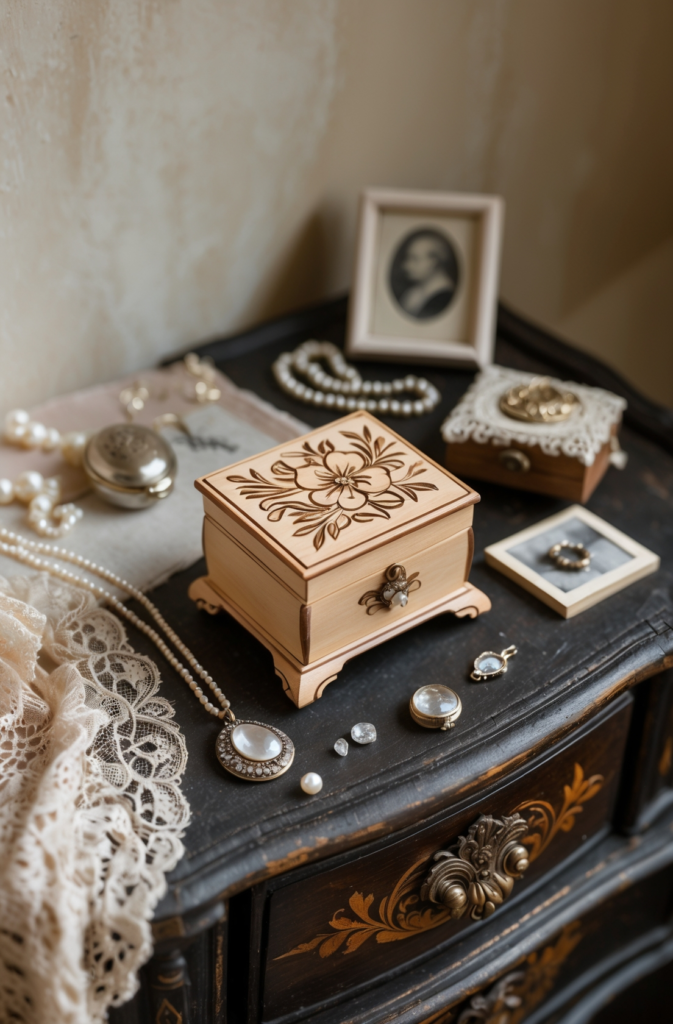
Transform a basic wooden box into a keepsake container with pyrography. One friend used stencils for a vine pattern on a small box, gifting it to her mom, who keeps special letters inside. The corners might be a bit trickier to burn, but practice helps. Since a box can hold anything from jewelry to photos, you’re making a personal storage space that’s also art.
- Materials: Wooden box, pyrography pen, optional stencils, clear finish
- Tools: Pencil, sandpaper, measuring tape, basic tips
How to Make It:
Sand the box thoroughly. Outline or use stencils for designs. Burn them in gently. Seal the box afterward. The vine-themed box from that friend was a highlight at her mom’s birthday party.
Tip for Decorating: Add a piece of cloth or velvet inside for a fancy touch if storing valuables.
Project 9: Modern Wall Art with Geometric Pyrography
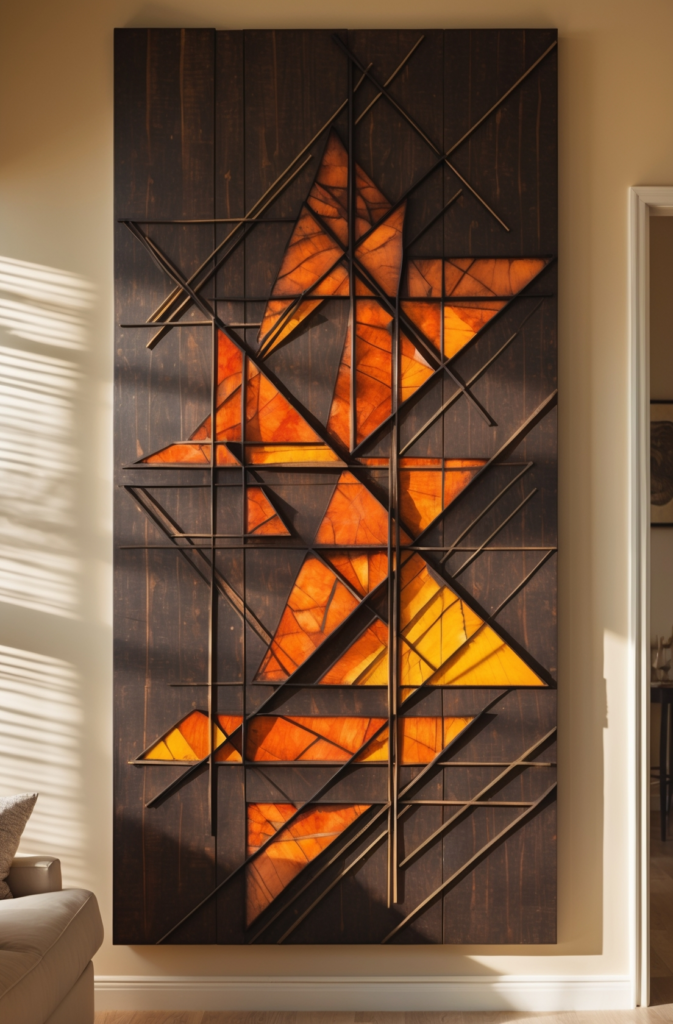
If you like modern shapes and crisp lines, try geometric pyrography on a wooden panel. A design student once filled three panels with overlapping triangles, which wowed her guests. Use a ruler to measure shapes so they look sharp. You can play with shading by burning some areas darker. The final piece can hang in your living room or office, adding a modern edge to the space.
- Materials: Wood panels, pyrography pen, pencil, sealant
- Tools: Sandpaper, ruler, different burn tips
How to Make It:
Smooth each panel, measure shapes, burn lines carefully. Add shading if you want. Seal them. The design student’s triple panel set got tons of praise for its cool, minimalist vibe.
Tip for Decorating: Hang them together in a row or grid for a bigger statement.
Project 10: Family Name Plaques with Wood Burning Stencils
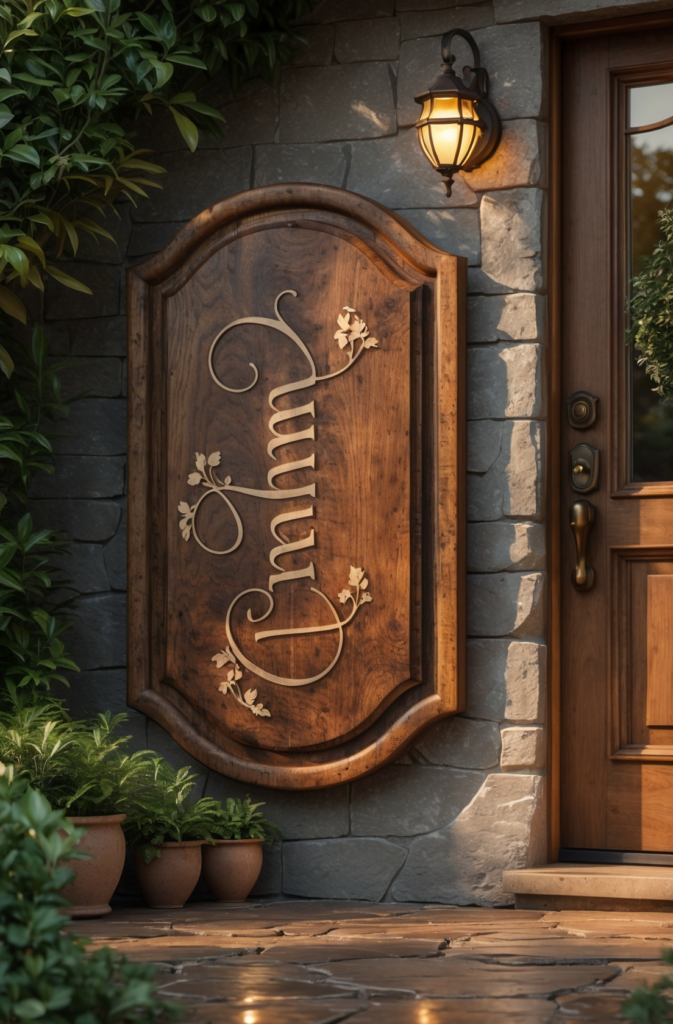
A family name plaque can give a warm welcome to visitors. One homeowner wrote her last name with “Est. 2020” on a plaque by the door, and friends found it super inviting. If you’re uneasy about freehand letters, use wood burning stencils. The plaque can go in your entryway, kitchen, or living room. Many people also gift these plaques at weddings or housewarmings.
- Materials: Wooden plaque, pyrography pen, stencils, clear sealant
- Tools: Pencil, sandpaper, measuring tape, lettering tips
How to Make It:
Sand the plaque. Position the stencils for letters or designs. Burn them steadily and wipe dust away. Seal it to keep it from fading. The homeowner’s sign turned her door space into a personal greeting spot.
Tip for Decorating: Mount it near a coat rack or console table so guests see it right when they come in.
Project 11: Festive Wood Burned Ornaments
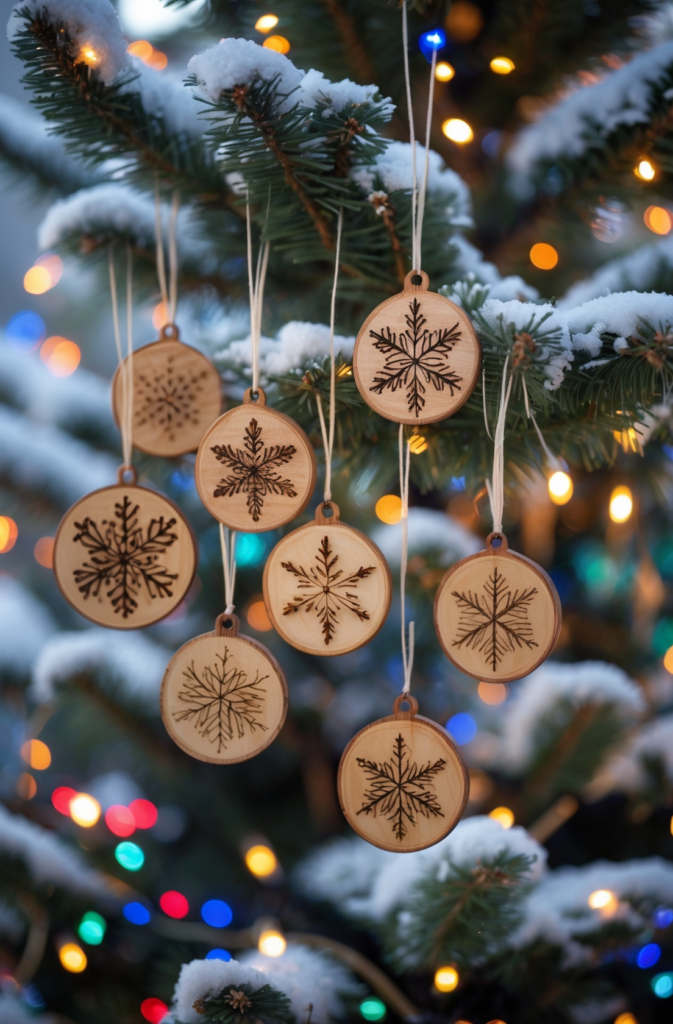
Festive ornaments are quick to make and brighten up any holiday celebration. A crafter who burned snowflakes on thin wood slices said they sold fast at a school fair. Draw simple shapes—stars, bells, snowmen, etc. Then attach ribbons or hooks. Because they’re small, it’s easy to do multiple ornaments in one sitting. Seal them so they last through many holiday seasons.
- Materials: Thin wood slices, pyrography pen, holiday stencils, ribbons
- Tools: Pencil, sandpaper, small burn tips
How to Make It:
Sand each slice so it’s smooth. Trace or freehand holiday shapes. Burn them gently, then attach a ribbon. A crafter’s star-themed set was a big hit with neighbors who wanted some too.
Tip for Decorating: Write names or the year on the back for a personalized holiday memory.
Project 12: Bold Woodburning Ideas for Sign Boards
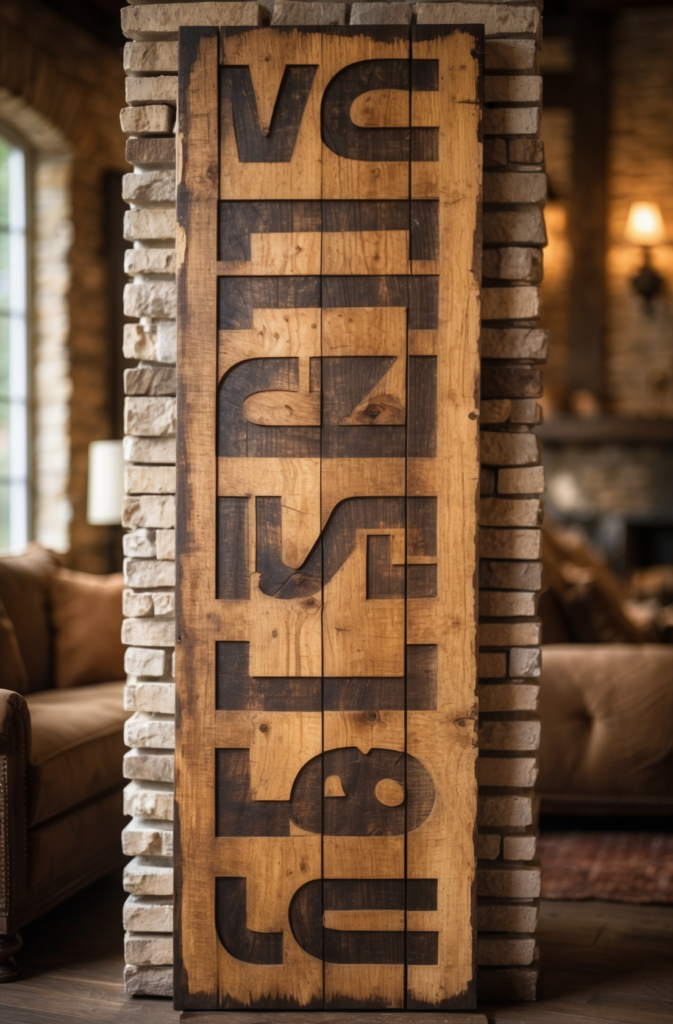
If you want a big statement piece, try bold sign boards. One café owner burned a short slogan onto a wide board, and customers loved the handmade vibe. Because it’s a bigger surface, you can explore shading or layering lines. Make sure you measure your letters so they look even. If it’s staying outside, choose weatherproof finishes. The sign can become the highlight of your home’s entry or a small business’s front display.
- Materials: Large wooden plank, pyrography pen, pencil, weatherproof finish
- Tools: Sandpaper, ruler, advanced tips
How to Make It:
Sand thoroughly. Draw or stencil your letters. Burn them slowly for clean lines. Seal if it’s outdoors. The café owner’s sign instantly attracted attention from passersby who enjoyed its down-to-earth style.
Tip for Decorating: Use a short, snappy phrase like “Welcome,” “Smile,” or something that reflects your space’s mood.
Tips for Mastering Pyrography Projects
Figuring out how to control your pyrography pen turns plain objects into artistic pieces. Practice on scraps to learn how heat levels affect line width and darkness. Try different wood burning stencils or freehand if you prefer a personal style. One newbie spent an hour daily burning squiggles, circles, and lines, which really improved her accuracy. Also, research how to shade or highlight by moving the pen at different speeds. With patience, you’ll see your confidence and skill grow.
Advanced Wood Burning Techniques for Complex Designs
Once you get comfy with the basics, advanced methods can take your pyrography up a level. Some people blend painting with burned outlines for a striking effect, like adding watercolor washes. Others do layered burns for deep shading and 3D illusions. If you like nature scenes, add speckling for texture. If you love patterns, combine pyrography with dot shading. These more complex projects might need more time, but the results often amaze family and friends.
Maintenance and Care for Wood Burned Items
Keeping your wood burned pieces in top shape is easy if you follow a few steps. Wash spoons or cutting boards gently and apply a food-safe oil or sealant once in a while. Dust signs or plaques with a soft cloth. One pyrography fan redid the seal on her spoons every few months to keep them looking brand-new. Also, avoid soaking or exposing them to extreme heat or cold, which can crack the wood.
Real-Life Success Stories from DIY Enthusiasts
Lots of people started with small beginner wood burning projects and ended up turning them into real success stories. One person made personalized coasters for her family, and soon friends asked if she sold them. Another posted her pyrography ornaments online, and they became a hit around the holidays. These stories show that with practice and creativity, you might go from burning random shapes on scraps to selling your own designs at fairs or online shops.
Quick Takeaways
- Easy wood burning ideas include spoons, coasters, signs, and more.
- Stencils or freehand methods both work, so pick what feels comfy.
- Use food-safe finishes for kitchen items like cutting boards or utensils.
- Basic practice leads to advanced shading or painted combos for bigger art.
- Simple upkeep—gentle washing, occasional sealing—keeps items looking fresh.
- Real-life stories prove that pyrography can grow from a hobby into a passion.
Conclusion
These 12 easy wood burning ideas for beginners show that pyrography can be fun, simple, and versatile. From decorating spoons and coasters to making bold sign boards, you’ll pick up wood burning techniques that let you personalize almost anything. With practice, you can move on to advanced styles like shading or mixing paint. Don’t forget to protect your pieces with the right sealant and keep trying new designs. You never know—you might end up impressing friends, selling items, or even decorating your entire home with hand-burned art.
Deeper Tutorial Tie-In: If you’re ready to go beyond these starter ideas, Ted’s Woodworking can help you do bigger projects. They have step-by-step plans for tons of woodworking tasks, and you can add pyrography touches to them. Learn more here.
FAQs
Q1: What are beginner wood burning projects? They’re small, simple pyrography tasks—like spoons or coasters—where you learn basic line work and shading. Q2: Do I need stencils for wood burning? They’re optional but helpful if you want neat shapes or letters while you’re still learning. Q3: What’s the best way to practice wood burning techniques? Try freehand lines on scrap wood. Adjust your pen’s heat for different shades. Slowly tackle more detailed designs as you improve. Q4: How do I maintain food-related items like spoons or boards? Wash gently, and seal them with a food-safe product. Avoid soaking them in water for too long. Q5: Can I sell the items I burn? Yes! Many people start by making gifts for friends, then move to craft fairs or online once they refine their skills.
We Want Your Feedback!
Have you tried any of these easy wood burning ideas? Did you decorate spoons, coasters, or something else? Let us know in the comments! We love seeing your diy wood burning experiments. Feel free to share this post with friends who might enjoy the magic of pyrography too.
References
- Popular Woodworking – Offers advice on woodworking and pyrography tools.
- This Old House – Explains basic DIY methods and home improvement tips.
- Wood Magazine – Shares advanced pyrography and general woodworking concepts.