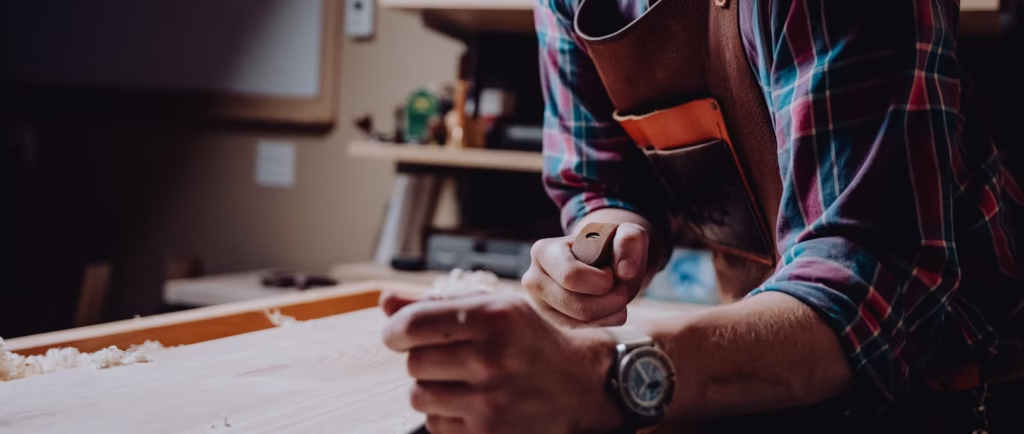
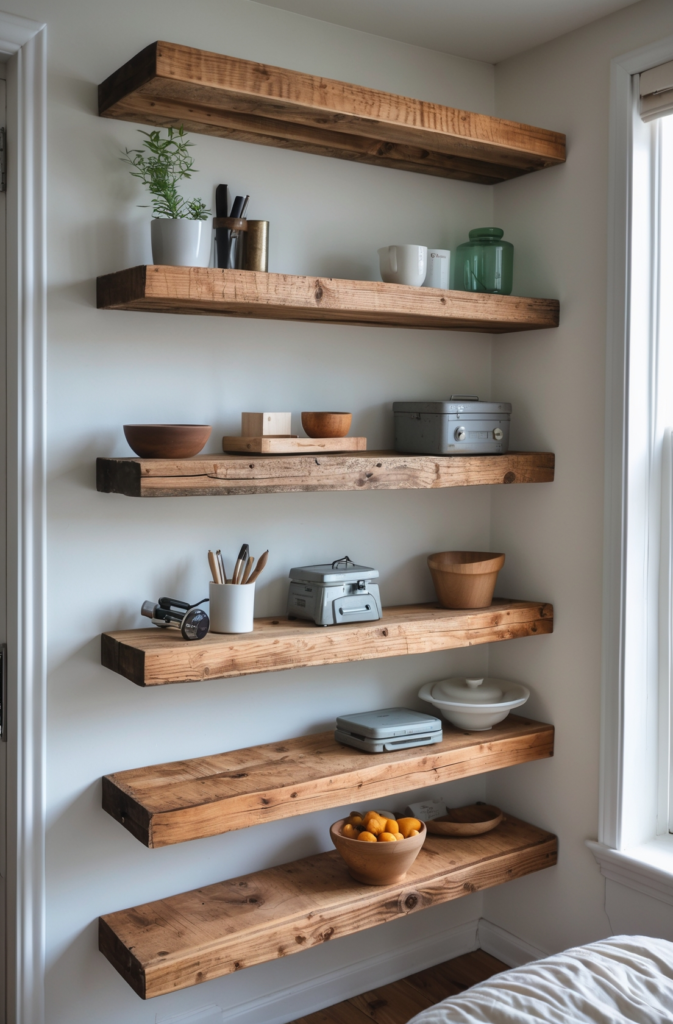
Floating shelves aren’t just a modern décor trend—they’re a practical solution for those with limited space who still crave style and functionality. In this guide, diy floating shelves easy projects are broken down into 10 unique, budget-friendly ideas that any dedicated DIYer can master. Whether you’re revamping your urban apartment, optimizing your workshop, or looking to add character to your off-grid cabin, each project is designed with clear instructions, detailed materials lists, and handy decorating tips.
Early Affiliate Disclosure: This post contains affiliate links. If you make a purchase through these links, I may earn a small commission at no extra cost to you. For those looking to get started with professional-grade woodworking plans, consider checking out Ted’s Woodworking – my trusted resource for detailed project blueprints. Learn more here.
Throughout this article, you’ll find real-life examples, practical tips, and insights that help you tackle each project with confidence. We’ll cover everything from simple designs for beginners to more advanced techniques suited for the seasoned craftsman. Get ready to dive into a world of creative, easy-to-build floating shelves that not only save space but also add a personalized touch to your home.
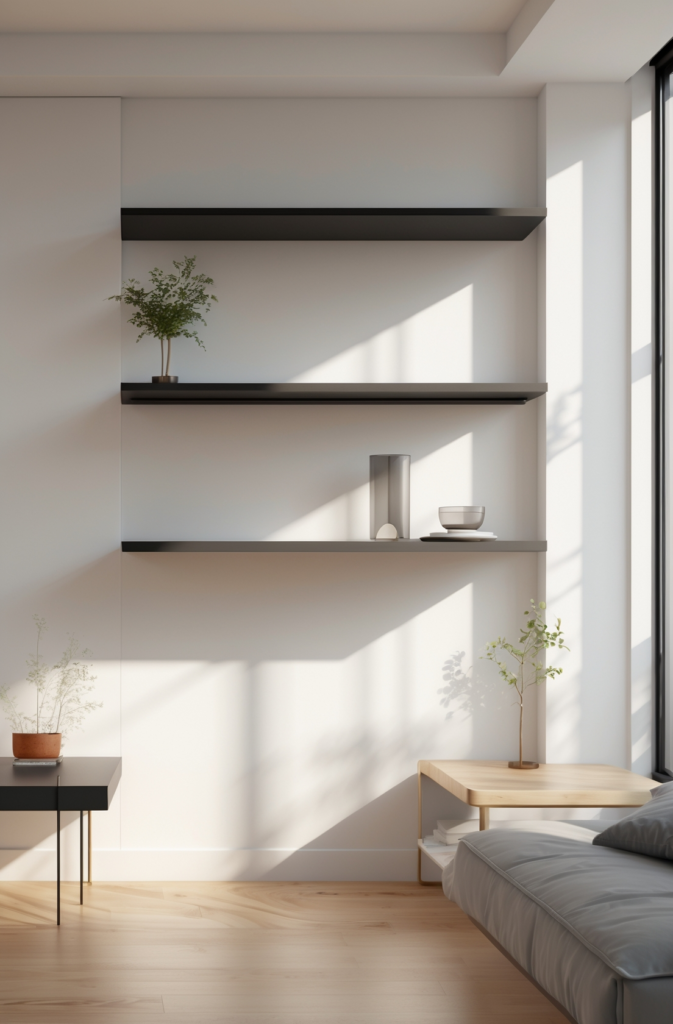
Table of Contents
- Project 1: Basic Floating Shelves for Starter Urban Apartments
- Project 2: Modern Minimalist Floating Shelves for Compact Kitchens
- Project 3: Rustic Floating Shelves for a Warm, Inviting Living Room
- Project 4: Industrial-Style Floating Shelves for Workshops & Garages
- Project 5: easy diy floating shelves easy cheap for Budget-Conscious Homeowners
- Project 6: Floating Shelves Bedroom Edition – Sleek & Functional
- Project 7: diy kitchen floating shelves with a touch of green energy
- Project 8: shelves diy for off-grid cabins – simple & sustainable
- Project 9: Floating Shelves for Tools & Workbenches – a carpenter’s dream
- Project 10: Floating Shelves for Outdoor Spaces & Garden Sheds
- Quick Takeaways
- Conclusion
- FAQs
- We Want Your Feedback!
- References
Project 1: Basic Floating Shelves for Starter Urban Apartments
Ideal for beginners, this project focuses on crafting wooden floating shelves that serve as the perfect introduction to DIY home improvement. These shelves are designed for those living in urban apartments where every inch of space counts. They provide a clean, modern aesthetic while offering practical storage for books, décor, or essential tools.
Materials & Steps:
- Materials: Plywood or reclaimed wood, hidden mounting hardware, wood screws, sandpaper, wood stain/paint, a level, measuring tape, and a drill.
- Tools: Drill, saw, sander, and a router for smooth edges.
How to Make It:
Begin by measuring your wall space to determine the optimal shelf length. Carefully cut the wood to size and sand all surfaces until smooth. Next, apply your chosen stain or paint for a refined look. Using hidden brackets ensures that the floating effect is achieved—secure them on the wall, making sure they are perfectly level before attaching the shelf. These instructions on build floating shelves ensure a modern, sleek look while providing a sturdy storage solution.

Decorating Tips:
Pair these shelves with small potted plants, minimalist art pieces, or vintage books to create a cozy yet stylish display. For instance, imagine a young professional using these shelves to organize both work essentials and cherished memorabilia—a perfect blend of functionality and personal style.
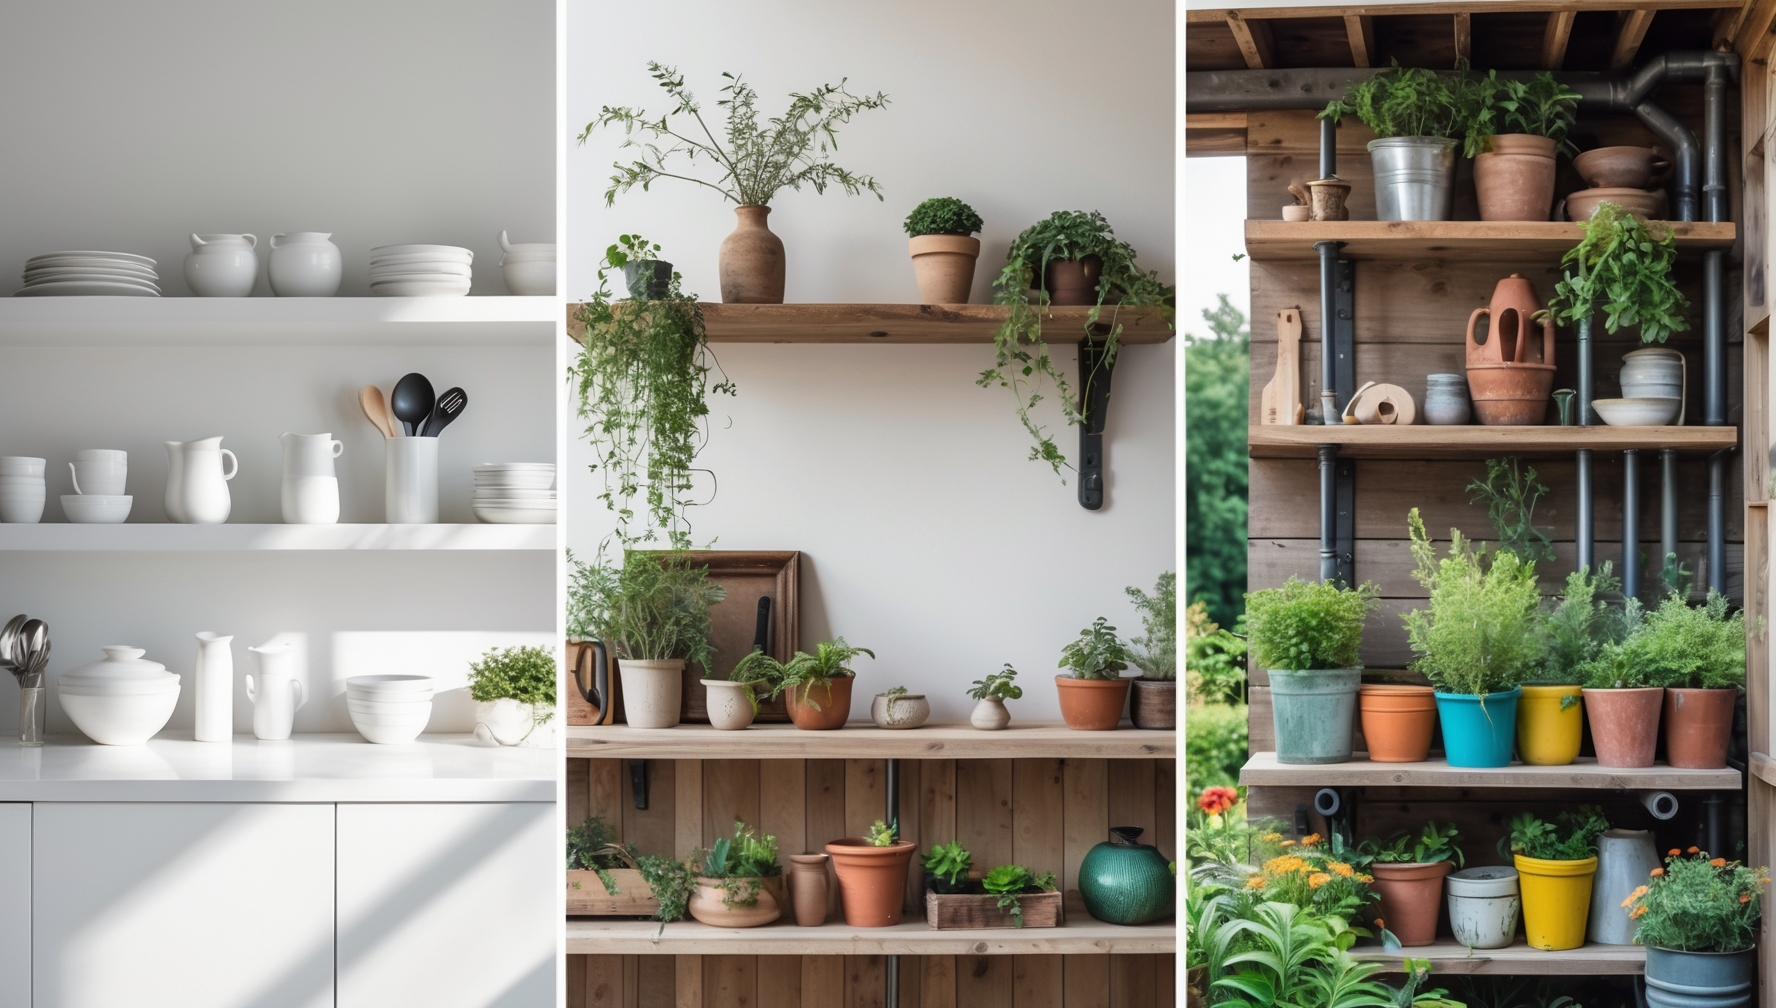
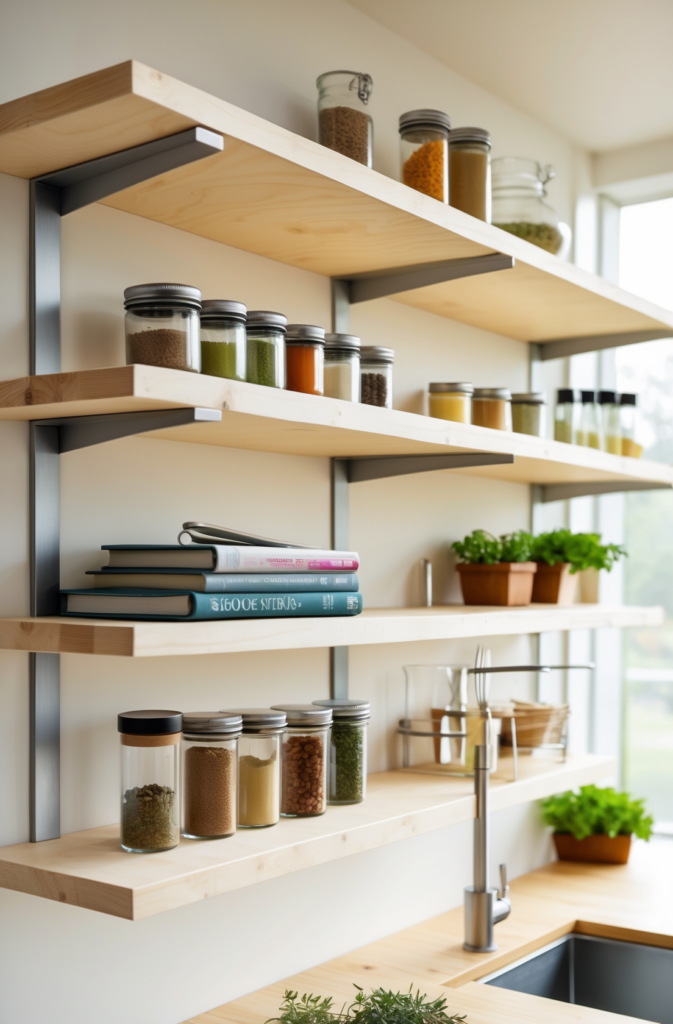
Project 2: Modern Minimalist Floating Shelves for Compact Kitchens
Compact kitchens demand smart storage solutions. This project provides a step-by-step guide to creating shelves diy that not only save space but also enhance your kitchen’s overall aesthetic. Tailored for those who appreciate modern design and practicality, these shelves are perfect for organizing spices, cookbooks, and decorative accessories.
Materials & Steps:
- Materials: High-quality plywood, sleek metal brackets, food-safe finish, and adhesive strips for additional support.
- Tools: Jigsaw, power sander, measuring tape, and a level.
How to Make It:
Cut the plywood into uniform pieces that fit perfectly into your kitchen space. Sand the surfaces thoroughly, then apply a food-safe sealant to ensure durability in a cooking environment. Mount the shelves using modern metal brackets, creating an industrial yet minimalist look. These instructions on make floating shelves how to build are both simple and effective for any DIY enthusiast.
Decorating Tips:
Enhance the look by grouping similar items together—think of clustering spice jars or arranging cookbooks in small stacks. Installing subtle LED strip lights underneath the shelves can further accentuate their sleek design and add warmth to your kitchen ambiance.
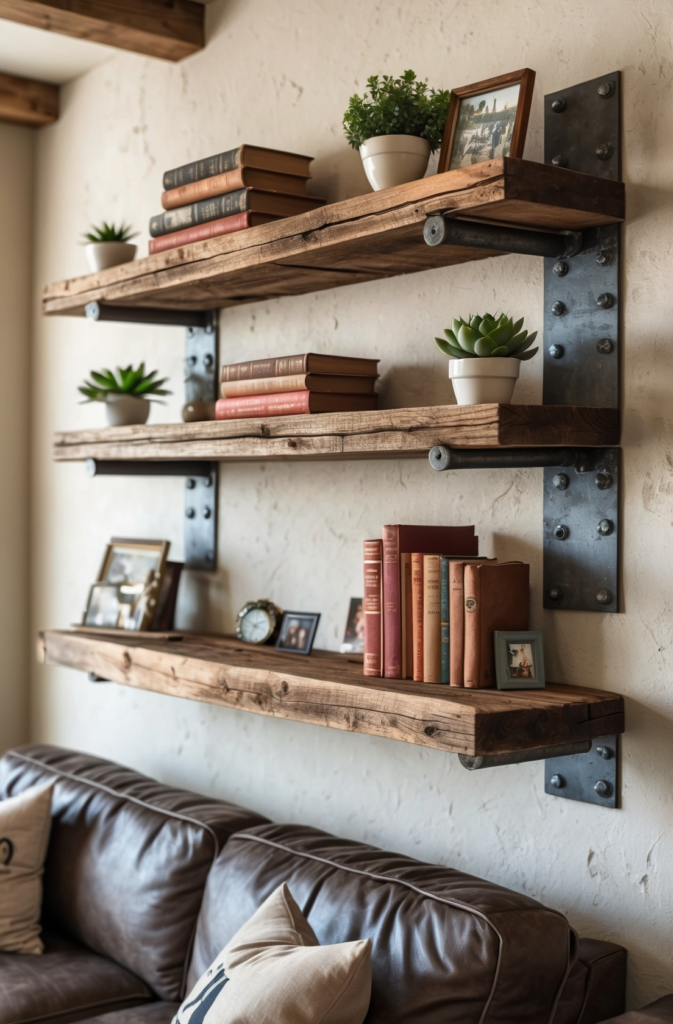
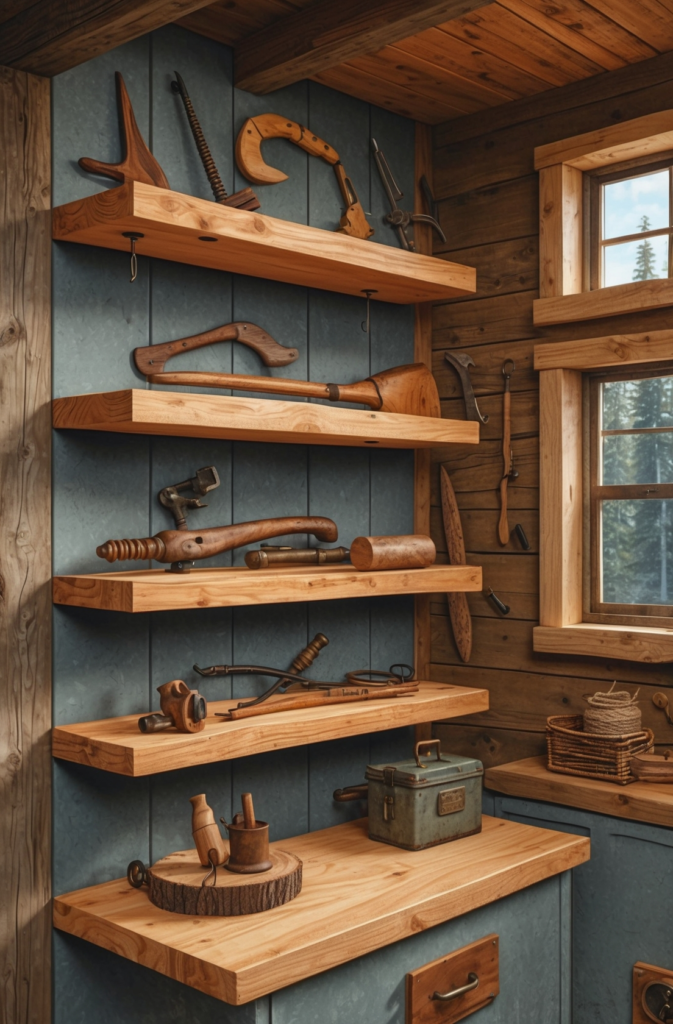
Project 3: Rustic Floating Shelves for a Warm, Inviting Living Room
For those who favor the charm of reclaimed wood, this project offers a chance to build floating shelves with a rustic twist. Perfect for living rooms or dens where you want to add warmth and character, these shelves are crafted from reclaimed wood that tells its own story.
Materials & Steps:
- Materials: Reclaimed wood with character, industrial brackets, rustic stain, protective sealant, and decorative nails.
- Tools: Saw, sander, drill, and a stain applicator.
How to Make It:
Select reclaimed wood that boasts unique grain patterns and character. Sand it down thoroughly, then apply a rustic stain that highlights its natural texture. Secure the wood to your wall using robust industrial brackets to ensure stability. These how to build floating shelves diy instructions blend vintage charm with modern functionality.
Decorating Tips:
Complement the shelves with rustic décor such as antique lamps, woven baskets, or family photos in distressed frames. For example, a family might use these shelves to showcase heirloom items and vintage kitchenware, creating an inviting and nostalgic atmosphere that feels both lived-in and stylish.
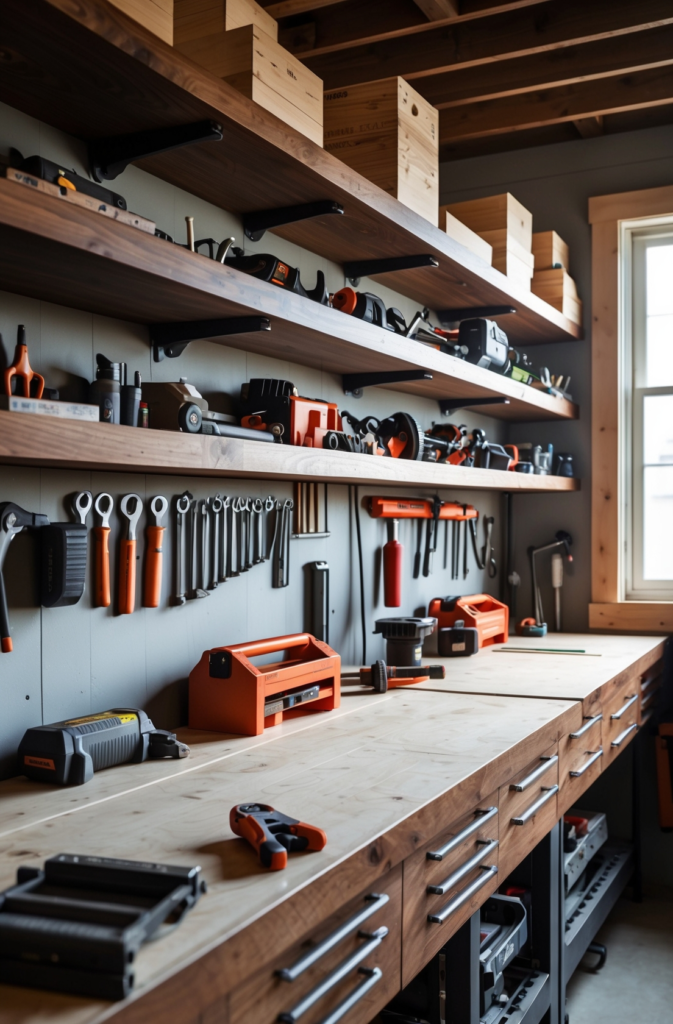
Project 4: Industrial-Style Floating Shelves for Workshops & Garages
Ideal for the hands-on craftsman, these industrial-style shelves are designed for workshops and garages. Their rugged look is not only about storage—it’s a testament to durability and function. These projects are perfect for those who need to display tools and equipment while keeping their workspace organized.
Materials & Steps:
- Materials: Heavy-duty wood planks, metal pipes or industrial brackets, industrial-grade paint, and robust fasteners.
- Tools: Circular saw, metal drill bits, sander, and a measuring tape.
How to Make It:
Cut the wood planks to your desired length and apply a coat of industrial-grade paint that’s resistant to grease and grime. Use metal pipes or sturdy brackets to mount the shelves securely on your workshop wall. This project, following shelves diy principles, ensures that your floating shelves are as tough as your work ethic.

Decorating Tips:
Integrate additional storage solutions like hooks or magnetic strips along the shelf edges to further organize your tools. A seasoned carpenter once revamped his cluttered garage by installing these shelves—transforming his space into a streamlined and productive workshop.
Project 5: easy diy floating shelves easy cheap for Budget-Conscious Homeowners
Budget constraints shouldn’t limit your creativity. This project is tailored for homeowners who want stylish storage solutions without a hefty price tag. Using affordable materials, you can achieve the modern look of easy diy floating shelves that are both chic and functional.
Materials & Steps:
- Materials: Affordable wood off-cuts or pallet wood, basic hidden brackets, inexpensive paint or stain, screws, and a level.
- Tools: Basic hand tools including a saw, drill, and sander.
How to Make It:
Begin by sourcing reclaimed or off-cut wood that meets your budget. Cut the wood into even pieces and sand them until smooth. Apply a fresh coat of paint or stain to achieve a clean finish. Mount the shelves with simple hidden brackets that offer the classic floating effect. These shelves diy techniques are specifically designed for those who need an affordable upgrade without sacrificing style.
Decorating Tips:
Use these shelves to display inexpensive décor items like thrift-store finds or DIY art pieces. One creative homeowner transformed a cramped living area by integrating these shelves to hold small potted plants and personal trinkets, proving that a limited budget can still yield high-impact design.
Pro Tip: If you’re looking to expand your DIY toolkit with professional-grade woodworking plans, check out Ted’s Woodworking. With over 16,000 detailed projects, it’s my top resource for turning budget ideas into high-quality builds. Explore more here.
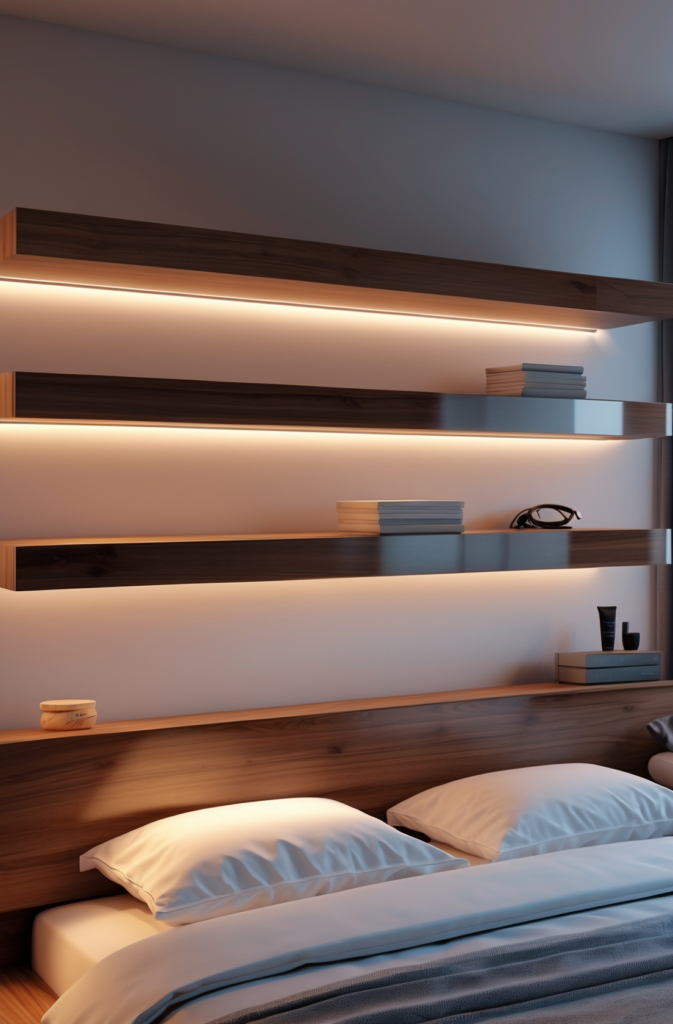
Project 6: Floating Shelves Bedroom Edition – Sleek & Functional
Your bedroom deserves both style and functionality. This project focuses on diy floating shelves bedroom designs that provide a practical storage solution while adding a sophisticated touch. Perfect for displaying personal items, books, or decorative accents, these shelves are both sleek and adaptable.
Materials & Steps:
- Materials: High-quality wood, hidden mounting hardware, optional LED strip lighting, and decorative accents.
- Tools: Drill, level, jigsaw, and sander.
How to Make It:
Measure the wall in your bedroom to choose the optimal placement for your shelves. Cut the wood to size, then sand and finish it with a stain or paint that matches your décor. For a modern twist, integrate LED strip lighting under the shelves to create a soft glow. Mount the shelves securely using hidden hardware for that flawless floating effect. These steps demonstrate how to build floating shelves that are both elegant and highly functional.
Decorating Tips:
Arrange your favorite books, small sculptures, and personal photographs to create a gallery wall effect. A retired engineer recently revamped his bedroom by using these shelves to display memorabilia from his travels, merging functionality with deeply personal style.
Deeper Tutorial Tie-In: As you grow more confident in your woodworking skills, explore the extensive project plans offered by Ted’s Woodworking. I’ve personally relied on these detailed guides for more ambitious builds, and they might be just what you need to take your DIY projects to the next level. Discover their full range here.

Project 7: diy kitchen floating shelves with a touch of green energy
Bring eco-conscious design into your kitchen with these sustainable diy kitchen floating shelves. Ideal for those who value green energy and alternative power sources, this project combines modern design with environmentally friendly materials. It’s perfect for displaying herbs, spices, and eco-friendly kitchen accessories.
Materials & Steps:
- Materials: Eco-friendly reclaimed wood, metal brackets, non-toxic paint, and solar-powered LED lights.
- Tools: Saw, sander, drill, and measuring tape.
How to Make It:
Start by selecting reclaimed wood known for its durability and unique grain. Cut the wood into shelves that fit your kitchen space, sand it, and apply a non-toxic finish to protect against spills. Mount the shelves with modern metal brackets and integrate solar-powered LED lighting for an eco-friendly touch. These instructions on how to build floating shelves diy offer a sustainable and innovative storage solution.
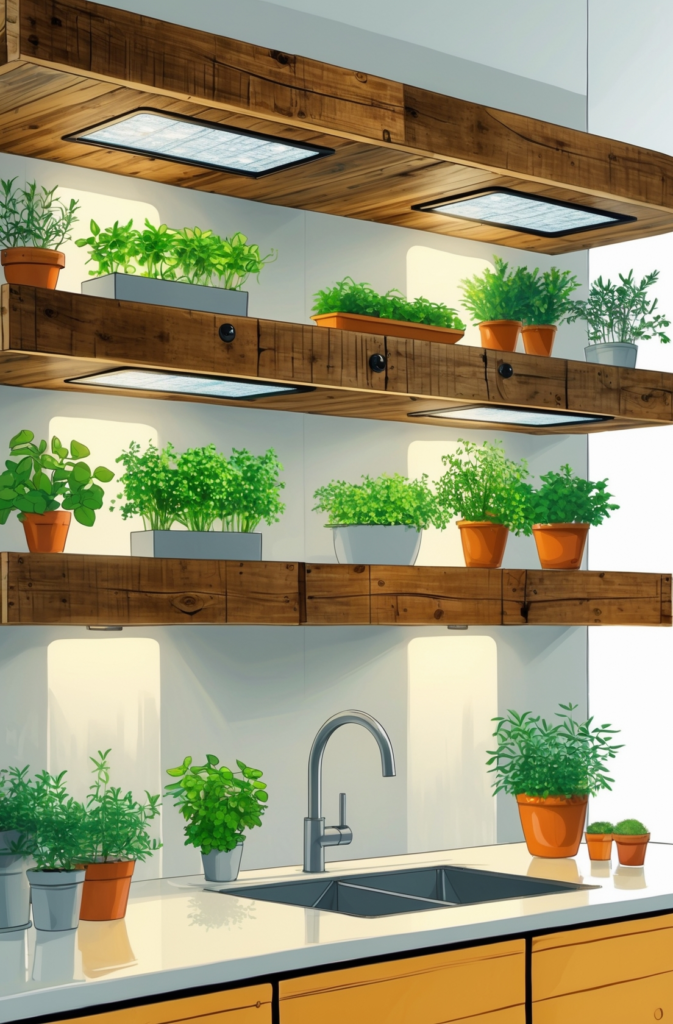
Decorating Tips:
Group your herbs and spices neatly on the shelves and consider adding small planters for an indoor herb garden. A passionate home chef used these shelves not only to save space but also to bring a touch of nature indoors, resulting in an organized and eco-chic kitchen.
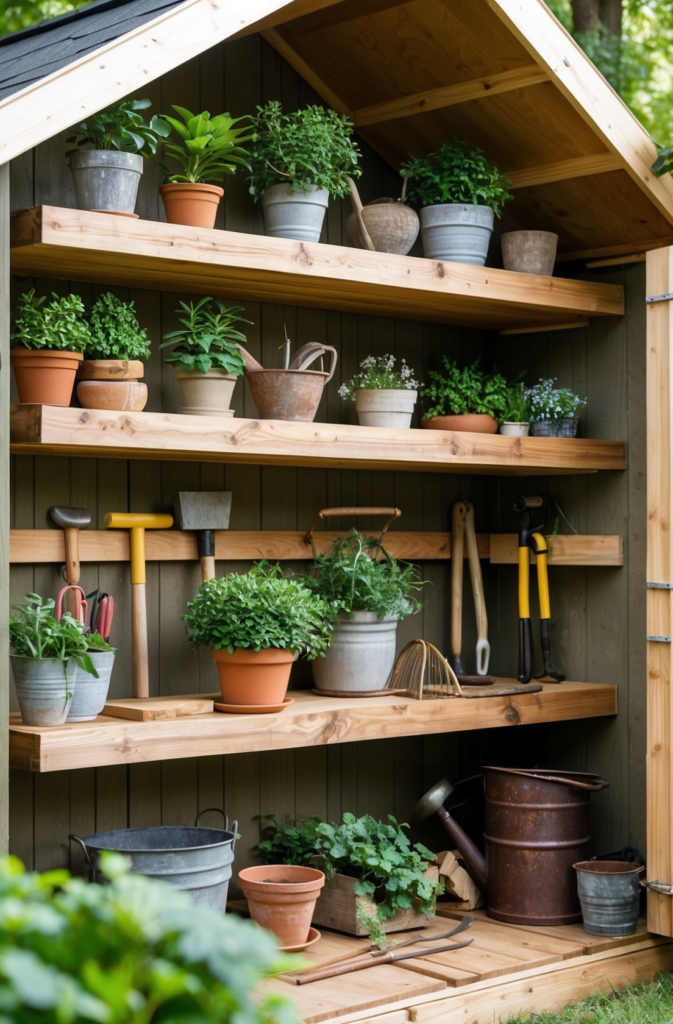
Project 8: shelves diy for off-grid cabins – simple & sustainable
For off-grid living enthusiasts, these floating shelves provide a sustainable storage solution that blends with nature. Built to withstand harsh weather and rugged conditions, these shelves are ideal for cabins, remote homes, or even garden sheds.
Materials & Steps:
- Materials: Weather-resistant wood (cedar or redwood), heavy-duty outdoor brackets, exterior sealant, and eco-friendly fasteners.
- Tools: Circular saw, power sander, drill, and measuring tape.
How to Make It:
Cut the wood to size and sand it thoroughly. Apply an exterior-grade sealant to protect the shelves from weathering. Mount the shelves using heavy-duty brackets designed for outdoor use, ensuring a robust installation that can handle off-grid conditions. These build floating shelves instructions ensure your project is both practical and resilient.
Decorating Tips:
Adorn your shelves with handmade pottery, local crafts, or even survival gear to evoke a sense of self-reliance. One off-grid homeowner used these shelves to neatly store essential tools and personal mementos, blending functionality with a rustic aesthetic.
Project 9: Floating Shelves for Tools & Workbenches – a carpenter’s dream
Every craftsman needs a well-organized workspace. This project is tailored for the dedicated DIYer who wants to incorporate shelves diy solutions into their workshop. These floating shelves are designed to hold tools, parts, and equipment—keeping your workbench clutter-free and efficient.
Materials & Steps:
- Materials: Durable hardwood, industrial metal brackets, tool hooks, and a protective finish.
- Tools: Table saw, power sander, drill, and level.
How to Make It:
Measure the available space on your workshop wall and cut the hardwood to the desired dimensions. Sand the wood and apply a protective finish. Mount the shelves securely with industrial brackets and add tool hooks along the edges to maximize functionality. These how to build floating shelves diy instructions ensure a robust and organized setup that any carpenter will appreciate.
Decorating Tips:
Keep the work area streamlined by arranging tools in logical groups. For example, one seasoned carpenter transformed his workshop by installing these shelves—resulting in a dramatic improvement in both safety and productivity.
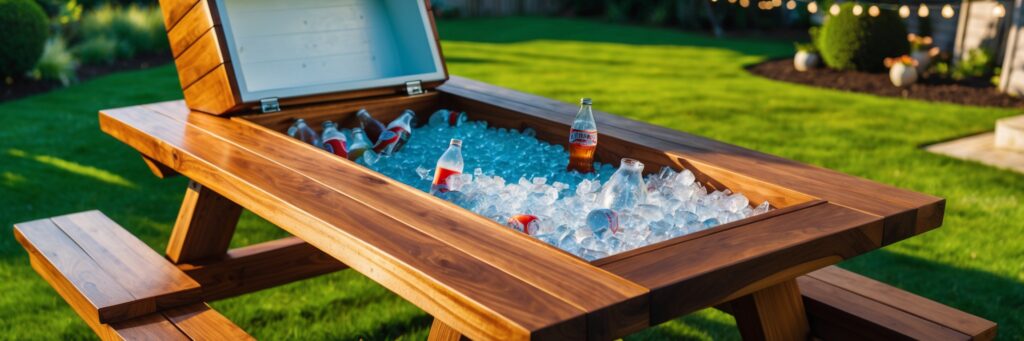
Project 10: Floating Shelves for Outdoor Spaces & Garden Sheds
Outdoor living spaces deserve functional yet stylish storage solutions. This project shows you how to create easy diy floating shelves that enhance your garden shed, patio, or outdoor kitchen. Built to endure the elements, these shelves blend durability with eye-catching design.
Materials & Steps:
- Materials: Weatherproof wood, corrosion-resistant brackets, outdoor paint or stain, and exterior sealant.
- Tools: Saw, sander, drill, and measuring tape.
How to Make It:
Prepare the weatherproof wood by cutting it to size and sanding it thoroughly. Apply an outdoor-grade finish to protect the wood. Secure the shelves with corrosion-resistant brackets that guarantee longevity even in harsh weather. These diy floating shelves easy cheap instructions provide a durable storage solution that enhances any outdoor space.
Decorating Tips:
Enhance the outdoor atmosphere by adding string lights or lanterns around the shelves. A passionate gardener used these shelves to create a charming display for seasonal plants and garden ornaments, turning a simple shed into a welcoming retreat.
Quick Takeaways
- Versatility: Projects are designed for various spaces—urban apartments, kitchens, workshops, off-grid cabins, and outdoor areas.
- Budget-Friendly: Each design uses affordable materials and straightforward techniques, making diy floating shelves easy for everyone.
- Step-by-Step Guidance: Detailed materials lists, how-to instructions, and decorating tips help you build with confidence.
- Eco-Friendly Options: Projects incorporate sustainable materials and energy-saving ideas for green-conscious DIYers.
- Customizable Design: Personalize each shelf with your unique décor and creative touches.
- Real-Life Examples: Each project includes practical examples and tips from experienced DIYers.
Conclusion
Creating your own floating shelves is more than just a home improvement project—it’s a way to express your creativity and optimize your living space. In this guide, we’ve walked you through 10 distinct projects that range from basic setups for small urban apartments to advanced designs for workshops and outdoor areas. By following our detailed instructions, you can easily transform ordinary walls into sleek, functional art pieces that reflect your style and needs.
Each project emphasizes practicality and affordability, proving that with the right approach, diy floating shelves easy projects are within anyone’s reach. From using reclaimed wood for a rustic vibe to integrating solar-powered LED lights for an eco-friendly kitchen solution, these ideas cater to diverse tastes and budgets. Remember, every project starts with a single shelf—a small step toward a more organized, stylish, and personalized home.
Deeper Tutorial Tie-In: As you grow more confident in your woodworking skills, explore the extensive project plans offered by Ted’s Woodworking. I’ve personally relied on these detailed guides for more ambitious builds, and they might be just what you need to take your DIY projects to the next level. Discover their full range here.
Take the time to experiment, adjust, and truly make each project your own. Your workspace, living room, or outdoor area can become a canvas for your creativity—one shelf at a time.
FAQs
Q1: What type of wood is best for diy floating shelves easy?
A: Quality plywood or reclaimed wood is ideal. These materials are durable, affordable, and perfect for achieving a modern look.
Q2: Can I build floating shelves without professional tools?
A: Yes, many projects require only basic tools like a saw, drill, and sander—great for beginners and seasoned DIYers alike.
Q3: How do I ensure my floating shelves are level?
A: Use a level and precise measurements when mounting your shelves. Hidden brackets can help maintain a flawless floating effect.
Q4: Are these projects suitable for a diy kitchen floating shelves design?
A: Absolutely! Several projects in this guide are specifically tailored for kitchen spaces, with food-safe finishes and modern aesthetics.
Q5: What are some cost-saving tips for building shelves diy?
A: Use reclaimed or off-cut wood, purchase affordable materials, and follow the step-by-step guides provided to keep expenses low without sacrificing style.
We Want Your Feedback!
Your opinion matters—what did you think of these floating shelf projects? Have you tried any of these designs in your home, workshop, or off-grid cabin? Share your experiences and tips in the comments below, and don’t forget to share this post with fellow woodworking enthusiasts. What’s your favorite project, and how do you personalize your space? Let us know!
References
- Popular Woodworking – Expert insights on modern diy floating shelves techniques.
- This Old House – In-depth review of cost-effective materials for woodworking projects.
- Wood Magazine – Sustainable diy projects and off-grid design inspirations.