Love the idea of building unique pieces but think you need a massive workshop or expensive tools? Think again! Below, you’ll discover 23 versatile wood projects for the home that fit right into your living space—no dedicated workshop required. Whether you’re short on square footage, living off-grid, or just starting out with wood projects for beginners, these builds prove you can create cool wood projects with minimal gear. Many of these are also small woodworking projects, perfect for those who want to tackle diy wood projects for home decor without big investments.
Disclosure: This post may contain affiliate links. If you purchase through them, I may earn a small commission at no extra cost to you. I only recommend resources I genuinely trust—like Ted’s Woodworking, which offers thousands of step-by-step plans for all kinds of wood working projects and wood projects that sell!
Table of Contents
- Why wood projects at home?
- Tools & prep tips
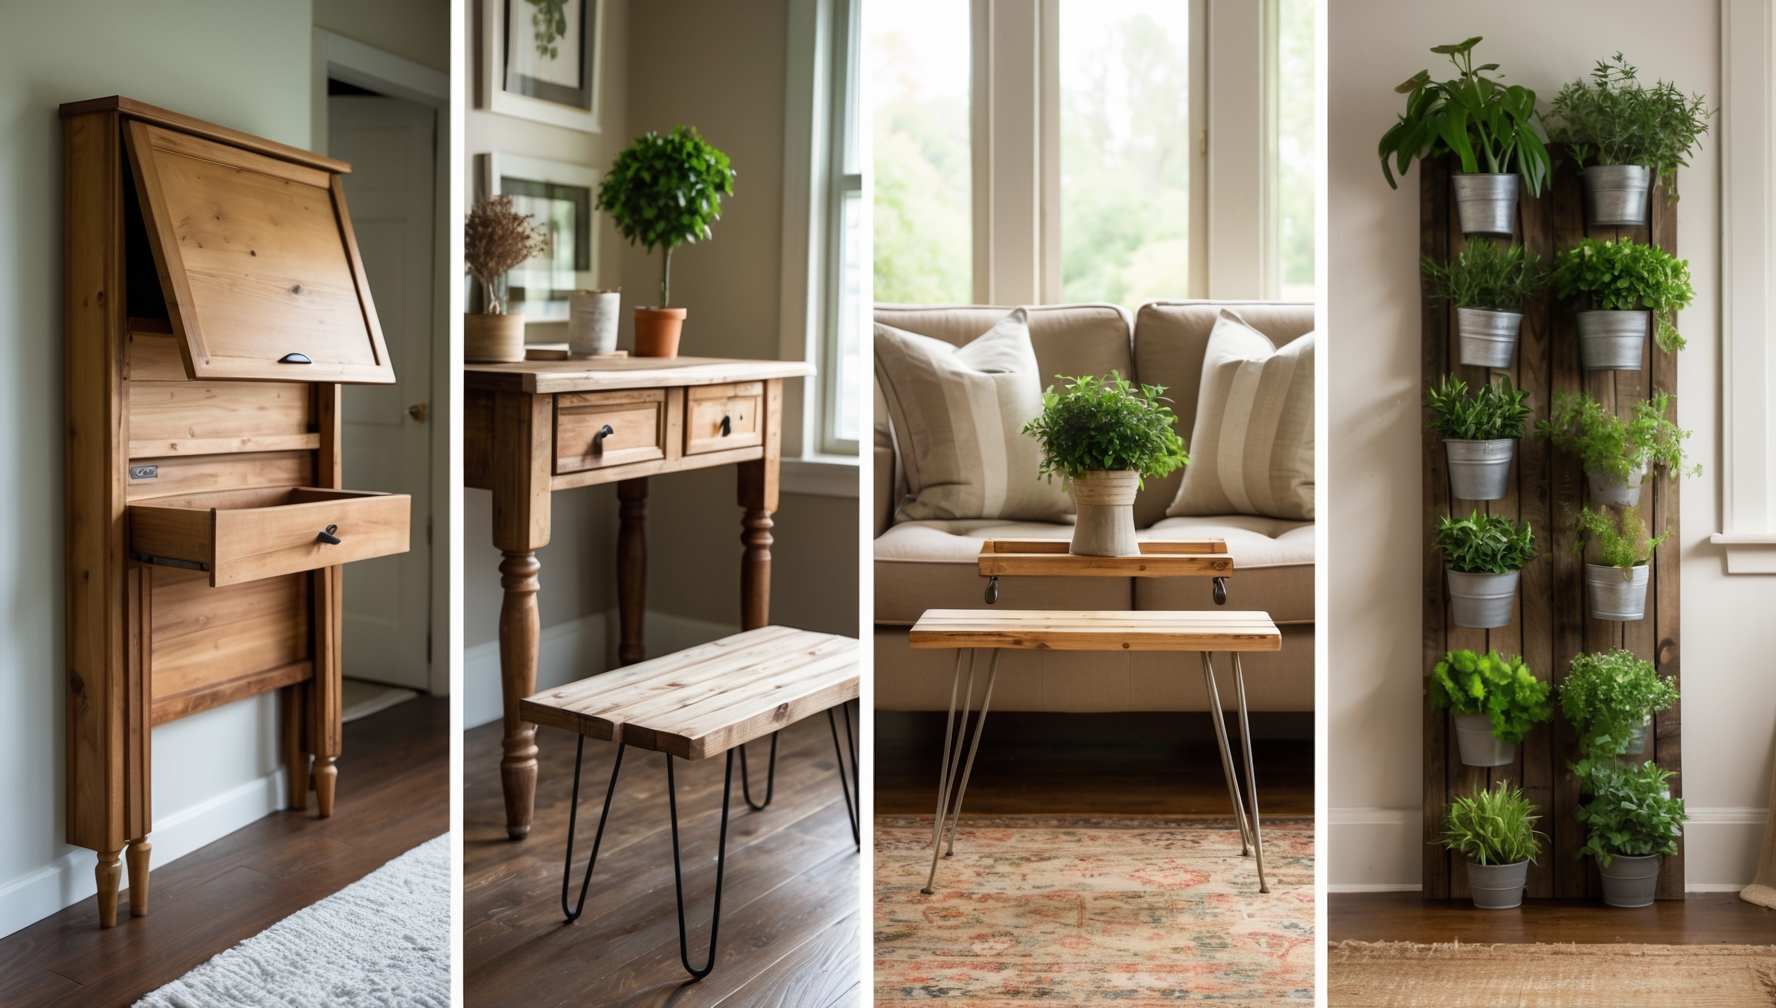
- Project 1: Fold-down hallway desk
- Project 2: Multi-purpose storage bench
- Project 3: Floating kitchen shelves
- Project 4: Simple indoor planter stand
- Project 5: Collapsible sawhorse pair
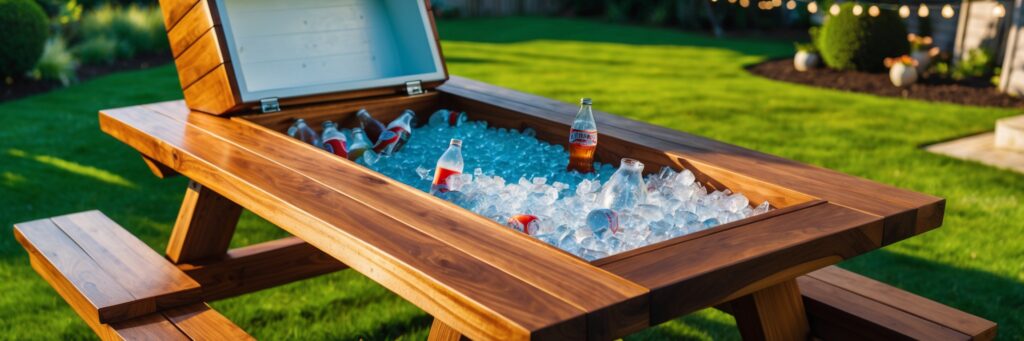
- Project 6: DIY rustic coffee table (no saw needed)
- Project 7: Wall-mounted bike shelf
- Project 8: Mini farmhouse bench
- Project 9: Under-bed storage drawers
- Project 10: Off-grid drying rack
- Project 11: Pallet shoe organizer
- Project 12: Folding workstation for small garages
- Project 13: Reclaimed wood headboard
- Project 14: DIY pantry caddy
- Project 15: Kid-friendly chalkboard table
- Project 16: Rustic blanket ladder
- Project 17: Tiered spice rack
- Project 18: Narrow bookshelf for tight corners
- Project 19: Simple router table attachment
- Project 20: Indoor herb wall
- Project 21: Compact TV console
- Project 22: Wall-mounted tool holder
- Project 23: DIY nightstand with hidden compartment
- Quick takeaways
- Conclusion
- FAQs
- References
Why wood projects at home?
Wood offers timeless charm, durability, and can be surprisingly easy to work with—even if you’re living in a small apartment or have limited tools. It’s also a sustainable choice—perfect for those who care about eco-friendly living or are exploring off-grid options. A simple jig saw, hand saw, or pre-cut lumber can take you far, whether you want rustic wood ideas or easy small wood projects diy home decor that add both form and function to your space.
Moreover, many wood projects for beginners can be adapted into wood projects that sell if you decide to turn your hobby into a small side hustle. From farmhouse accents to modern shelving, the range of wood working projects is almost endless.
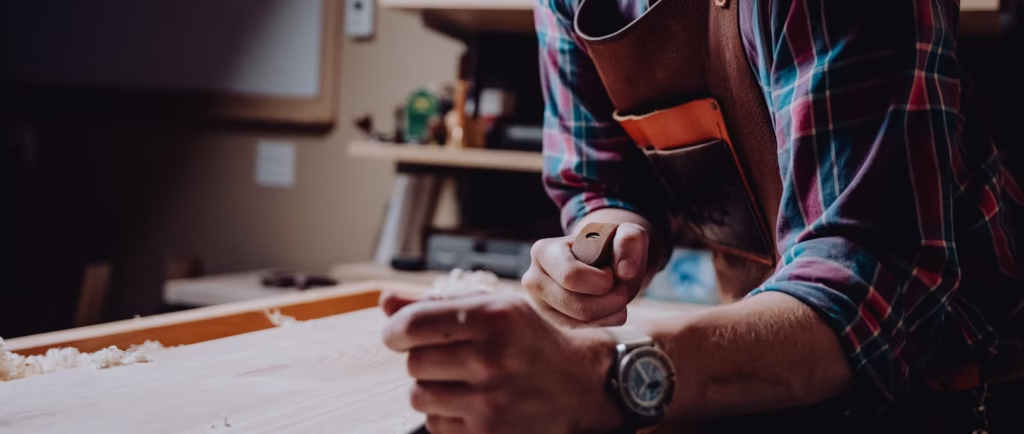
Tools & prep tips
You don’t need a huge setup to get started. A basic drill/driver, measuring tape, clamps, and possibly a circular saw (or even a sturdy hand saw) are enough for most cool wood projects. Opt for reclaimed or pre-cut boards if you can’t handle major cuts at home. Always keep safety gear—like safety glasses and ear protection—on hand, especially if you’re in a tighter workspace where dust and noise can be overwhelming.
Tip: If you’re craving more detailed plans—like furniture-grade builds or advanced joinery—check out Ted’s Woodworking. They’ve got step-by-step guides that even small-space DIYers can adapt!

Project 1: Fold-down hallway desk

Why you’ll love it & who it’s for
If you’re a busy professional or a parent juggling errands, this desk solves the problem of not having a dedicated workspace. It’s for anyone who wants a quick laptop station or mail-sorting area without sacrificing precious floor space. Keep reading to see how it can transform a cramped hallway into a functional mini-office.
Real-life example
Picture a small city apartment where every inch counts. Sarah, a freelance graphic designer, installed a fold-down hallway desk. Now she can pop open her workspace in seconds for client calls, then fold it away, leaving the hallway clear for traffic.
How to make it
- Mount a narrow board: Choose a board around 10–12 inches wide. Attach it to the wall using sturdy hinges.
- Support mechanism: Use a fold-out leg or a chain support that locks in place when the desk is open.
- Surface finishing: Sand and seal or paint to match your hallway’s style.
Decorating tips
- Add a small corkboard or a mini pegboard above for notes and keys.
- A slim LED strip underneath can create a soft glow when in use.
Project 2: Multi-purpose storage bench

Why you’ll love it & who it’s for
Struggling with scattered shoes or pet supplies? This bench is for anyone needing extra storage in an entryway or mudroom. It doubles as seating, so it’s perfect if you often have guests or kids who need a spot to put on shoes.
Real-life example
Mike, a dad of two, built this bench to store sports gear and dog leashes. The kids drop their backpacks inside, so they’re never scrambling in the morning. He also uses the top to sit and tie his work boots.
How to make it
- Basic frame: Use 1×12 boards or plywood to form a rectangular box.
- Hinged top: Attach the seat with sturdy hinges, allowing it to flip open.
- Reinforce corners: Add small brackets inside for durability, especially if kids will jump on it.
Decorating tips
- Top it with a comfy cushion or decorative throw pillows.
- Paint or stain the exterior to coordinate with your hallway color scheme.
Project 3: Floating kitchen shelves

Why you’ll love it & who it’s for
Tired of rummaging through crowded cabinets? Floating shelves solve the problem of limited storage in small kitchens. Ideal for anyone who wants quick access to spices, mugs, or cookbooks while adding a modern touch.
Real-life example
Laura, living in a cozy bungalow, installed two floating shelves above her stove. Now she displays her favorite mugs and keeps salt and pepper within easy reach—plus it brightened up her once-cluttered corner.
How to make it
- Hidden bracket system: Secure a bracket to wall studs, ensuring it can handle the shelf load.
- Hollow box shelf: Build a box (top, bottom, front, back) that slips over the bracket.
- Finishing touches: Sand any rough edges and seal or paint to match kitchen decor.
Decorating tips
- Use matching canisters or jars for a uniform look.
- Incorporate small potted herbs for a fresh pop of green.
Project 4: Simple indoor planter stand

Why you’ll love it & who it’s for
Love greenery but don’t have floor space? This stand is for plant enthusiasts wanting to elevate small pots off the ground. It helps prevent water damage to floors and keeps plants at eye level for easier care.
Real-life example
Cameron, an urban gardener, built three stands of varying heights for a “tiered jungle” effect near his living room window. Now his succulents and ferns thrive in the sunlight, and guests always compliment the display.
How to make it
- Cut or buy legs: Tapered legs or simple 2×2 boards work fine.
- Platform or ring: The top can be a small circular platform or an adjustable ring for different pot sizes.
- Secure & finish: Attach legs to the platform with angle brackets, then stain or paint.
Decorating tips
- Group two or three stands together at different heights for a dramatic effect.
- Use bright-colored pots or neutral tones to blend with your interior style.
Project 5: Collapsible sawhorse pair

Why you’ll love it & who it’s for
If you do occasional cutting or sanding but don’t have a workshop, these foldable sawhorses solve the issue of storage. Perfect for weekend warriors or small-garage owners who need a stable surface on demand.
Real-life example
Jacob, living in a townhome, keeps his collapsible sawhorses under the stairs. Whenever he needs to cut plywood or do a quick project, he unfolds them in the driveway—then folds them away when done.
How to make it
- Frame & legs: Build two identical frames from 2×4 boards.
- Hinges or bolts: Attach the legs with hinges so they fold inward.
- Locking mechanism: Use a latch or sliding brace to keep legs from collapsing mid-use.
Decorating tips
- Paint each sawhorse a bright color (like red or yellow) so they’re easily spotted in a cluttered storage area.
- Add a small hook on the side for hanging a tape measure or pencil.
Project 6: DIY rustic coffee table (no saw needed)
")
Why you’ll love it & who it’s for
Don’t own a saw or power tools? This coffee table is for those who want a centerpiece without major cuts. Ideal for small apartments, first-time DIYers, or those who prefer pre-cut boards.
Real-life example
Olivia, a college student, grabbed a pre-cut pine board and hairpin legs from a hardware store. She assembled them in under an hour, giving her dorm living area a homey, rustic vibe.
How to make it
- Select a pre-cut board: Look for something around 2×4 feet in dimension.
- Attach legs: Screw on metal hairpin legs or simple wooden blocks.
- Finish: Sand lightly and apply a clear coat or stain for a rustic effect.
Decorating tips
- Place a small tray with candles or coasters on top to enhance the look.
- Add a woven rug underneath for extra warmth and texture.
Project 7: Wall-mounted bike shelf

Why you’ll love it & who it’s for
Struggling to store your bike in a tight space? This is for urban dwellers or garage-less homeowners who need a vertical solution. It keeps your bike off the floor, freeing up space.
Real-life example
Tony, living in a studio, mounted a wooden bike shelf above his couch. Now, his prized road bike doubles as a statement piece—plus it’s easy to grab and go for weekend rides.
How to make it
- Cut support arms: Angle them to cradle the bike’s top tube.
- Secure to studs: Use heavy-duty screws or bolts so it holds the bike’s weight.
- Add padding: Stick foam or felt to protect the bike’s frame.
Decorating tips
- Paint the shelf to match your wall, or leave the wood grain visible for a modern-industrial feel.
- Hang a small basket or hook below for your helmet and gloves.
Project 8: Mini farmhouse bench

Why you’ll love it & who it’s for
Need extra seating in a narrow entryway or bedroom corner? This bench is for farmhouse-style lovers who want a compact piece with charm. It’s perfect for putting on shoes or holding a decorative throw.
Real-life example
Greg, a retiree who loves a country aesthetic, built this bench for his covered porch. Guests now have a cozy spot to sit while they chat, and the bench doesn’t crowd the walkway.
How to make it
- Cut the seat & legs: 2×6 or 2×8 boards for a sturdy seat, 2×4 for legs.
- Assemble frame: Use pocket holes or screws.
- Distress finish: Lightly sand edges and apply a whitewash or chalk paint for that farmhouse vibe.
Decorating tips
- Place a wicker basket underneath for extra storage.
- Throw a plaid cushion on top to accent the rustic look.
Project 9: Under-bed storage drawers

Why you’ll love it & who it’s for
If your bedroom is short on closet space, these drawers solve the problem of seasonal clothes or linen overflow. Ideal for minimalists or city dwellers with limited storage.
Real-life example
Rachel, who lives in a small loft, stores winter sweaters and extra blankets in these rolling drawers. She freed up half her closet and keeps the bedroom looking clutter-free.
How to make it
- Build shallow boxes: Use 1×6 boards or plywood for the sides.
- Add casters: One on each corner for easy rolling.
- Handles or cutouts: Drill finger holes or attach simple pulls.
Decorating tips
- Stain or paint the drawer fronts to match your bed frame.
- Label each drawer (e.g., “Linens,” “Sweaters”) for quick retrieval.
Project 10: Off-grid drying rack

Why you’ll love it & who it’s for
Want to air-dry laundry without a bulky machine or high energy bills? This rack is for homesteaders, survivalists, or anyone seeking a more eco-friendly approach.
Real-life example
Lisa, living off-grid in a cabin, built a folding rack to dry clothes in front of her wood stove during winter. It collapses to just a few inches thick when not in use.
How to make it
- Accordion frame: Cut thin strips of wood (1×2 or dowels) to form the sides.
- Attach dowels: These become the horizontal rods for hanging clothes.
- Hinges: Connect the sides so it folds like a concertina.
Decorating tips
- Use weatherproof finish if you plan to set it outside.
- Add small hooks on the frame for clothespins.
Project 11: Pallet shoe organizer
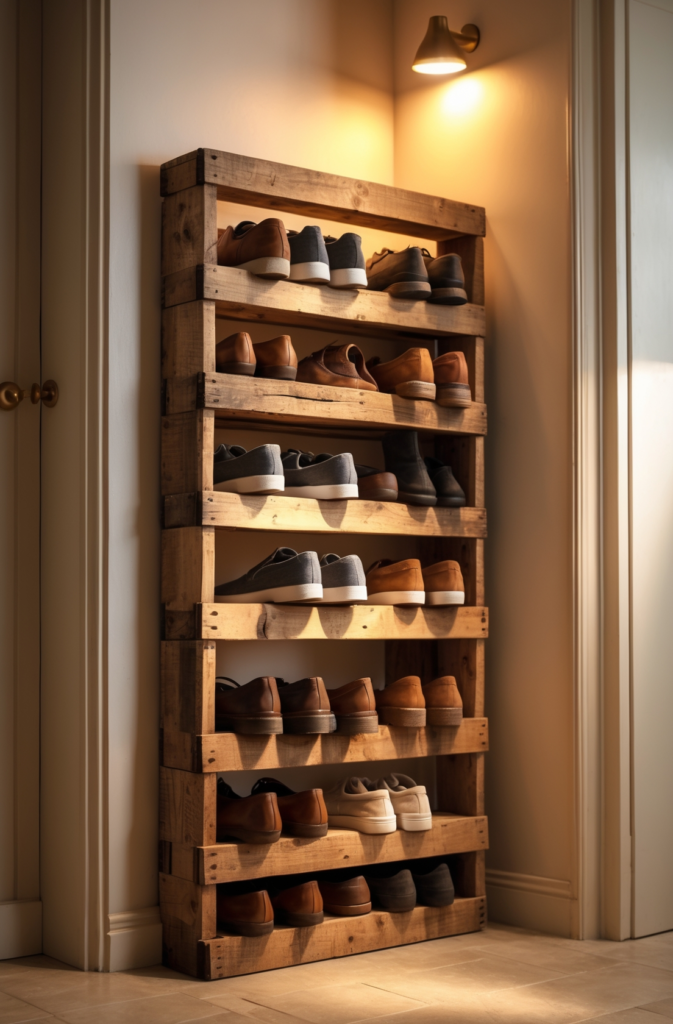
Why you’ll love it & who it’s for
Got a stack of pallets or limited entryway space? This is for budget-conscious DIYers who want a quick fix for messy footwear.
Real-life example
Carlos found a free pallet behind a hardware store, leaned it against the wall, and now slides his shoes into the openings. No nails, no fuss.
How to make it
- Select a sturdy pallet: Ensure it’s heat-treated and free of cracks.
- Sand rough edges: Pallets can have splinters.
- Lean or secure: Prop it against a wall or use brackets for stability.
Decorating tips
- Paint or stain for a pop of color.
- Add small hooks for keys or dog leashes.
Project 12: Folding workstation for small garages
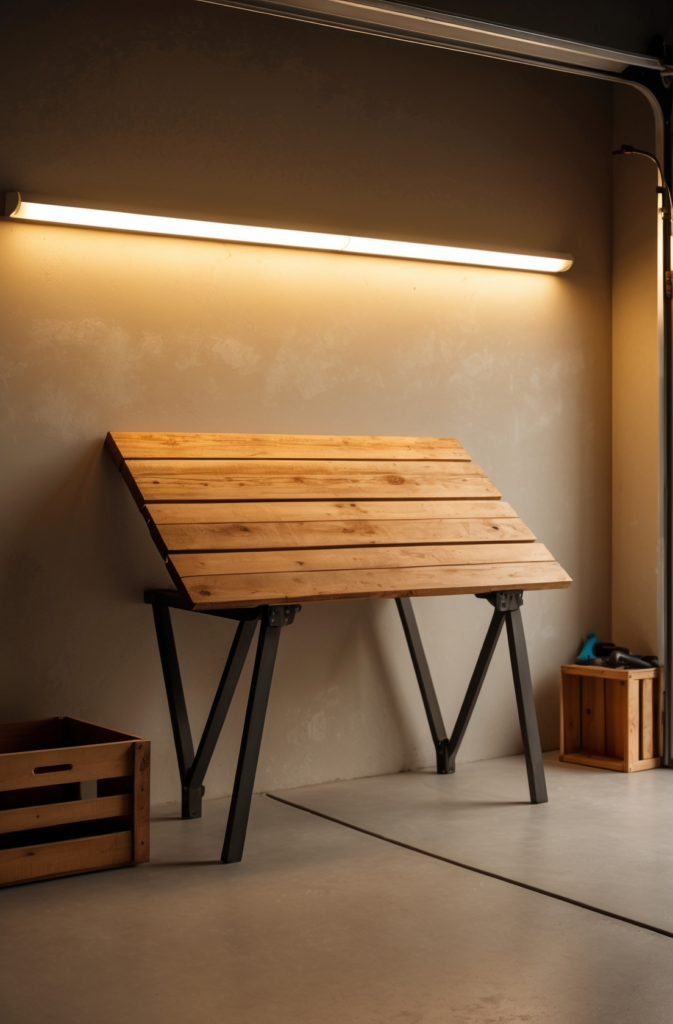
Why you’ll love it & who it’s for
If you park your car in a one-car garage but still want a functional workspace, this fold-down station is for you. Great for weekend tinkerers who need a quick setup.
Real-life example
Terry, a father of three, unfolds this bench on Saturdays to fix bikes and do small woodworking tasks. By Sunday night, it’s folded up so the family minivan fits back in.
How to make it
- Wall-mounted 2×4 frame: Anchor to studs.
- Plywood top with hinges: Let it fold upward or downward, whichever suits your space.
- Leg or chain support: When open, ensure it can bear the weight of tools and materials.
Decorating tips
- Paint the underside with chalkboard paint to jot down measurements or reminders.
- Mount a small LED strip to illuminate the work surface.
Project 13: Reclaimed wood headboard
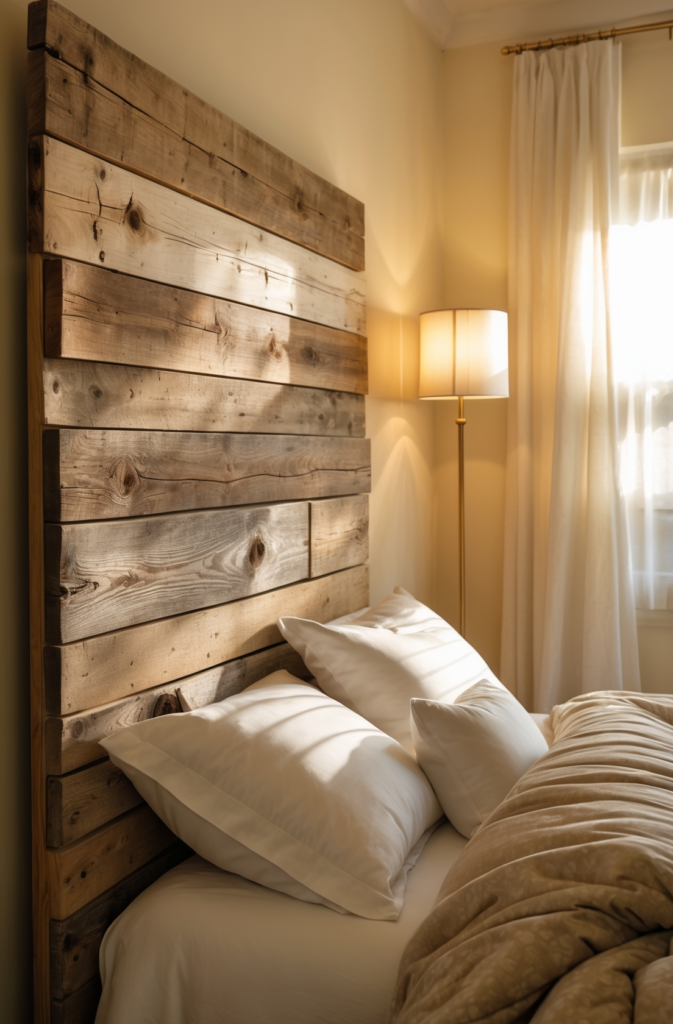
Why you’ll love it & who it’s for
Craving a rustic bedroom focal point but don’t want to build an entire bed frame? A reclaimed wood headboard is for design enthusiasts who want that cozy, weathered vibe.
Real-life example
Jackie, living in a suburban ranch house, collected fence boards from a neighbor’s teardown. She assembled them into a patchwork headboard that now adds character to her otherwise modern room.
How to make it
- Select boards of varying widths: Clean them thoroughly, remove nails.
- Attach to backing: Use plywood or 1×2 braces behind the boards.
- Mount to wall or bed frame: Use brackets or a French cleat for stability.
Decorating tips
- Add soft string lights along the top for ambiance.
- Hang small framed photos or decorative signs if the headboard is tall enough.
Project 14: DIY pantry caddy
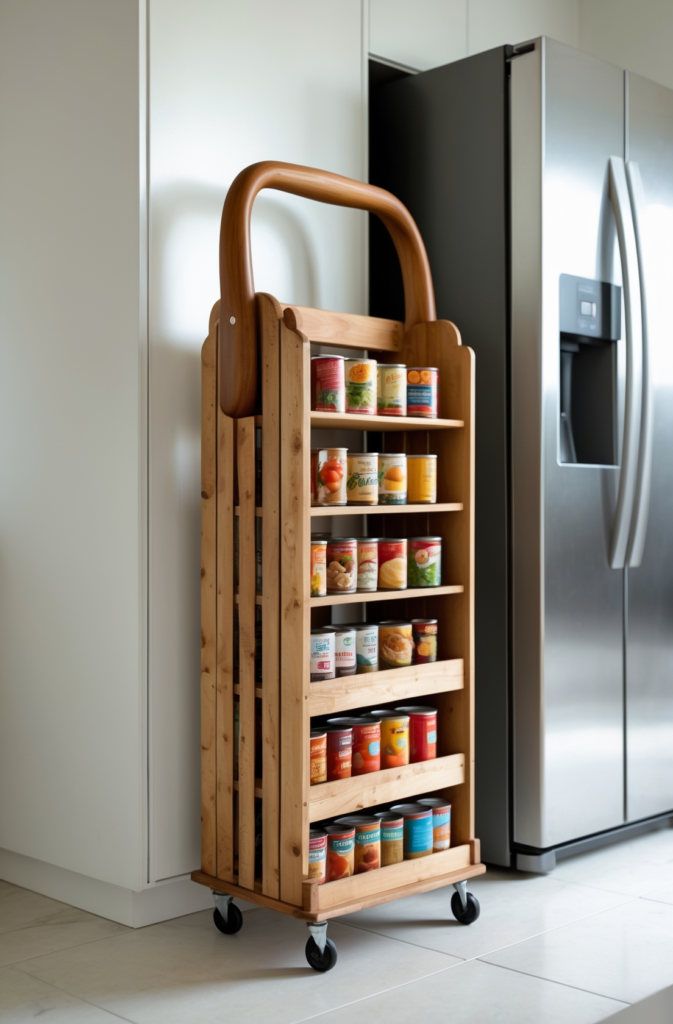
Why you’ll love it & who it’s for
If your kitchen is bursting at the seams, a narrow rolling caddy is for you. Slide it between the fridge and the wall to store canned goods, spices, or baking supplies.
Real-life example
Allison, living in a tiny cottage, built this caddy to keep all her soup cans and jars. She pulls it out like a drawer, grabs what she needs, and slides it back in—instant organization.
How to make it
- Cut narrow boards: Form the sides and shelves.
- Add dowels or rails: Prevent items from falling off each shelf.
- Attach casters: One on each corner so it rolls easily.
Decorating tips
- Paint the front with chalkboard paint to label what’s on each shelf.
- Use uniform storage containers for a clean, Instagram-worthy look.
Project 15: Kid-friendly chalkboard table
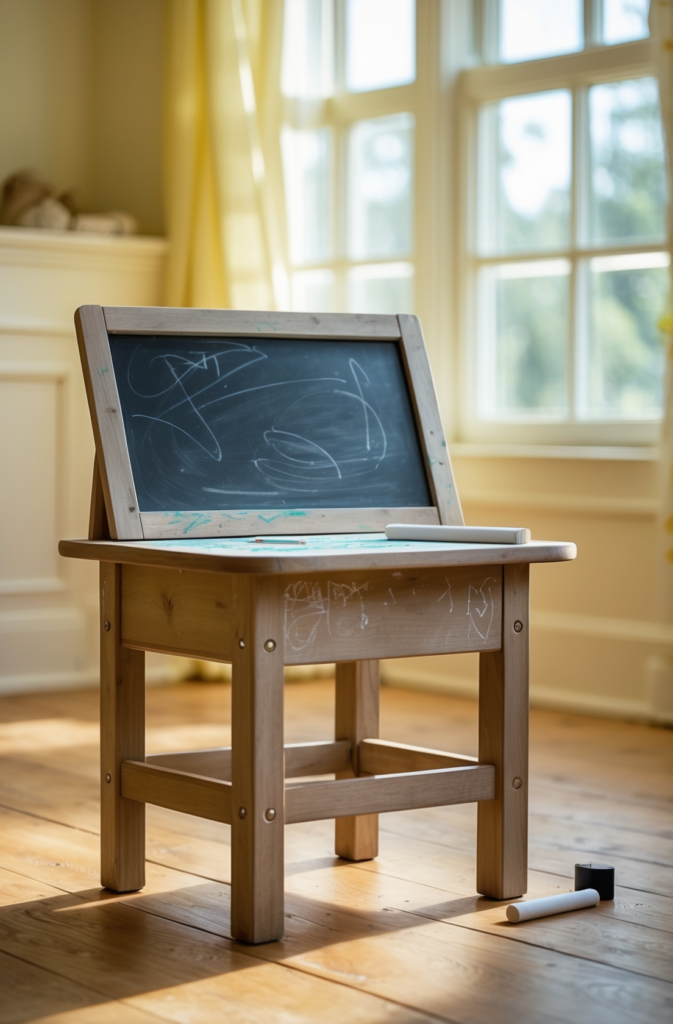
Why you’ll love it & who it’s for
This project solves the chaos of crayons and coloring books strewn everywhere. Perfect for parents or grandparents who want a creative corner that kids can’t resist.
Real-life example
Martha, a grandmother of four, placed this table in her living room. The grandkids draw happily while she relaxes on the couch—no more scattered markers on the floor.
How to make it
- Build a simple frame: 2×2 boards for legs, plywood top.
- Apply chalkboard paint: Several coats, allowing each to dry fully.
- Add storage: Hang small buckets on the sides for chalk and erasers.
Decorating tips
- Let the kids pick the leg color—maybe bright red or yellow.
- Attach stickers or stencils around the edges for extra fun.
Project 16: Rustic blanket ladder

Why you’ll love it & who it’s for
If your blankets or throws are piled in a corner, this ladder is for you. It provides vertical storage that’s stylish and easy to move around.
Real-life example
Jon, living in a cabin-style home, built a blanket ladder to hold quilts passed down from his grandmother. Now, each piece is displayed like artwork.
How to make it
- Two long rails: 2×3 or 2×4 boards.
- Rungs: Space them about a foot apart.
- Distress finish: Sand edges, use a weathered stain for a cozy look.
Decorating tips
- Drape fairy lights along the sides for soft lighting.
- Hang scarves or pot holders if you place it near the kitchen.
Project 17: Tiered spice rack
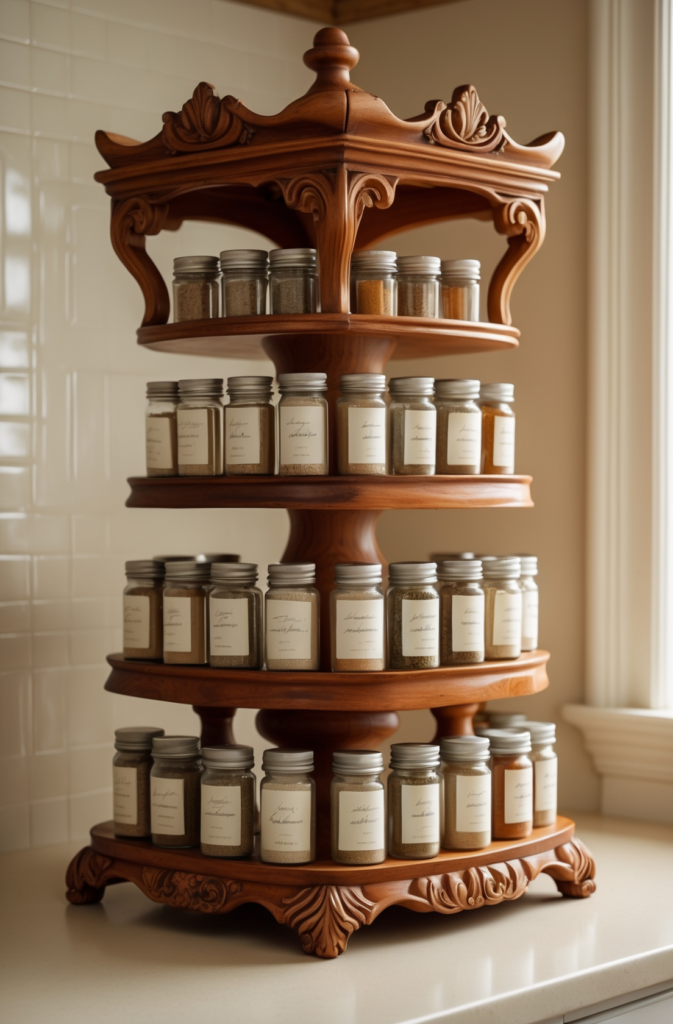
Why you’ll love it & who it’s for
Tired of digging for cumin at the back of your cabinet? A tiered rack is for busy cooks who need quick access to spices. Ideal if your kitchen is tight on drawers.
Real-life example
Nathan, who loves experimenting with new recipes, built a 3-tier rack. Now he spots his chili powder or oregano at a glance—no more rummaging.
How to make it
- Cut steps: Each “step” can be a simple plank, slightly narrower as you go up.
- Stack & secure: Use small wooden blocks or brackets between tiers.
- Optional back panel: Keep the rack stable or attach it to the wall.
Decorating tips
- Use matching spice jars with clear labels.
- Paint each tier a different color for a playful vibe.
Project 18: Narrow bookshelf for tight corners
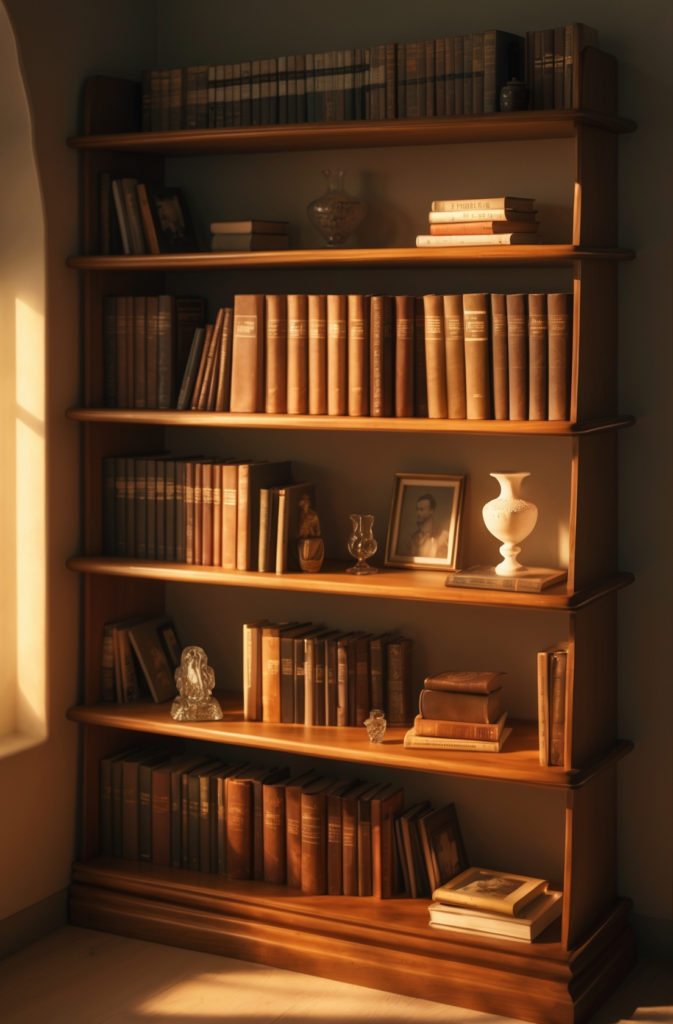
Why you’ll love it & who it’s for
If you’re a book lover but lack a reading nook, this solves the issue of scattered novels. Perfect for dorms, tiny homes, or corners that usually stay empty.
Real-life example
Denise, a retiree with a cozy cottage, placed this shelf in her living room corner. She displays classic novels and family photos, turning a once-dead space into a reading oasis.
How to make it
- Cut side panels & shelves: 1×8 boards or plywood.
- Assemble: Attach shelves at intervals that fit typical book heights.
- Secure to wall: Prevent tipping, especially if you have pets or kids.
Decorating tips
- Mix books with small décor items or framed postcards.
- Paint the inside a bold color for contrast.
Project 19: Simple router table attachment
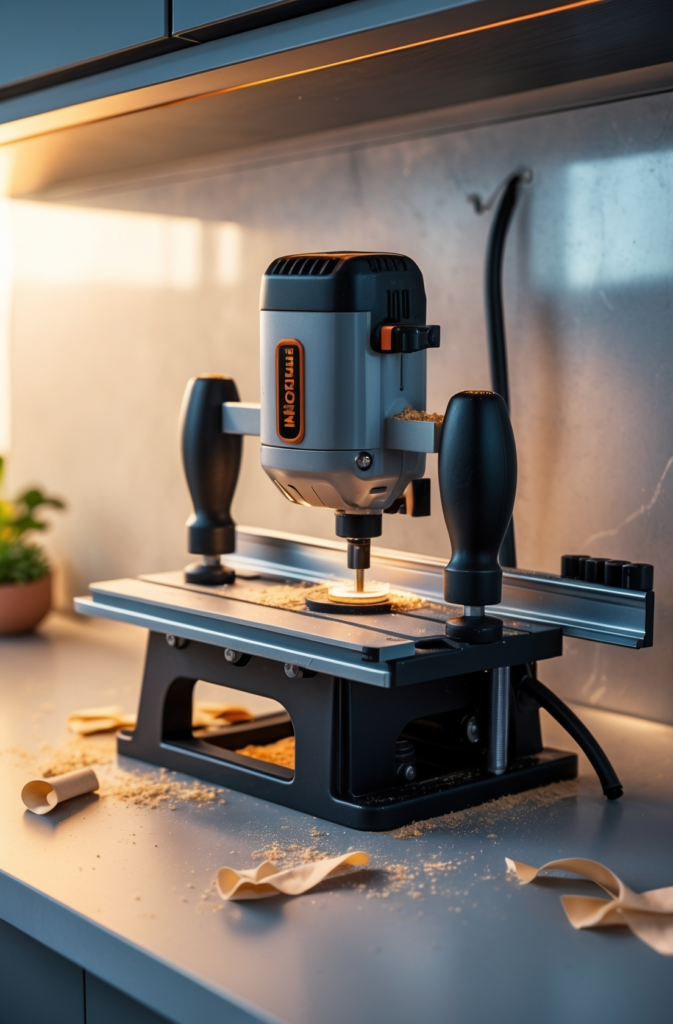
Why you’ll love it & who it’s for
Want to do edge profiles but can’t store a full router table? This attachment clamps onto a countertop or desk, ideal for small-space woodworkers.
Real-life example
Harold, living in a trailer while traveling, uses this attachment to refine small woodworking pieces. He clamps it to a sturdy picnic table at RV parks.
How to make it
- Plywood base: Cut a hole for the router’s bit.
- Clamp system: Attach simple C-clamps to secure it to a table edge.
- Mini fence: Use a straight board with two clamps to guide your work.
Decorating tips
- Store it in a flat tote bag or behind a cabinet.
- Paint it a bright color so you don’t misplace it in a cluttered closet.
Project 20: Indoor herb wall
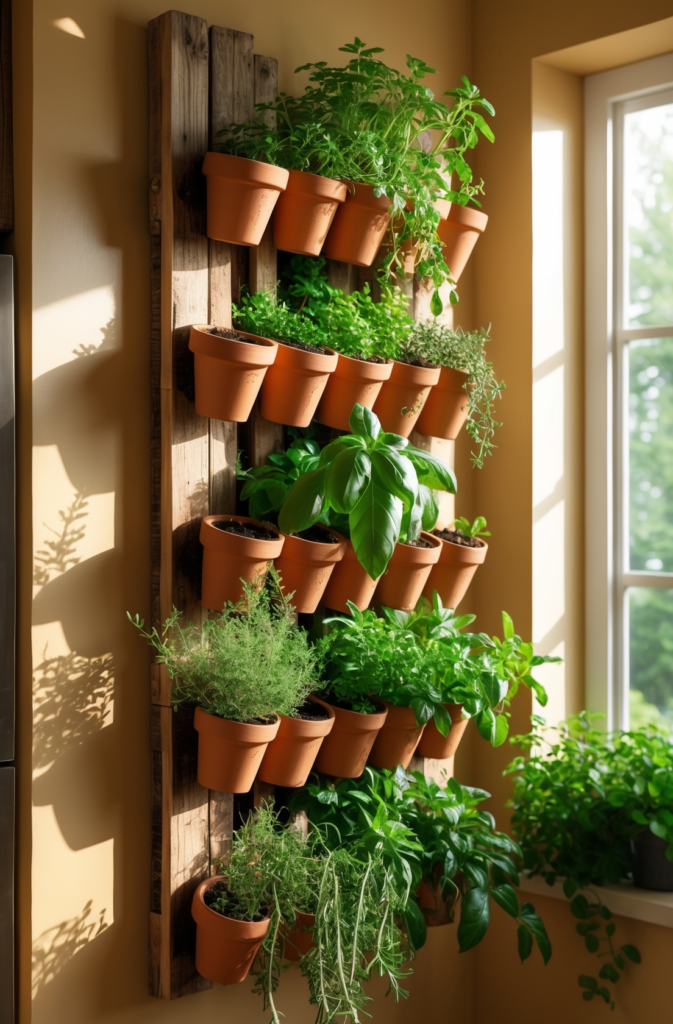
Why you’ll love it & who it’s for
Love fresh herbs but no yard space? This vertical wood frame solves the problem by letting you grow basil, mint, or rosemary indoors. Ideal for foodies and small-apartment dwellers.
Real-life example
Angela, a passionate cook in a studio loft, attached mason jars to her herb wall. She waters them lightly and snips fresh thyme for dinner—no more wilted store-bought herbs.
How to make it
- Build a ladder-style frame: 1×2 boards or reclaimed slats.
- Attach pots or jars: Use hose clamps or small hooks to hold containers.
- Mount to wall studs: Herbs can get heavy when watered.
Decorating tips
- Label each jar with chalkboard paint or small tags.
- Use trailing plants like thyme or oregano for a lush effect.
Project 21: Compact TV console
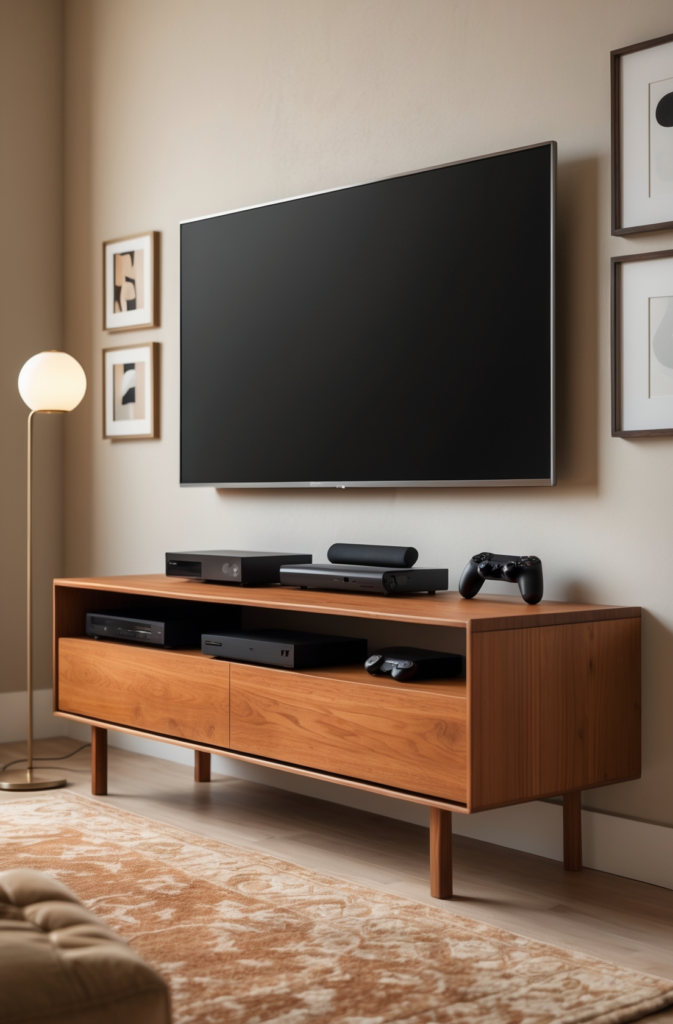
Why you’ll love it & who it’s for
Tight living room? This console is for those needing a slim stand for their TV, gaming consoles, or streaming devices without hogging floor space.
Real-life example
Emily, in a one-bedroom apartment, built a console just wide enough for her 32-inch TV. Two small shelves below store her media box and game controllers.
How to make it
- Plywood top & sides: Cut to the width of your TV plus a few inches.
- Shelf divider: Use 1×2 boards or another piece of plywood.
- Legs or hairpin: Keep it minimal to maintain a sleek profile.
Decorating tips
- Route a hole in the back for cable management.
- Stain or paint to match your living room palette.
Project 22: Wall-mounted tool holder
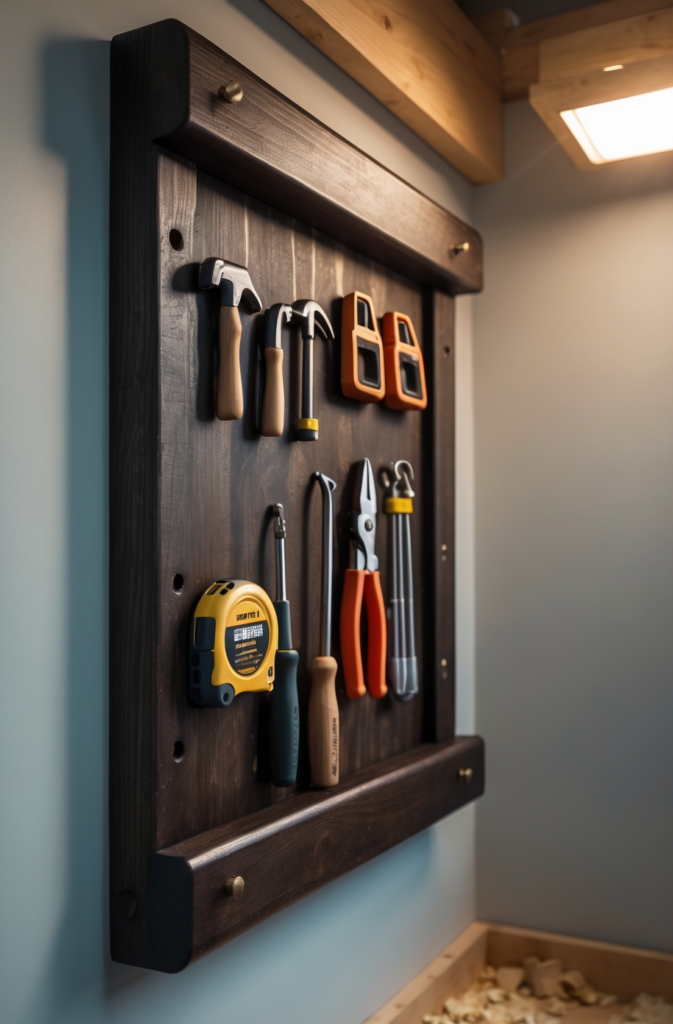
Why you’ll love it & who it’s for
Stop misplacing screwdrivers or wrenches. This holder is for anyone who wants an organized workshop or even a small closet for tool storage.
Real-life example
Ben, living in a condo, hung this in a small utility closet. Now, all his screwdrivers, pliers, and mini saws are in plain sight—no rummaging through boxes.
How to make it
- Board & hooks: Attach various hooks, nails, or small shelves to a 1×6 or 1×8 board.
- Mount to studs: Tools can be heavy, so secure them well.
- Label sections: If you like extra order, label each hook (e.g., “Phillips,” “Hammer”).
Decorating tips
- Paint or stain the board for a polished look.
- Add a small magnetic strip for drill bits or metal tools.
Project 23: DIY nightstand with hidden compartment
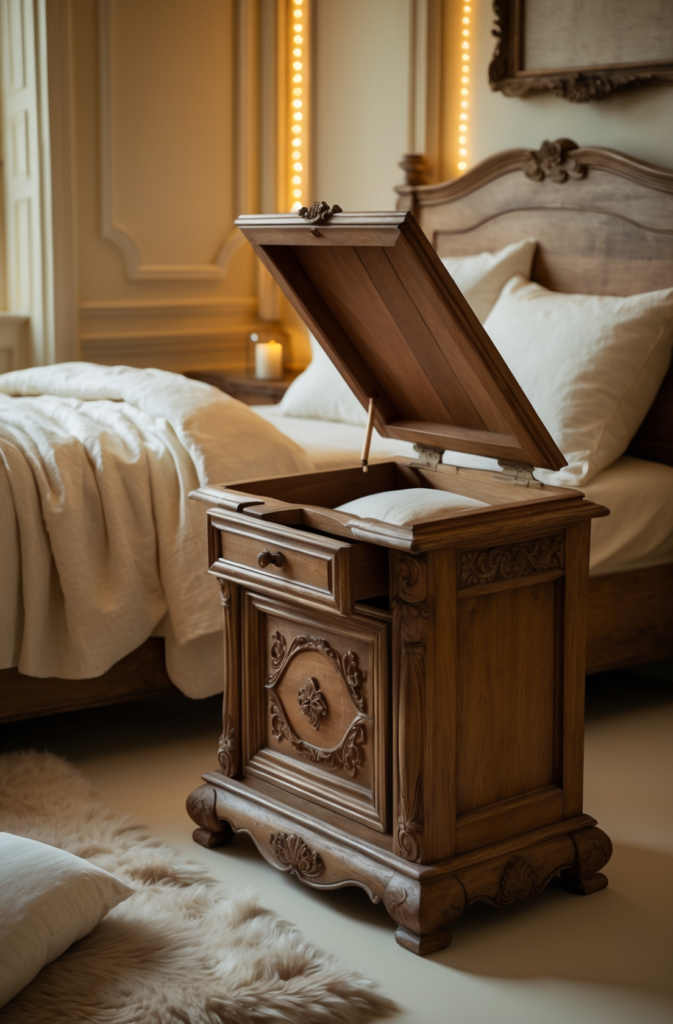
Why you’ll love it & who it’s for
Worried about valuables or important papers lying around? This is for anyone seeking extra security without needing a huge safe.
Real-life example
Mark, an avid camper, stores his passport and emergency cash in the hidden compartment. He sleeps easier knowing they’re out of sight yet easily accessible.
How to make it
- Basic nightstand box: Use plywood or pine for sides and top.
- False top or sliding panel: Conceal the compartment underneath.
- Secure hinges or magnetic latch: Ensure it’s discreet but not too hard to open.
Decorating tips
- Match your bedroom style: modern, rustic, or painted.
- Add a small LED light inside for quick nighttime access.
Quick takeaways
- You can create impressive wood projects for the home without a full-blown workshop.
- Pre-cut boards or reclaimed wood can simplify your build process.
- Hinges and fold-down designs maximize space in small homes or apartments.
- Many of these small woodworking projects are beginner-friendly, using just a drill, clamps, and simple hardware.
- Distressed or “rustic” finishes can hide minor mistakes and add rustic wood ideas flair.
Conclusion
Crafting these 23 wood projects for the home proves that a spacious workshop isn’t mandatory. From a fold-down hallway desk to a hidden-compartment nightstand, each idea shows how simple cuts, creative hinges, and basic hardware can transform raw lumber into functional art. If you’re feeling adventurous or want more complex wood working projects, Ted’s Woodworking can guide you step by step.
Whether you’re a survival enthusiast seeking off-grid solutions, a city dweller craving space-saving hacks, or just someone who loves the warmth of wood, these projects fit a variety of lifestyles. Start small with a shoe organizer or herb wall, then challenge yourself with bigger furniture or advanced joinery. The only limit is your imagination—and maybe the square footage of your living room. Happy building!
FAQs
- Can I build these projects in my apartment?
Absolutely. Focus on smaller builds or use pre-cut boards to minimize cutting and noise. - What if I have zero woodworking experience?
Start with the simplest project—like a pallet shoe organizer or floating shelves. You’ll learn basic measuring, drilling, and finishing skills along the way. - Is reclaimed wood safe to use?
Generally, yes—just avoid boards treated with harsh chemicals or showing signs of rot. A quick sanding and sealing often do the trick. - Do I need a power saw?
Not necessarily. Many stores offer cutting services, and you can choose no-saw builds or rely on a simple hand saw for minor trims. - How do I protect my floors from sawdust?
Lay down a tarp or large drop cloth. A small shop vac or even a household vacuum helps manage debris.
References