| Key Takeaway | Why It Matters |
|---|---|
| Barn wood crafts often use reclaimed barn wood or old barn wood pieces. | You give new life to leftover or recycled wood, making each piece unique. |
| Rustic designs and barnboard projects sell well at craft fairs or online. | They appeal to buyers who love reclaimed wood ideas for a cozy, farmhouse look. |
| Working with scrap wood crafts is beginner-friendly. | You learn basic woodworking skills without big costs or fancy tools. |
| Small projects are quick to finish. | You can make multiple items to sell, turning wood projects that sell into profits fast. |
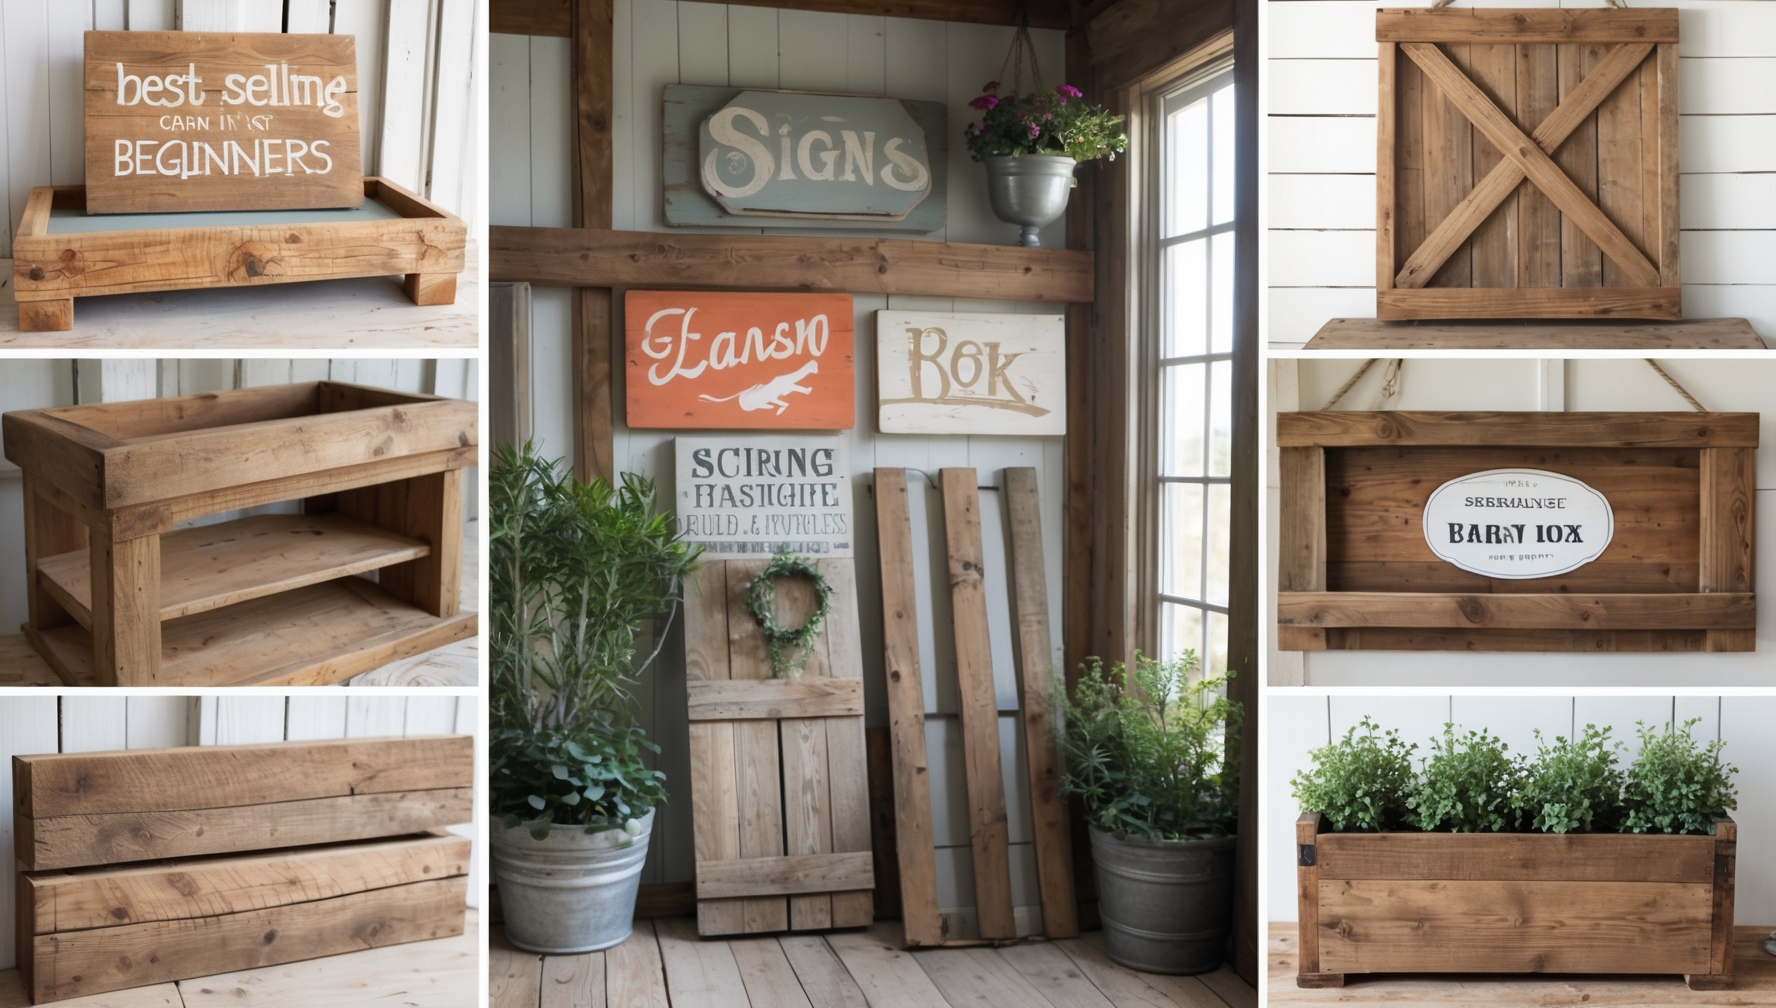
Want to earn money from barn wood crafts while enjoying a fun DIY hobby? This post features 15 best-selling barn wood projects you can make & sell for profit. We’ll look at reclaimed barn wood projects, scrap wood ideas, and other wood projects for beginners that customers love. Whether you have old barn wood in your shed or plan to buy reclaimed lumber from a salvage yard, these projects are low-cost, high-appeal. They also fit many styles, from rustic tray builds to barnwood interior walls. By the end, you’ll be ready to create cool wood projects that might become your next small business success!
Early Affiliate Disclosure: This post contains affiliate links. If you purchase through these links, I may earn a small commission at no extra cost to you. For step-by-step woodworking guides, visit Ted’s Woodworking – my favorite resource for projects with wood. Learn more here.
Table of Contents
- Project 1: Reclaimed Barn Wood Tray
- Project 2: Barn Wood Wall Art
- Project 3: Rustic Serving or Breakfast Trays
- Project 4: Recycled Wood Projects – Coat Rack
- Project 5: Barnwood Signs for Quick Profits
- Project 6: DIY Scrap Wood Lanterns
- Project 7: Kids Woodworking Projects – Barn Wood Bird Feeder
- Project 8: Cool Wood Projects – Barn Board Picture Frame
- Project 9: Reclaimed Wood Walls (Accent Panels)
- Project 10: Barnboard Projects – Small Bookshelf
- Project 11: Woodworking Projects Furniture – Simple Stool
- Project 12: Barnwood Crafts – DIY Candle Holders
- Project 13: Reclaimed Barnwood Ideas – Planter Box
- Project 14: Old Barn Wood Ideas – Decorative Ladder
- Project 15: Barn Wood Walls – Headboard
- Tips for Mastering Barn Wood Projects
- Advanced Barnwood Interior Walls & More
- Maintenance for Reclaimed Wood Projects
- Real-Life Success Stories
- Quick Takeaways
- Conclusion
- FAQs
- We Want Your Feedback!
- References
Project 1: Reclaimed Barn Wood Tray
Turn old barn wood into a handy tray perfect for serving drinks or displaying decor. One crafter nailed four pieces into a shallow box shape, then attached simple handles. It’s an easy build that looks classy, especially if the barn wood has a weathered surface. Buyers love these for creating a farmhouse vibe. This is a great way to use leftover reclaimed lumber projects to impress guests or earn a bit of extra cash.
- Materials: Barn boards, nails or screws, optional handles
- Tools: Saw, hammer or drill, sandpaper
How to Make It:
Cut two long boards and two short boards for the tray’s sides. Nail or screw them together to form a rectangle. If you have metal handles, attach them now. Sand the edges so they won’t splinter. Many people leave the barn wood’s rough look for that authentic, reclaimed style.
Tip for Decorating: Seal it lightly if you plan to serve drinks. Keep the grain visible for a rustic tray vibe.
Project 2: Barn Wood Wall Art
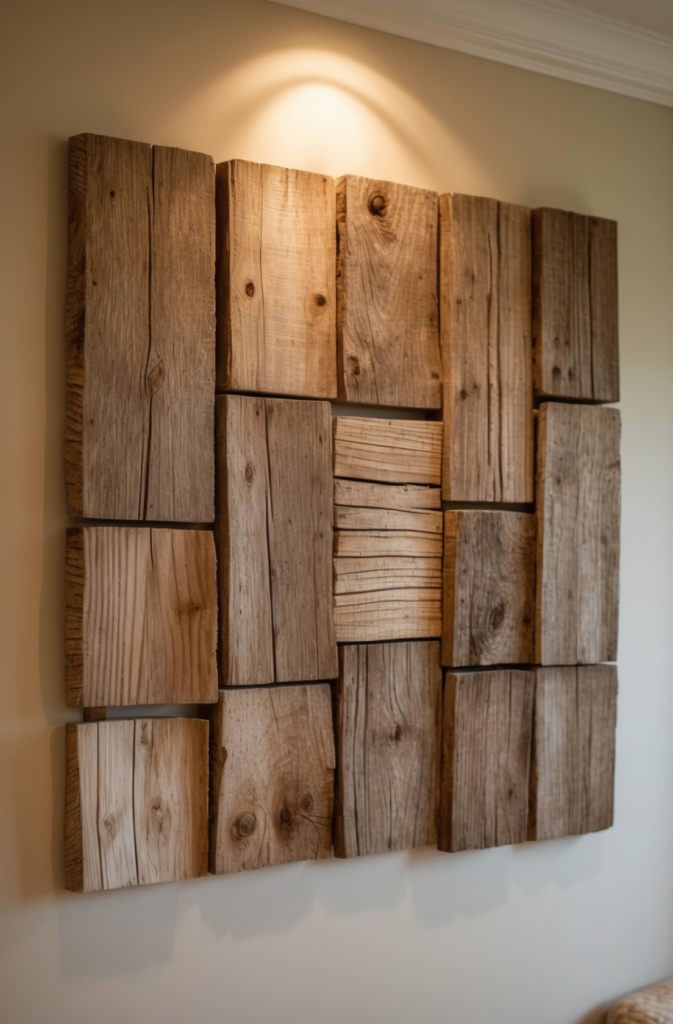
If you have smaller scraps, try turning them into unique wall art. One person arranged bits of barn board projects in a diagonal pattern, forming a neat design she hung like a painting. This technique also works for reclaimed wood diy, because you can add color or burn small shapes into each piece. People love such cool wood projects for their warm, country feel. It’s also fairly simple: arrange, glue, clamp, and then hang.
- Materials: Various barn wood scraps, glue, hooks for hanging
- Tools: Saw (optional), sander, clamp
How to Make It:
Sort your barn wood by color or texture. Lay them in a pattern you like. Glue them onto a plywood backing, clamp until dry. Sand corners if needed. Attach a hanging hook on the back. Barn wood wall art is a favorite in farmhouse-themed homes.
Tip for Decorating: Mix lighter and darker pieces for contrast and a dynamic look.
Project 3: Rustic Serving or Breakfast Trays
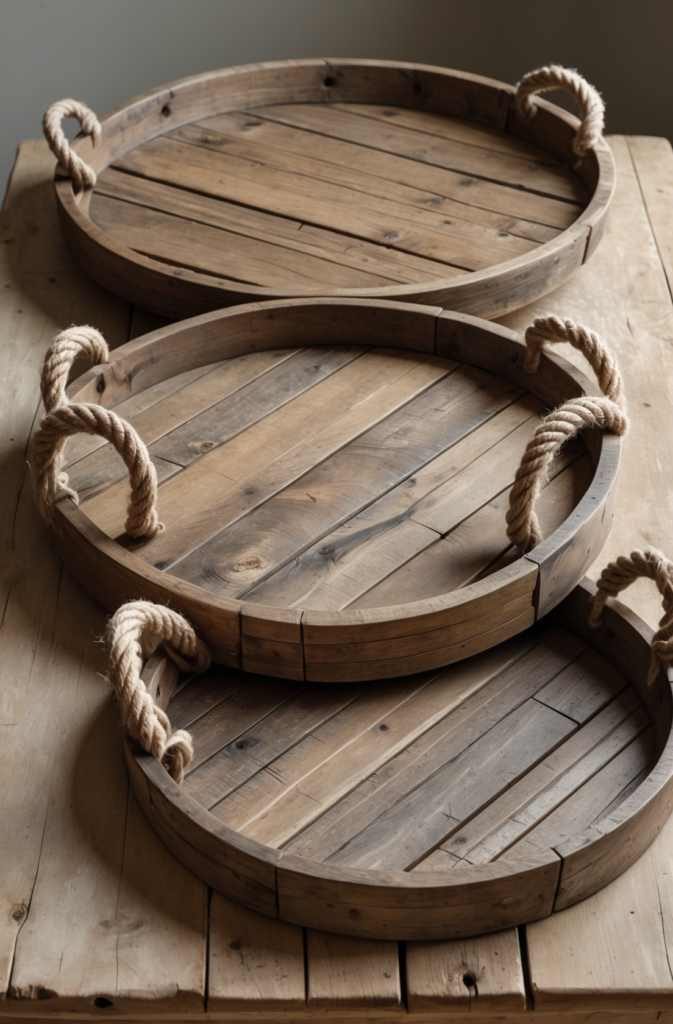
Similar to the first tray idea but smaller and simpler, these rustic tray builds are perfect for quick sells. You can create multiple mini trays for serving breakfast in bed or storing small items on a dresser. One hobbyist said she made five trays in one weekend and sold them all at a local craft fair. The wood’s weathered look does half the job for you. People adore that barnwood charm!
- Materials: Barn wood planks, handles (rope or metal), nails or glue
- Tools: Saw, hammer or drill, measuring tape
How to Make It:
Cut barn wood to the tray size you prefer. Attach simple sides with nails or glue. Add rope or metal handles. Since these are smaller, it’s faster than a big tray, and you can do multiple in one sitting. The rough texture looks nice for barn wood crafts.
Tip for Decorating: Tie a ribbon around them if you plan to give them as housewarming gifts or sell them in sets.
Project 4: Recycled Wood Projects – Coat Rack
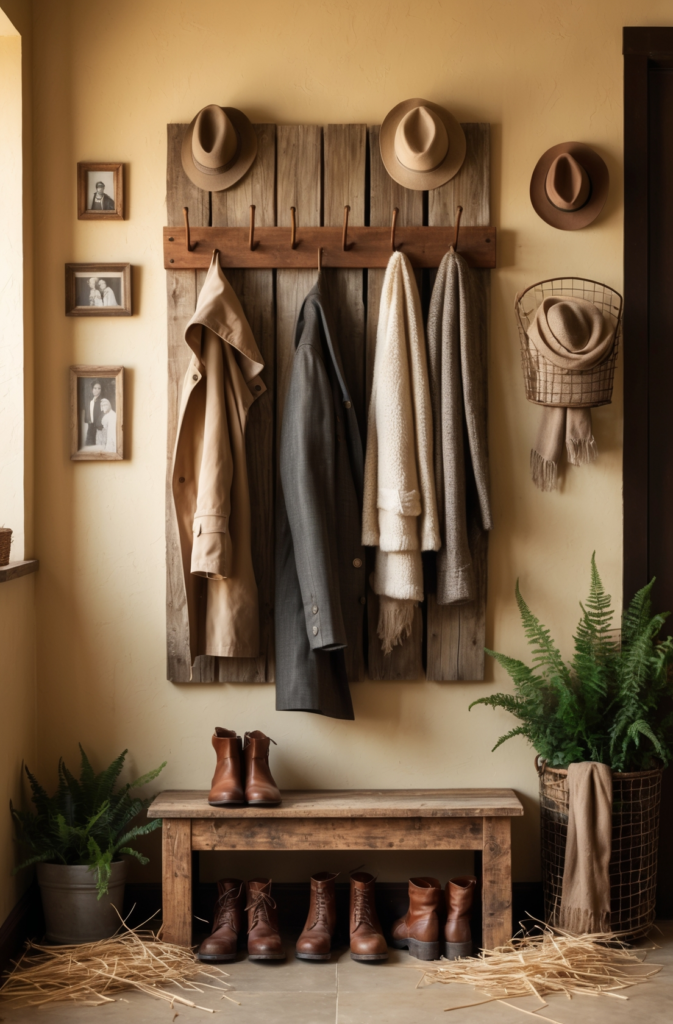
A coat rack from recycled wood projects can be a big seller. One builder used a long piece of barn wood, sanded it a bit, and screwed on metal hooks for coats and hats. People like having a barn wood wall accent in their foyer or mudroom. This project is straightforward but adds instant charm to any space.
- Materials: Barn wood plank, coat hooks, screws
- Tools: Drill, measuring tape, sandpaper
How to Make It:
Cut the plank to your desired length. Sand enough so it’s not splintery. Arrange hooks evenly, and screw them in. Attach the rack to your wall studs or use sturdy wall anchors. Some folks even paint stenciled words like “Welcome” above the hooks for extra flair.
Tip for Decorating: Mix different metal hook styles (like bronze, black, or vintage shapes) for a unique look.
Pro Tip: For bigger, more detailed woodwork projects beyond these, check out Ted’s Woodworking. They offer step-by-step plans that can make even barn wood ideas into serious builds. Learn more here.

Project 5: Barnwood Signs for Quick Profits

Signs are one of the easiest barn wood projects to make and sell. You just cut or find a suitably sized piece of barn wood, then paint or burn letters on it. A friend made “Welcome” and “Gather” signs that flew off her Etsy shop. Because they’re small and simple, you can produce several in a day. This also suits wood diy projects newbies who want to practice painting or stenciling words.
- Materials: Barn wood boards, paint or stencils, clear sealant
- Tools: Pencil, sandpaper, optional pyrography pen
How to Make It:
Lightly sand the barn wood. Sketch or stencil your letters. Fill them with paint or burn them using a pyrography pen. Seal if needed. One crafter reported that her mini signs, sometimes only a foot long, were her biggest seller at fairs.
Tip for Decorating: Use soft, neutral paint for a farmhouse style or bright colors for a playful vibe.
Project 6: DIY Scrap Wood Lanterns

Lanterns built from diy scrap wood or barn wood scraps can add a warm glow to patios or living rooms. One lady made frames with open sides and a small top handle, then placed LED candles inside for safety. They sold well because they look both vintage and cozy. It’s a simple box frame with cross pieces for the windows. The trick is to measure so the candle fits nicely inside.
- Materials: Barn wood strips, nails or screws, finishing nails (for crossbars)
- Tools: Saw, measuring tape, hammer or drill, sandpaper
How to Make It:
Cut four vertical corner pieces and connect them at the base and top with horizontal boards. Add crossbars if you like that windowed look. Sand lightly, keeping the barn wood’s rustic texture. Drop a candle or fairy lights inside. People love them for wedding decor or front porch ambiance.
Tip for Decorating: Hang a small sign or tag on the lantern handle with the word “Welcome” or your family name.
Project 7: Kids Woodworking Projects – Barn Wood Bird Feeder
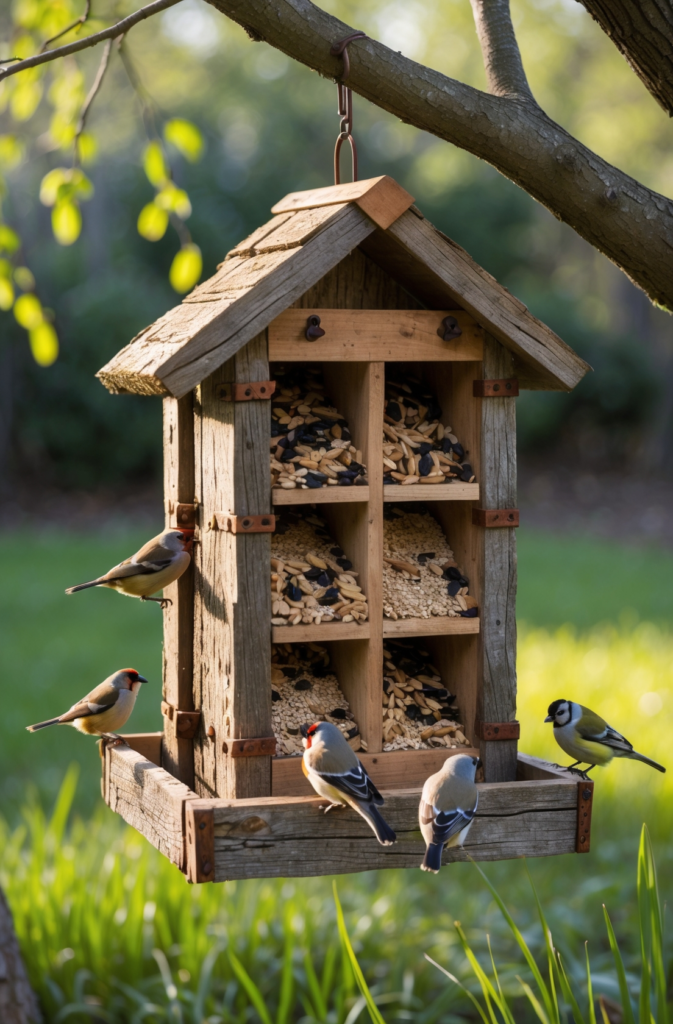
For a family-friendly project, a barn wood bird feeder is perfect. Similar to a birdhouse, but more open so birds can reach seeds. One dad and son team crafted a shallow box with a roof. They placed it on a post in their backyard, and local birds loved it. It’s a sweet intro for kids woodworking projects that use leftover reclaimed barn wood. The “old barn wood” texture also blends nicely with nature.
- Materials: Barn wood, nails or screws, some kind of roof panel
- Tools: Saw, hammer or drill, sandpaper
How to Make It:
Cut a simple rectangular base, add short walls so seeds don’t spill, then attach a roof with enough gap for birds. Sand edges so kids won’t get splinters. Set it on a post or hang it. Before you know it, you’ll see birds stopping by for a snack.
Tip for Decorating: Let kids paint tiny birds or flowers on the feeder for extra flair.
Project 8: Cool Wood Projects – Barn Board Picture Frame

If you have small strips of barn wood, turn them into a frame. One crafter made a frame for a family photo and got so many compliments, she began selling them. It’s one of those barnboard projects that require only four cuts at neat angles, plus some glue or small nails. Because the wood has a naturally worn look, you don’t need fancy finishing. People love frames that carry a piece of old wood wall history.
- Materials: Barn board strips, backing board, small nails or picture frame tabs
- Tools: Saw (for angle cuts), hammer or drill, measuring tape
How to Make It:
Measure your photo size and cut four strips at 45-degree angles. Nail or glue them together, attach a backing piece, and add hardware for hanging. One framer used corners from old barn wood walls, and the frame sold quickly online.
Tip for Decorating: Try adding a small sign, like “Family” or “Memories,” burned into the bottom edge.
Project 9: Reclaimed Wood Walls (Accent Panels)
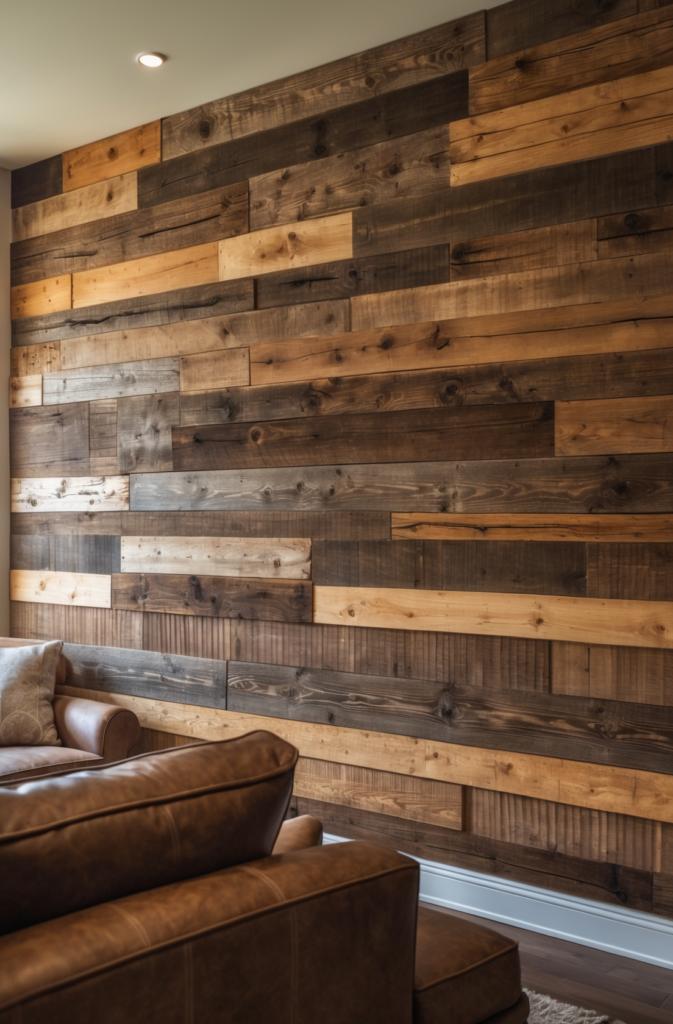
If you’re brave enough for a bigger statement, adding an accent wall of reclaimed wood walls can transform a room. People love the rustic feel of barn wood walls. One homeowner installed horizontal boards behind the TV area, and it looked like a model home. This project’s a bit larger but still doable on a weekend if you measure carefully. Plus, it’s not as tricky as you might think—just nail or glue planks side by side.
- Materials: Barn wood planks, nails or strong adhesive, optional trim pieces
- Tools: Saw, level, measuring tape, hammer
How to Make It:
Prepare your wall by finding studs or using proper adhesives. Cut the barn wood planks to fit the wall’s width. Start from the bottom, move upward, making sure each row is level. One homeowner loved her new wall so much, she installed similar barnwood interior walls in other rooms.
Tip for Decorating: Mix planks of various shades for a cool patchwork effect.
Project 10: Barnboard Projects – Small Bookshelf
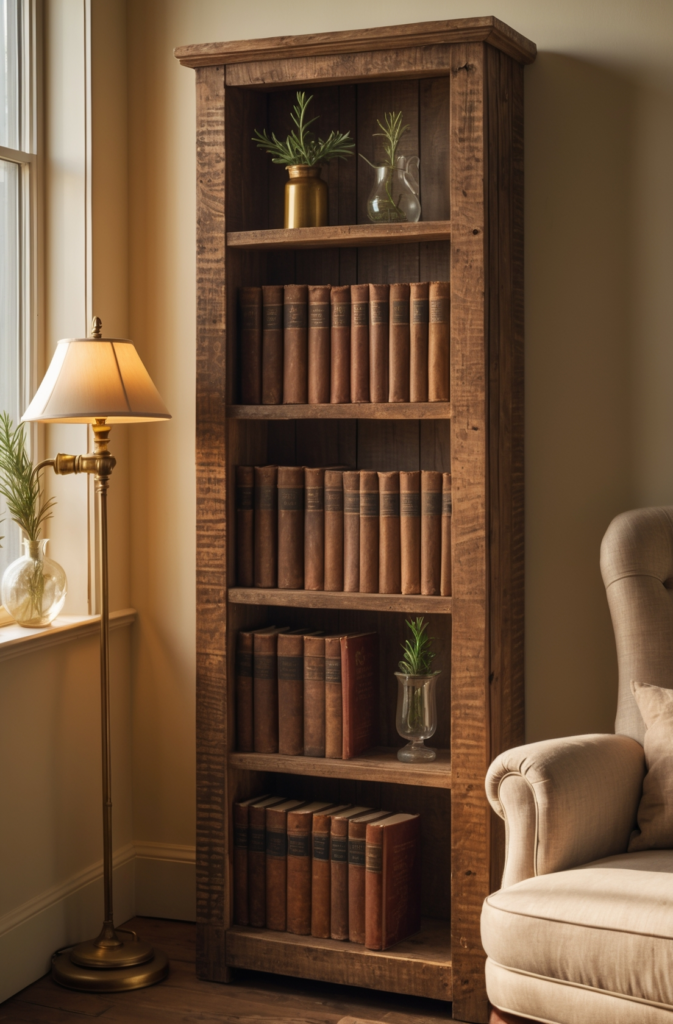
A small bookshelf built from barnboard can be a simple rectangle with two or three shelves. One novice woodworker created a short, narrow shelf to hold her favorite books. The look was cozy yet stylish, thanks to the aged boards. Because it’s small, you can finish it fast, and it still counts as woodworking projects furniture. If you want to sell it, highlight the reclaimed barn wood projects angle—customers often pay extra for that authenticity.
- Materials: Barnboard planks, nails or screws, sandpaper
- Tools: Saw, measuring tape, hammer or drill
How to Make It:
Cut two boards for the sides, plus two or three for shelves. Attach them, ensuring each shelf is level. Sand edges to avoid splinters. A friend found that even a short, two-shelf piece sold quickly to people craving rustic decor.
Tip for Decorating: Stain the boards a bit darker, or leave them raw for extra farmhouse charm.
Project 11: Woodworking Projects Furniture – Simple Stool
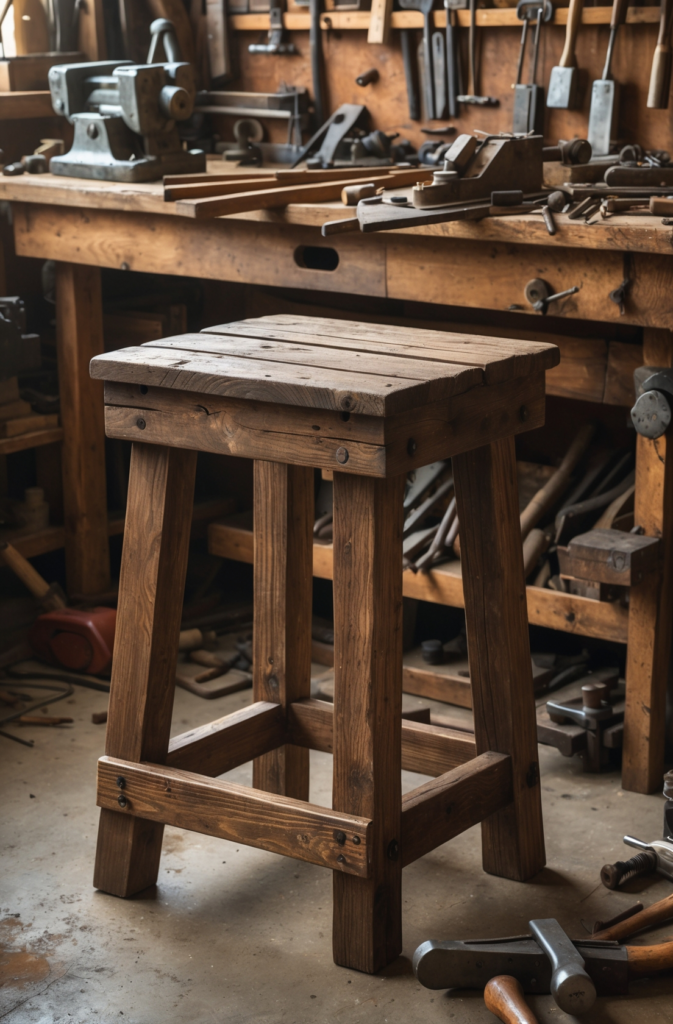
You can also build a small stool using old barn wood ideas. Similar to other stools, but the difference is the weathered wood, which makes each seat look unique. One person said it took her a few hours to measure, cut, and screw together a short square stool. Great for a kid’s room or an outdoor porch. This piece shows you can do woodworking projects furniture with minimal fuss.
- Materials: Barnwood planks, screws, optional brackets, sealant
- Tools: Saw, drill, measuring tape, clamp
How to Make It:
Cut the seat to a square (or rectangle), measure and cut four legs. Drill them into each corner, checking angles so it’s stable. Lightly sand to avoid splinters. Barn wood’s rough texture can add that rustic vibe without extra work.
Tip for Decorating: Paint a small pattern on the seat or keep it raw for a simpler farmhouse look.
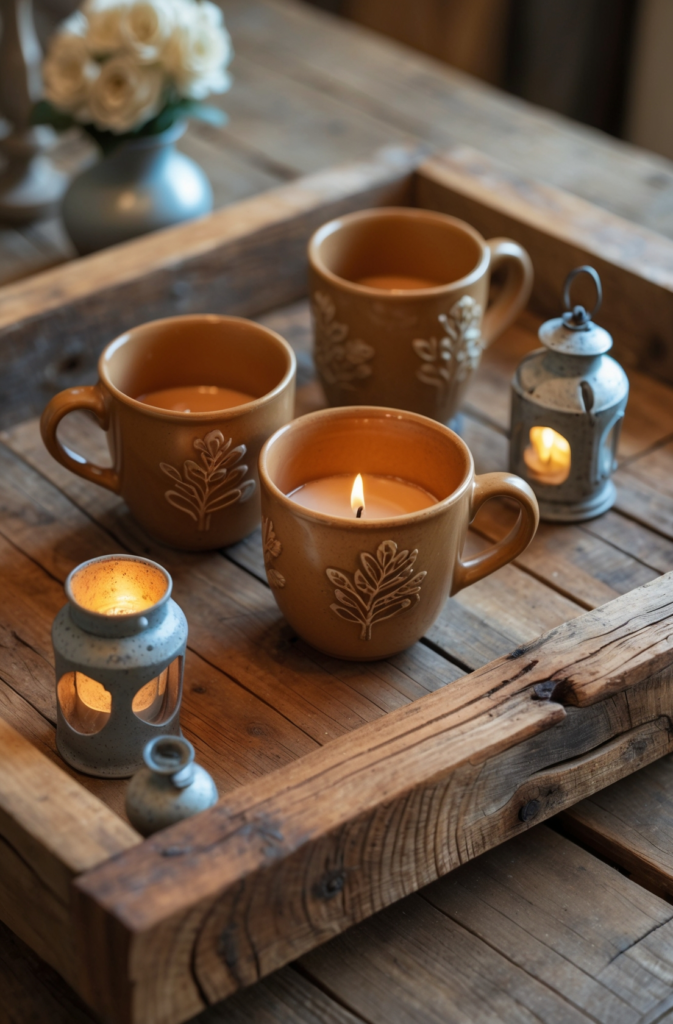
Project 12: Barnwood Crafts – DIY Candle Holders

Short blocks of old barn wood can easily become tea light or pillar candle holders. One maker cut them to different heights, drilled holes on top for the candles, and sanded lightly. The set looked cute on a coffee table. People love these for weddings or holiday decor. They’re also wood projects that sell quickly because they’re small and gift-worthy.
- Materials: Barn wood blocks, candles or tea lights, optional finish
- Tools: Saw, drill with a spade bit, sandpaper
How to Make It:
Cut scraps to the heights you like. Use a spade bit to drill a shallow hole on top that fits your candle size. Sand the edges so no one gets splinters. You can add a clear coat, but many crafters leave them raw for that “barnwood crafts” charm.
Tip for Decorating: Make a set of three in various heights, tie them with twine, and sell them as a bundle.
Project 13: Reclaimed Barnwood Ideas – Planter Box
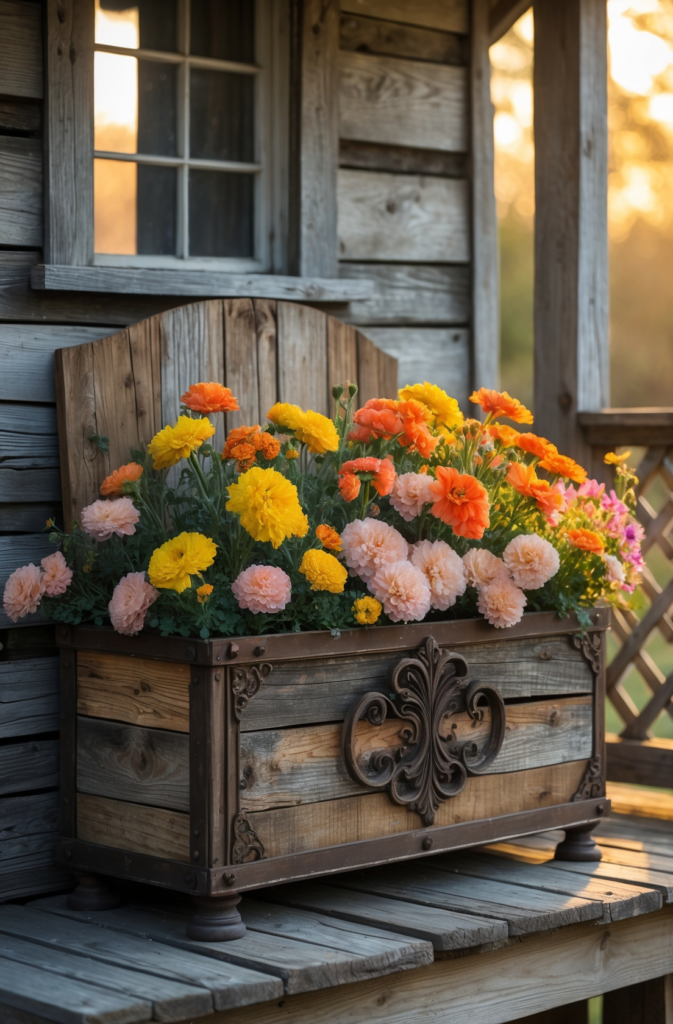
Similar to other planter ideas, you can make a bigger or more detailed version from reclaimed barnwood ideas. People love these for front porches or patios. One porch enthusiast built a long, narrow box for bright flowers, and neighbors kept asking where it was from. Barnwood’s weathered look fits perfectly with gardens, making it a popular choice if you plan to sell your creations.
- Materials: Barnwood planks, nails or screws, optional plastic liner
- Tools: Saw, measuring tape, hammer or drill, sandpaper
How to Make It:
Measure how tall and wide you want it. Cut four side boards plus a base. Nail or screw them together. Drill drain holes if needed. Light sanding can remove major splinters but keep the rustic charm. One gardener’s big barnwood planter turned her porch into a cheerful spot.
Tip for Decorating: Stencil your family name or a cute saying like “Bloom Here” on the front board.
Project 14: Old Barn Wood Ideas – Decorative Ladder
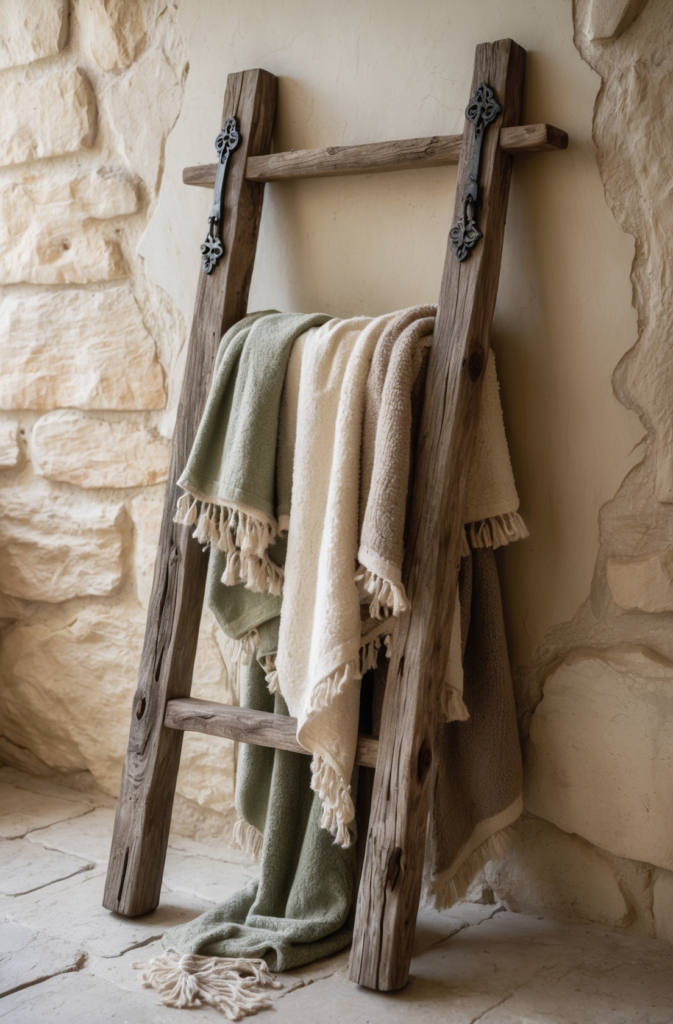
Decorative ladders are a top pick for old barn wood ideas. You simply cut two longer boards for the sides and attach shorter rungs. People use them to hang blankets, towels, or just display them in corners. One shop owner sold multiple ladders by leaning them in her booth with cozy blankets. It’s easy to do and sells well if you keep the wood’s worn look visible.
- Materials: Two barnwood planks (sides), smaller pieces for rungs, nails or screws
- Tools: Saw, measuring tape, hammer or drill
How to Make It:
Decide how tall you want your ladder. Cut two side rails at that length. Cut a few rungs, spacing them evenly. Nail or screw them on each side. Sand enough so no splinters remain. People hang blankets, magazines, or lights for an instant farmhouse vibe.
Tip for Decorating: Use a contrasting paint color on the rungs or attach small hooks for extra storage.
Project 15: Barn Wood Walls – Headboard
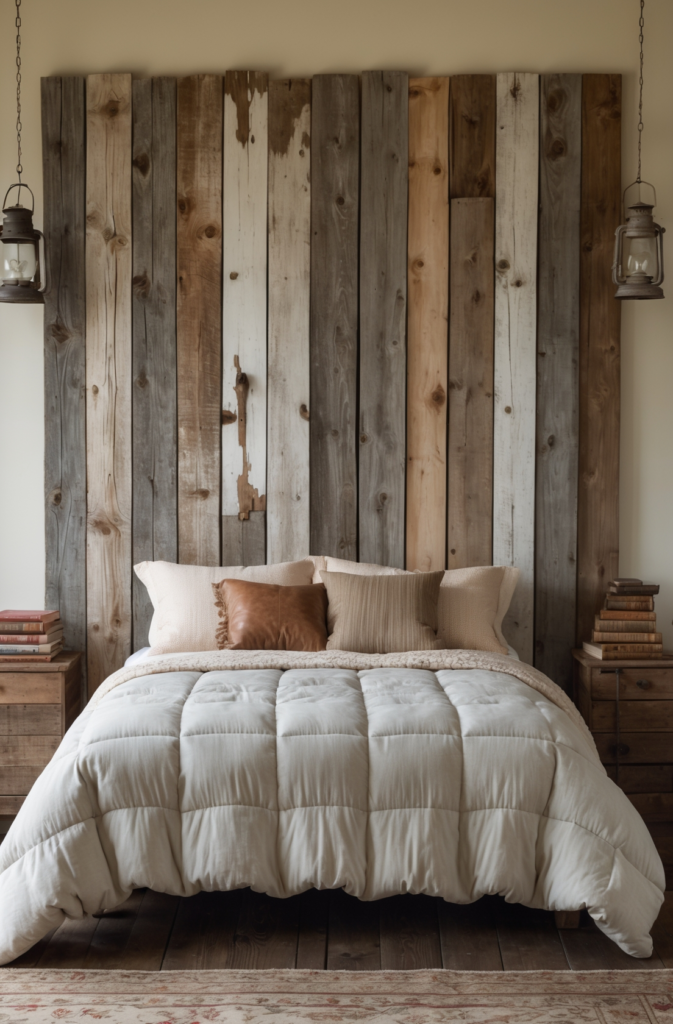
If you want a bigger piece, a barn wood headboard is perfect. You can attach barn wood walls to plywood cut to your mattress width. One couple shaped planks into a curve at the top, but a straight edge is easier. Buyers love these headboards for a warm, country feel. It’s bigger than most projects here but still possible in a weekend if you measure carefully.
- Materials: Barn wood planks, plywood backing, nails or screws, sealant (optional)
- Tools: Saw, measuring tape, drill or hammer, sandpaper
How to Make It:
Cut plywood to your bed width. Arrange barn wood across it, varying plank lengths for a cool look. Nail or screw them in place. Sand edges lightly, but keep the natural charm. One friend’s barn wood headboard transformed her bedroom overnight.
Tip for Decorating: Combine planks of different tones or paint subtle patterns for a twist on the traditional barn look.
Tips for Mastering Barn Wood Projects
When working on reclaimed barn wood projects, check for nails, bugs, or rot first. Always clean and dry the boards. If you want a smoother look, sand away the roughness; for a more rustic style, keep it. Some people add a light sealant to stop further aging. Also, measure carefully—projects with wood can warp if not cut properly. For kids woodworking projects, watch for splinters. The main key is to embrace each board’s unique marks, knots, and color variations. That’s what makes barn wood crafts so fun!
Advanced Barnwood Interior Walls & More
If you love the rustic look, you might tackle barnwood interior walls or reclaimed wood walls for a whole room. Adding old wood wall planks can give a cabin feel, and it’s not too tough—just bigger. Some crafters build woodworking projects furniture like coffee tables with hidden storage, or reclaimed wood tray sets that nest inside each other. You can also carve designs into barn wood walls or layer colors of paint, then sand lightly for a vintage effect. As you learn, you’ll see bigger builds become easier.
Maintenance for Reclaimed Wood Projects
Keep your barn wood items clean by dusting with a soft cloth. If you sealed them, a gentle wipe with mild soap and water is okay, but don’t soak them. For cool wood projects outside (like planters or bird feeders), re-seal each year to avoid rot. One crafter said it’s best to keep them out of direct rain if possible. If it’s a rustic tray or sign, an occasional dusting is all you need. With proper care, old barn wood projects can last a long time, retaining their charm.
Real-Life Success Stories
Many people found success selling barnwood signs, trays, or accent walls. One seller told me she started with small scrap wood crafts like candle holders, then expanded to making planters and shelves. Another posted pictures of her reclaimed wood walls online, and neighbors asked her to help them do the same. These tales show that a weekend project can become a small business. Projects with wood that highlight the barnwood style are always in demand among folks wanting that farmhouse feel.
Quick Takeaways
- Barnwood projects appeal to rustic, farmhouse-loving buyers.
- Check for leftover nails or insects in old barn wood before building.
- Scrap wood ideas save you money and add unique character to every piece.
- You can make wood projects that sell online or at local craft fairs.
- Focus on small, easy builds like signs, trays, or candle holders if you’re new.
- Maintain items by sealing or dusting, so they last a long time.
Conclusion
These 15 best-selling barn wood projects show how barn board projects and reclaimed barn wood projects can turn into fun, easy builds that make real profits. Whether you craft a simple reclaimed wood tray or install barnwood interior walls, people love the rustic look. By using leftover or old barn wood, you save costs and help the environment, too. Over time, you might even find a steady demand for your barn wood crafts, turning a hobby into a side income. So gather your scrap boards, grab those wood crafting tools, and bring your best barnwood ideas to life!
Deeper Tutorial Tie-In:
Want in-depth, step-by-step woodworking plans beyond these barnwood projects? Ted’s Woodworking has thousands of guides that teach you bigger woodwork projects. They’re perfect if you dream of building more reclaimed lumber projects. Click here to learn more.
FAQs
Q1: Where do I get old barn wood for these projects?
Try salvage yards, local farms, or Craigslist ads. Many people have old barn wood they want to sell or give away.
Q2: Are barn wood walls hard to install?
Not really. Pick planks, measure carefully, and nail them to your existing walls. Just watch out for studs or strong adhesives.
Q3: Do I need special tools for reclaimed barn wood?
Basic saws, hammers, and drills are enough. Just be sure to remove old nails and sand the surface first.
Q4: Can kids help with these barn wood projects?
Yes. Start them on simpler tasks like sanding or painting. Always supervise for safety, though.
Q5: Which barn wood crafts sell best?
Small items like trays, signs, candle holders, and simple furniture usually do well at fairs and online.
We Want Your Feedback!
Have you tried any of these barn wood crafts? Did you make a rustic tray or put up barn wood walls? We’d love to hear how it turned out. Please drop a comment below and share your experiences or new reclaimed wood ideas. Also, feel free to share this post with friends who might want to turn scrap wood crafts into a profitable hobby!
References
- Popular Woodworking – Offers advice on woodworking and pyrography tools.
- This Old House – Explains home improvement tips and recycled wood usage.
- Wood Magazine – Shares advanced pyrography and general woodworking concepts.