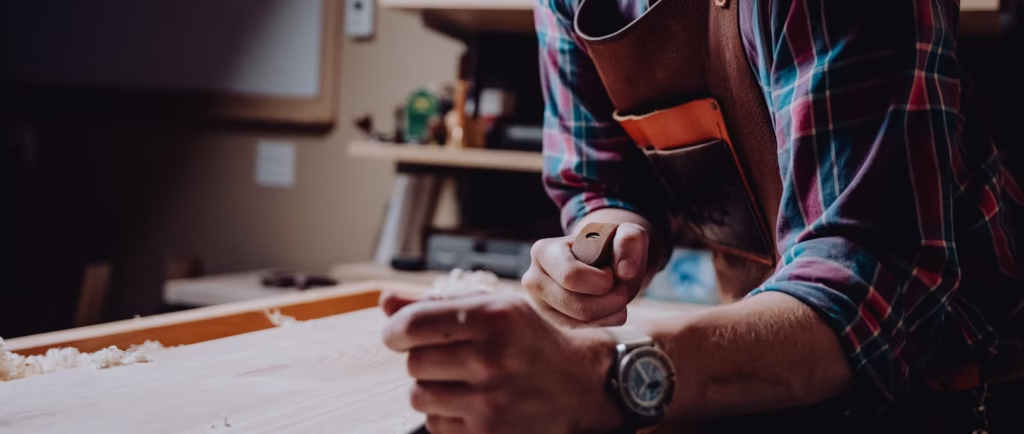
Wooden coasters are an excellent way to add personality to your home décor while also offering a practical solution to protect surfaces. In this guide, we present 10 simple wooden coasters DIY ideas that you can easily make at home. Furthermore, this article is specifically tailored for those who enjoy woodworking, DIY projects, and creative home improvement. We provide step-by-step instructions that cover everything from selecting quality wood to applying creative finishes. In addition, each project comes with useful decorating tips that help you transform ordinary coasters into memorable keepsakes. As a result, you will not only protect your furniture but also create personalized accents that make great gifts. Finally, read on to discover innovative ideas and techniques that will inspire your next DIY project.
Moreover, these projects use techniques like engraving, stenciling, and distressing to add a unique touch to each coaster. Also, they are designed to be beginner-friendly while still offering creative challenges. In short, every idea here helps you create practical, stylish items that enhance your home décor.
Early Affiliate Disclosure: This post contains affiliate links. If you make a purchase through these links, I may earn a small commission at no extra cost to you. For detailed woodworking plans, check out Ted’s Woodworking – my trusted resource for step-by-step guides. Learn more here.
Table of Contents
- Project 1: Engraved Wooden Coasters for Customized Gifts
- Project 2: Rustic Homemade Coasters with a Distressed Finish
- Project 3: Minimalist DIY Wood Coasters Using Stencils
- Project 4: Colorful DIY Coasters Wooden for Bright Accents
- Project 5: Eco-Friendly Homemade Coasters from Reclaimed Wood
- Project 6: Modern DIY Wooden Coasters with Geometric Patterns
- Project 7: Personalized Engraved Wood Coasters for Special Occasions
- Project 8: Chic DIY Wood Coasters Easy to Make with Natural Finishes
- Project 9: Vintage Wooden Coasters DIY with a Distressed Look
- Project 10: Creative Wood Coasters DIY for Outdoor Entertaining
- Tips for Mastering DIY Wooden Coaster Projects
- Advanced Techniques for Enhancing Homemade Coasters
- Maintenance and Care for Wooden Coasters
- Real-Life Success Stories from DIY Enthusiasts
- Quick Takeaways
- Conclusion
- FAQs
- We Want Your Feedback!
- References
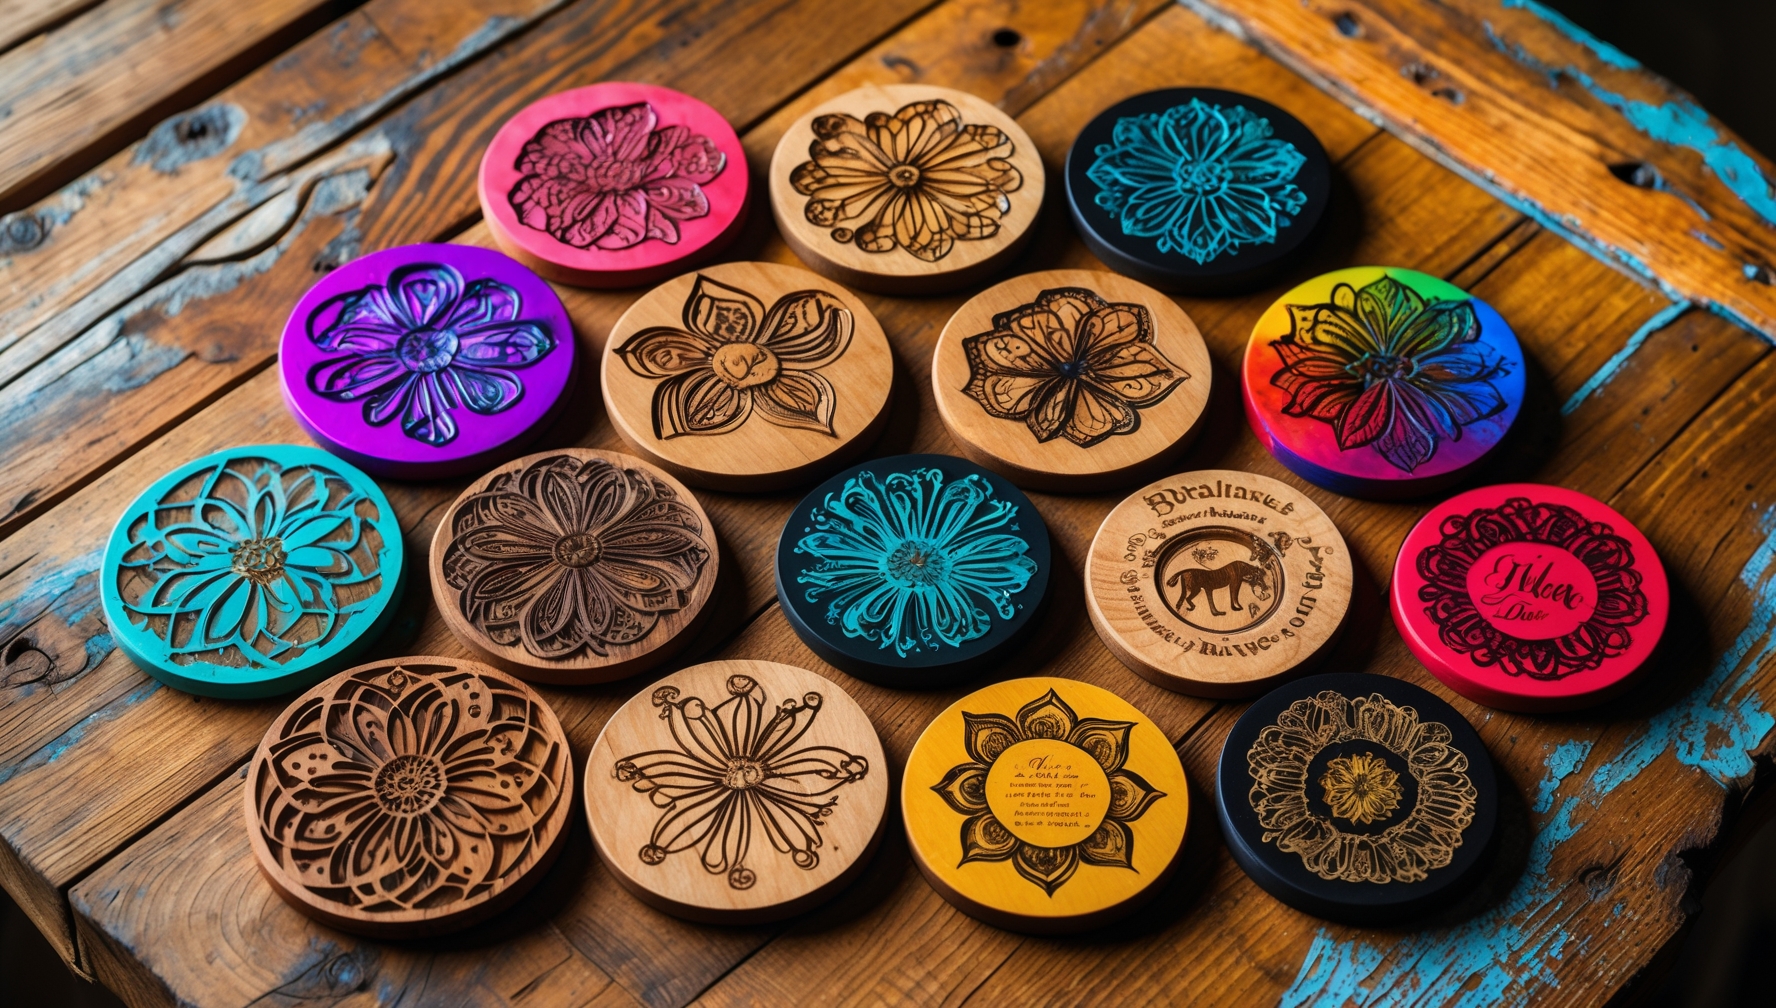
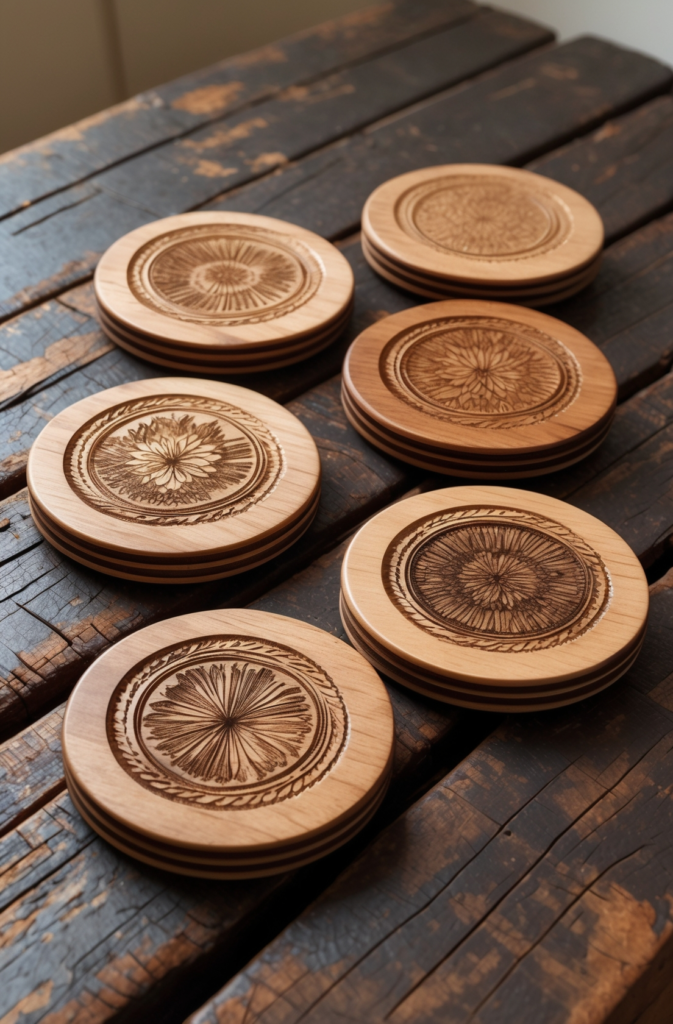
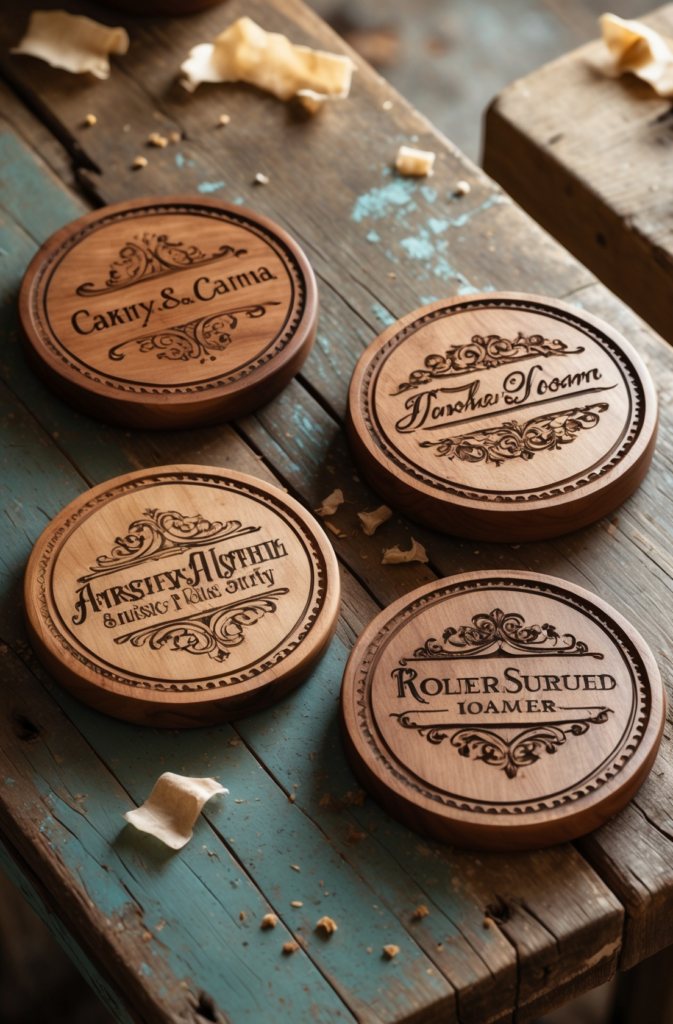
Project 1: Engraved Wooden Coasters for Customized Gifts
Engraved wooden coasters are an excellent way to create personalized home accents and thoughtful gifts. They work well for those who want to add a custom touch to everyday items. In this project, you will learn how to design and engrave wooden coasters that feature intricate patterns and names. For example, one DIY enthusiast engraved his family’s initials onto each coaster, and during a family reunion, his personalized coasters became a cherished topic among guests. This technique not only creates functional items but also turns them into memorable keepsakes. As a result, your coasters will serve as both practical protectors for surfaces and sentimental gifts that celebrate special moments.
Materials & Steps:
- Materials: hardwood boards, engraving tools, wood stain, clear varnish.
- Tools: carving tools, pencil, sandpaper, woodburning pen (optional).
How to Make It:
First, cut the wood into uniform coaster sizes. Then, sand each piece thoroughly until smooth. Next, transfer your chosen design onto the wood using a pencil. Carefully engrave the design with carving tools or a woodburning pen. After that, apply wood stain to enhance the natural grain, and finally, finish with clear varnish for durability. For instance, a DIY enthusiast crafted these coasters as a personalized gift, which later became a family treasure.
Decorating Tips:
Use these coasters on a matching tray or package them in a custom gift box to add an extra personal touch.
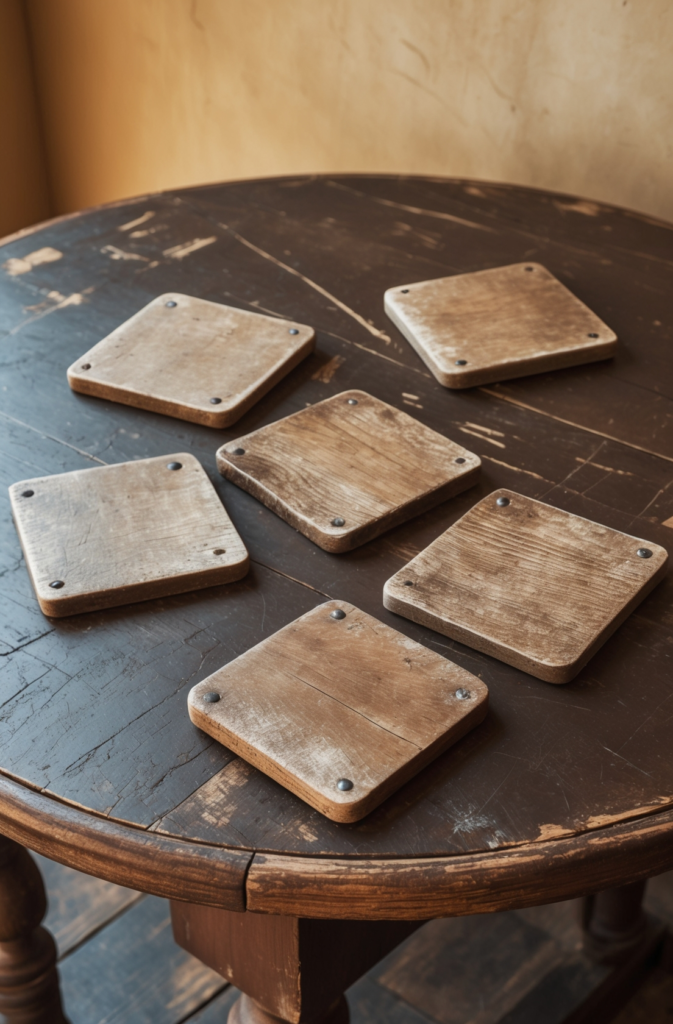
Project 2: Rustic Homemade Coasters with a Distressed Finish
Rustic homemade coasters bring vintage flair to your décor while offering a unique tactile experience. They work great for those who love a weathered look that highlights the natural character of wood. In this project, you will learn to create coasters with a distressed finish using techniques like dry brushing. For example, a hobbyist created a set of coasters with a deliberately worn appearance, which he proudly displayed at a dinner party. Guests admired how the coasters added nostalgic charm and warmth to the setting. This project is both simple and satisfying, as it transforms ordinary wood into rustic art.
Materials & Steps:
- Materials: reclaimed wood, wood stain, distressing tools, clear sealer.
- Tools: saw, sander, paintbrush, dry brushing tool.
How to Make It:
Cut the wood into square coasters and sand them lightly to create a worn effect. Then, apply wood stain and use a dry brush to achieve a distressed finish. Once the effect is set, seal the coasters with a clear sealer to protect the design. For example, one hobbyist produced these coasters, which later became the highlight of his rustic dining table.
Decorating Tips:
Arrange the coasters on a rustic tray or coffee table to showcase their vintage appeal.
Project 3: Minimalist DIY Wood Coasters Using Stencils
Minimalist DIY wood coasters using stencils are perfect for those who appreciate clean, modern designs. They allow you to add subtle patterns or inspirational quotes to your coasters. In this project, you will learn how to use stencils to create uniform and elegant designs. For example, one designer used geometric stencils to produce coasters that became the centerpiece of his contemporary living room. His guests admired the clean lines and simple elegance, which perfectly complemented his modern décor. This project is straightforward, making it ideal for beginners who want to experiment with creative ideas.

Materials & Steps:
- Materials: smooth wood boards, stencils, acrylic paint, clear sealant.
- Tools: saw, sander, sponge or stencil brush, measuring tape.
How to Make It:
Cut the wood into uniform coaster sizes and sand them thoroughly for a smooth finish. Then, position stencils on each coaster and apply acrylic paint evenly. Once the design is complete, remove the stencils and allow the coasters to dry completely. Finally, seal with a clear finish for durability. For instance, a designer created a set of coasters with inspirational quotes that added a unique touch to his coffee table.
Decorating Tips:
Pair these coasters with minimalist home décor or gift them as unique personalized items.
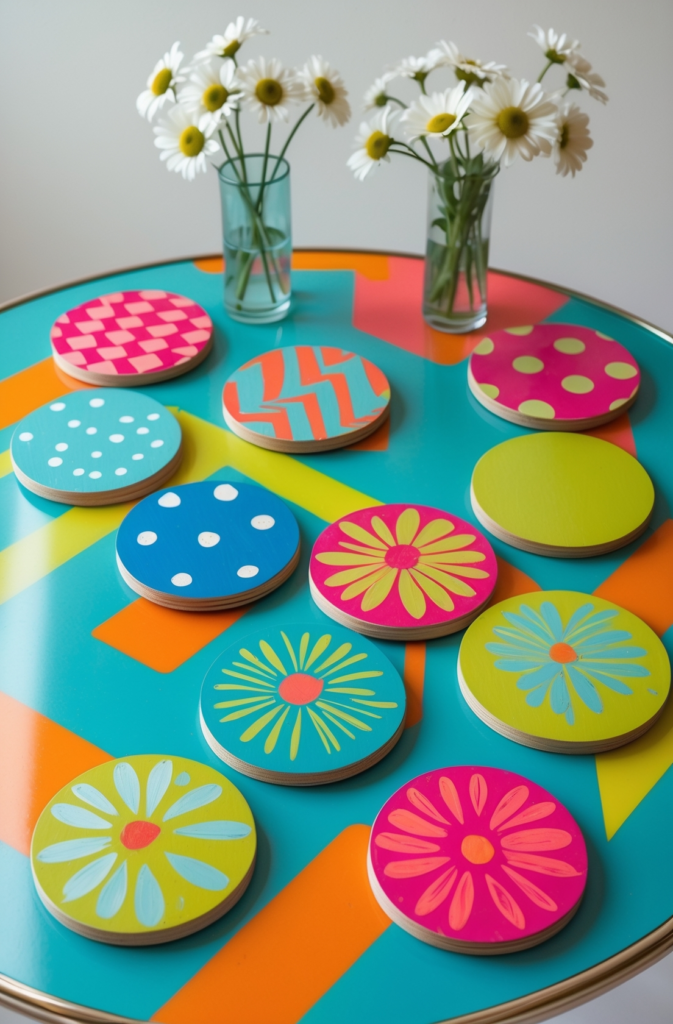
Project 4: Colorful DIY Coasters Wooden for Bright Accents
Bright, colorful DIY coasters add a lively touch to any room and serve as excellent conversation pieces. This project is perfect for those who enjoy bold design elements and want to make a statement with their home accents. In this guide, you will create wooden coasters using vibrant acrylic paints that instantly brighten up a coffee table. For example, one homeowner painted each coaster in a different bright hue and used them during a summer party, which impressed every guest with their cheerful appearance. These coasters are not only functional but also serve as creative, personalized gifts.
Materials & Steps:
- Materials: wood boards, acrylic paints in various colors, paintbrushes, clear sealer.
- Tools: saw, sander, palette, measuring tape.
How to Make It:
Begin by cutting the wood into uniform coasters and sanding them smooth. Then, apply a base coat of white paint to enhance the vibrancy of the colors. Next, paint each coaster in a unique pattern using a variety of acrylic paints. Allow the coasters to dry completely before sealing them with a clear finish. For example, one homeowner created these bright coasters that added energy and warmth to his living room décor.
Decorating Tips:
Display these coasters on a vibrant tray or serve them as cheerful gifts in a stylish package.
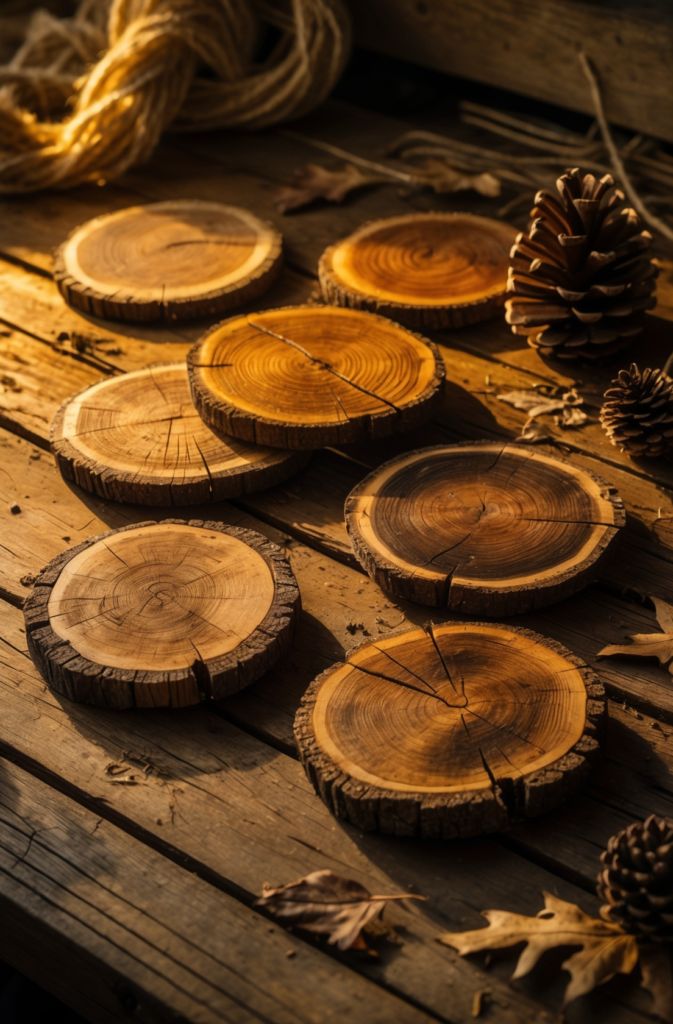
Project 5: Eco-Friendly Homemade Coasters from Reclaimed Wood
Eco-friendly homemade coasters made from reclaimed wood offer a sustainable way to add personality to your home décor. This project is ideal for those who care about the environment and appreciate the unique character of reclaimed materials. For example, one DIY enthusiast repurposed scrap wood from an old table to create a set of coasters that he proudly showcased at an eco-themed dinner party. The coasters not only add rustic charm but also spark conversations about sustainability. In addition, these projects demonstrate that repurposing old materials can result in beautiful and functional home accents.
Materials & Steps:
- Materials: reclaimed wood, eco-friendly wood stain, clear sealer.
- Tools: saw, sander, brushes, measuring tape.
How to Make It:
First, cut the reclaimed wood into equal-sized pieces and sand them until smooth. Next, apply an eco-friendly wood stain to highlight the natural grain of the wood. Then, finish each piece with a clear sealer to protect it from wear. For instance, one eco-conscious DIYer turned scrap wood into a set of coasters that became a hit at his dinner party.
Decorating Tips:
Use these coasters on a rustic coffee table or package them as thoughtful, eco-friendly gifts.
Pro Tip: If you’re ready to expand your DIY skills beyond wooden coasters, consider exploring Ted’s Woodworking plans. They offer over 16,000 detailed, step-by-step guides that cover everything from simple décor projects to full-scale furniture builds. Many DIY enthusiasts have found that these resources help them tackle even more advanced projects with confidence. This resource is ideal for anyone looking to elevate their woodworking projects and achieve professional-quality results.
Discover Ted’s Woodworking here.
Project 6: Modern DIY Wooden Coasters with Geometric Patterns
Modern DIY wooden coasters with geometric patterns offer a sleek, contemporary twist on classic designs. They are perfect for those who appreciate clean lines and bold design elements. In this project, you will use geometric stencils to create unique patterns on your coasters. For example, one local designer used angular patterns on his coasters, which then became the centerpiece of his modern kitchen table. This project not only adds a decorative accent but also showcases your creativity. Consequently, these coasters blend art and functionality, making them excellent for home décor or as personalized gifts.

Materials & Steps:
- Materials: wood boards, geometric stencils, acrylic paints, clear sealant.
- Tools: saw, sander, stencil brushes, measuring tape.
How to Make It:
Begin by cutting the wood into equal-sized coasters and sanding them smooth. Then, place geometric stencils on each coaster and apply acrylic paint evenly. After the design sets, remove the stencils and allow the coasters to dry completely. Finally, seal them with a clear finish for durability. For example, one designer created these coasters and received many compliments for their modern, artistic look.
Decorating Tips:
Display these coasters on a modern tray or use them as unique gifts for a chic presentation.
Project 7: Personalized Engraved Wood Coasters for Special Occasions
Personalized engraved wood coasters make ideal gifts and lasting keepsakes for any occasion. They are perfect for those who want to add a personal touch to their home accents or create meaningful presents. In this project, you will learn to engrave custom designs, such as names or dates, onto your coasters. For example, one DIYer engraved his company’s logo and founding year on a set of coasters, which later became a cherished gift at his corporate anniversary celebration. This project not only produces functional items but also creates sentimental pieces that celebrate milestones.
Materials & Steps:
- Materials: hardwood boards, engraving tools or woodburning pen, wood stain, clear varnish.
- Tools: saw, sander, pencil, engraving tools.
How to Make It:
First, cut the wood into uniform coaster sizes and sand them until smooth. Next, transfer your design onto each coaster using a pencil. Carefully engrave the design using carving tools or a woodburning pen. Then, apply wood stain to enhance the wood grain, and finish with a clear varnish for durability. For example, a DIY enthusiast’s engraved coasters became the hit of his family celebration.
Decorating Tips:
Serve these coasters on a stylish tray or package them as personalized gifts for special occasions.
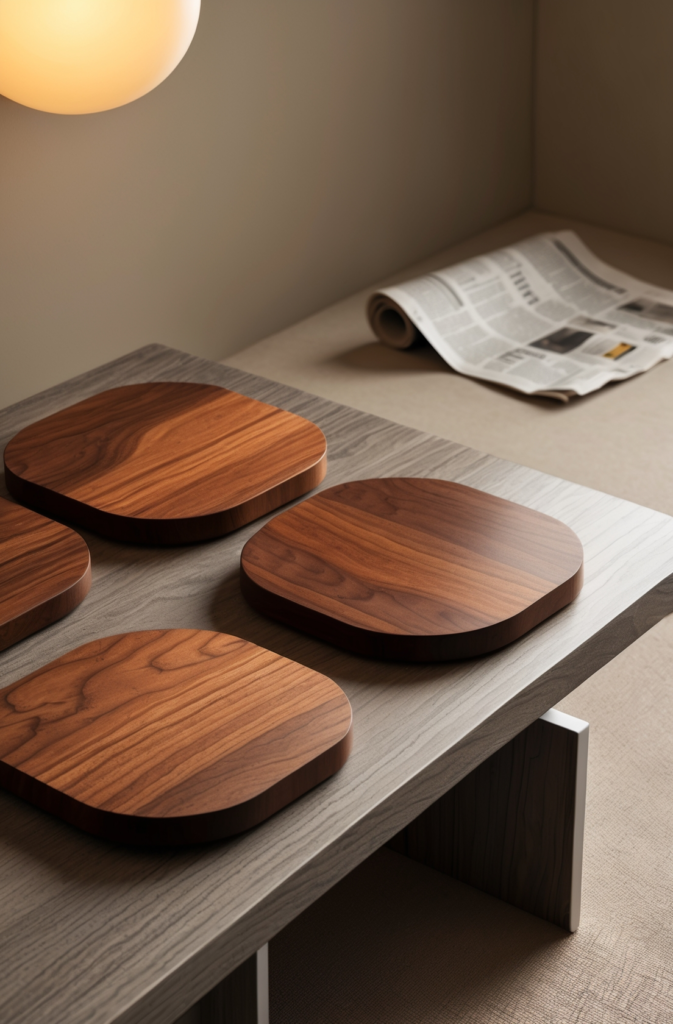
Project 8: Chic DIY Wood Coasters Easy to Make with Natural Finishes
Chic DIY wood coasters with natural finishes offer a simple yet elegant solution for everyday home accents. They are ideal for those who prefer a minimalist approach and want to showcase the beauty of natural wood. In this project, you will learn to create coasters by applying a natural oil finish that highlights the wood’s grain. For example, a beginner crafted a set of coasters with a natural finish that perfectly complemented his modern, neutral living room during a casual gathering. This project is straightforward and results in coasters that are both functional and visually appealing.
Materials & Steps:
- Materials: smooth wood boards, natural oil or wax finish, clear sealant.
- Tools: saw, sander, cloth, measuring tape.
How to Make It:
Cut the wood into coaster sizes and sand them until completely smooth. Then, apply a natural oil or wax finish to enhance the wood’s grain. Once the finish dries, seal the coasters with a clear protective layer. For example, one DIYer created these minimalist coasters that matched his modern décor perfectly.
Decorating Tips:
Use these coasters on a sleek coffee table or as unique, personalized gifts.
Project 9: Vintage Wooden Coasters DIY with a Distressed Look
Vintage wooden coasters with a distressed look offer a nostalgic yet trendy approach to home décor. They are perfect for those who love retro styles and want to add character to their coffee tables. In this project, you will learn how to create a worn, vintage appearance by using selective sanding and stain techniques. For example, a hobbyist produced a set of coasters with a deliberately aged look that became the centerpiece of his dinner parties. Guests appreciated the rustic charm and the story behind each piece. This project transforms simple wooden coasters into items that evoke memories and add a touch of history to your home.

Materials & Steps:
- Materials: wood boards, wood stain, distressing tools, clear sealer.
- Tools: saw, sander, dry brush, measuring tape.
How to Make It:
First, cut the wood into coasters and sand them lightly to preserve some texture. Then, apply wood stain and use a dry brush to create a distressed effect. Once the finish dries, seal with clear sealer to protect the look. For example, a DIY enthusiast’s vintage coasters received praise for their authentic, aged appearance at a family gathering.
Decorating Tips:
Display these coasters on a rustic tray or coffee table to enhance their vintage appeal.
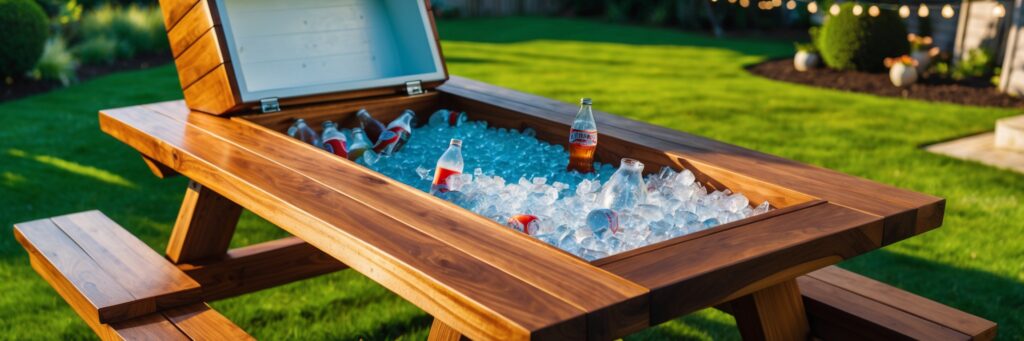
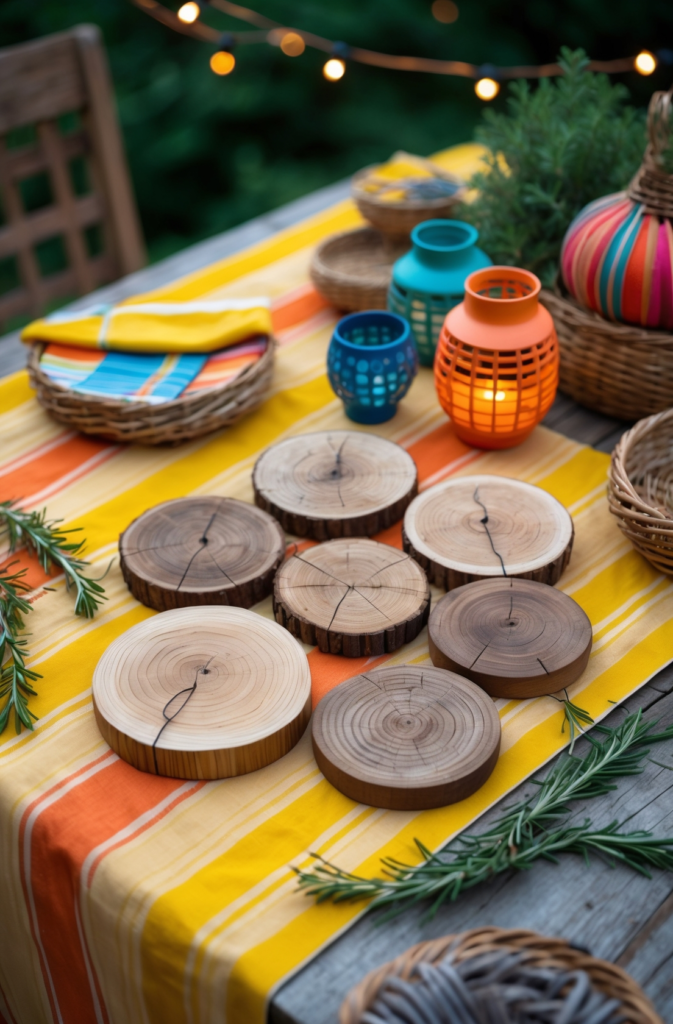
Project 10: Creative Wood Coasters DIY for Outdoor Entertaining
Creative wood coasters for outdoor entertaining provide a stylish and practical way to protect surfaces while adding a personal touch to your gatherings. They are perfect for hosts who want their décor to reflect creativity and individuality. In this project, you will design coasters that feature playful designs and vibrant colors. For example, one host crafted a set of coasters with bold, artistic patterns and used them during outdoor dinner parties, which sparked many compliments from his guests. These coasters serve as both functional items and decorative conversation pieces, making them ideal for entertaining.
Materials & Steps:
- Materials: quality wood boards, acrylic paints or woodburning tools, stencils, clear sealant.
- Tools: saw, sander, paintbrushes, woodburning pen.
How to Make It:
Cut the wood into uniform coasters and sand them until smooth. Then, use stencils or a woodburning pen to add creative designs or messages. Once the design is set, seal the coasters with a clear protective finish. For example, one host used these coasters at outdoor parties and received high praise for their unique design.
Decorating Tips:
Pair the coasters with an outdoor serving tray and festive décor to create an inviting setup for your next party.
Tips for Mastering DIY Wooden Coaster Projects
Learning how to make wooden coasters step by step can significantly enhance your DIY skills and add a personal touch to your décor. Clear, detailed instructions and quality materials are essential for success. In this section, we share valuable tips on selecting the right wood, using effective engraving techniques, and achieving a professional finish. For example, one beginner followed these tips and created coasters that not only protected surfaces but also became conversation pieces at family gatherings. In addition, experimenting with different designs can lead to truly unique results. Overall, proper planning and attention to detail can turn a simple project into a standout home accent.

Advanced Techniques for Enhancing Homemade Coasters
For those ready to take their coaster projects further, advanced techniques can add unique flair and sophistication. Mastering detailed engraving, layering multiple finishes, and incorporating mixed media can transform basic coasters into exceptional pieces. For instance, a seasoned DIYer combined woodburning with hand-painting to create coasters that became memorable holiday gifts. These advanced methods allow you to customize your coasters to reflect your personal style and elevate their overall appeal. Furthermore, experimenting with these techniques can lead to innovative designs that stand out.

Maintenance and Care for Wooden Coasters
Regular maintenance is essential to preserve both the beauty and functionality of your wooden coasters. Simple cleaning and resealing help protect the wood from wear, while proper storage prevents damage over time. For example, one DIY enthusiast kept his coasters looking new by cleaning them with mild soap and water and resealing them annually. Adjusting your care routine based on seasonal conditions can further extend their lifespan. Consequently, regular upkeep ensures that your handmade coasters remain attractive and durable.

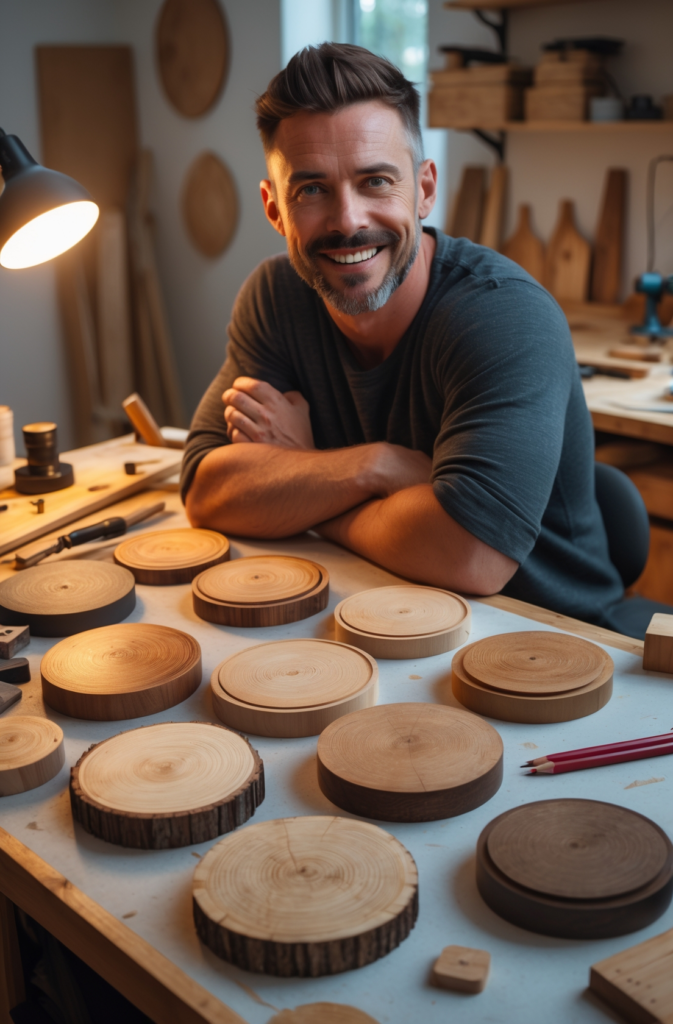
Real-Life Success Stories from DIY Enthusiasts
Real-life success stories offer invaluable inspiration and practical insights into creating beautiful wooden coasters. Many hobbyists have transformed simple projects into cherished home accents and popular gifts. For example, one enthusiast started with basic DIY coasters and gradually advanced to intricate engraving techniques, resulting in a set of personalized coasters that became the highlight of a family gathering. These stories demonstrate that creativity and persistence pay off and that even beginner projects can lead to impressive results. In addition, they provide useful tips for overcoming challenges and refining your techniques.
Case Studies and Interviews
Learn how a beginner transformed simple wooden coasters into unique personalized gifts. Discover insights from a seasoned DIYer who now sells custom coasters, and understand the creative process behind designing and finishing homemade coasters.
Quick Takeaways
- diy outdoor wooden coaster ideas provide personalized, space-saving home accents.
- Each project includes clear, step-by-step instructions and creative decorating tips.
- Essential materials and tools are highlighted to achieve professional results.
- Advanced techniques like engraving and custom finishes elevate your projects.
- Regular maintenance keeps your coasters durable and attractive.
- Real-life success stories inspire confidence and innovation in DIY projects.
- Embracing these ideas supports creative expression and personalized gifting.
Conclusion
In conclusion, these 10 simple wooden coasters DIY ideas show that creating personalized home accents and thoughtful gifts can be both fun and rewarding. By following our detailed, step-by-step instructions, you can craft wooden coasters that protect surfaces and add unique style to your décor. Each project is designed with functionality and creativity in mind, making them suitable for both beginners and experienced DIY enthusiasts.
Furthermore, the blend of traditional techniques with modern design elements ensures that your coasters become cherished keepsakes. As you explore these projects, remember that every step brings you closer to mastering your craft. Additionally, integrating creative techniques and personal touches will make your coasters stand out. I encourage you to experiment with various designs and share your successes with others.
Deeper Tutorial Tie-In: As you continue your DIY journey, consider exploring Ted’s Woodworking plans for more advanced projects. Their detailed, step-by-step guides have helped countless enthusiasts turn their passion into profitable ventures. Discover Ted’s Woodworking here.
FAQs
Q1: What are wooden coasters DIY ideas?
A: They are creative projects that show you how to make personalized wooden coasters for home décor and gifts.
Q2: Can beginners make DIY wood coasters easily?
A: Yes, each project provides step-by-step instructions and tips that make even diy coasters easy to create.
Q3: What materials should I use for homemade coasters?
A: Use quality wood, such as hardwood or reclaimed wood, along with proper stains, finishes, and sealants for durability.
Q4: How can I personalize my DIY wooden coasters?
A: You can add engravings, custom paintings, or use stencils to create unique designs that reflect your style.
Q5: Are engraved wood coasters suitable as gifts?
A: Absolutely; engraved wood coasters are popular for their personalized touch and make thoughtful, unique gifts.
We Want Your Feedback!
Your thoughts and experiences are invaluable. Which wooden coaster design inspired you the most? Have you tried any of these DIY wooden coasters ideas at home? Please share your feedback in the comments and consider sharing this post with fellow DIY enthusiasts. What unique twist did you add to your coasters? Let us know below!
References
- Popular Woodworking – Expert insights on woodworking projects and creative DIY designs.
- This Old House – Detailed guides on building home décor projects, including coasters.
- Wood Magazine – Inspiration and advice on sustainable woodworking and DIY home accents.